A good hand saw can cut just as clean as plenty of power tools, if you know what you’re doing. Picking up some basic hand saw skills will help you make cleaner cuts, waste less wood, and actually feel confident in your woodworking. A lot of beginner guides gloss over the hand saw, but honestly, it’s one of the most important tools in your shop.
This guide runs through the main hand saws you should know: crosscut saws, rip saws, and Japanese pull saws. You’ll see how each one works, when to use them, and what makes them different. I’ll also cover how to start a cut, follow a line, and read the wood grain before you ever put saw to board.
You’ll know how to care for your hand saw, sharpen it, and stash it so it lasts for years. I’ll point out common mistakes beginners make, too, so you can dodge them right from the start. Whether you’re sticking with hand tools or mixing in power tools later, this stuff just makes you a better woodworker.
Choose the Right Saw for the Cut
Every hand saw is designed for a specific job. The tooth pattern, blade length, and shape all shift depending on whether you’re cutting across the grain, with the grain, or making tight curves.
Crosscut Saws for Clean Across-Grain Cuts
A crosscut saw is meant for cutting across the wood grain. Its teeth are shaped like tiny knives, slicing through fibers instead of ripping them out.
Use this saw when you’re cutting a board to length or trimming the end of a piece. The teeth are angled and sharpened on both sides, so they score the wood cleanly as you push and pull.
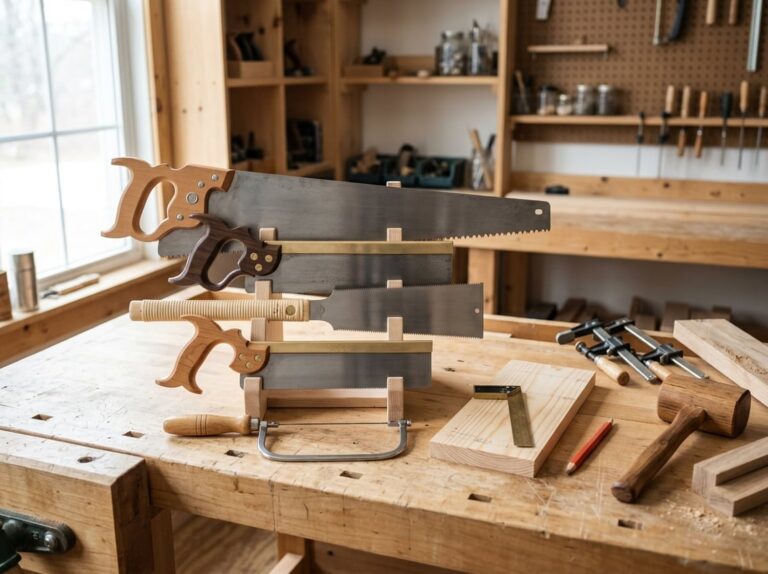
The crosscut panel saw is a common version. It’s got a wide blade and handles most general cutting on boards and panels.
If you want smooth results, look for a saw with 8 to 12 teeth per inch. Fewer teeth will cut faster, but you’ll end up with a rougher edge.
Rip Saws for Cutting With the Grain
Rip saws are for cutting along the length of the wood grain. The teeth look like little chisels, chipping away at wood as you push the saw forward.
This saw is great for ripping boards into narrower strips or resawing thick stock. Rip saws usually have fewer teeth per inch, around 4 to 6, so each tooth can dig in and remove more wood with every stroke.
The teeth are shaped differently from a crosscut saw, so a rip saw won’t give you a clean cut across the grain. If you use the wrong saw, you’ll work harder and get a messier edge.
Pick the saw that matches your cut direction, and you’ll work faster with less hassle.
Panel Saws for General Stock Preparation
Panel saws are longer and made to break down big boards or sheets into smaller, manageable pieces. A western panel saw usually has a wide blade and a simple handle, and it’s built for long, straight cuts.
You’ll reach for this saw early in a project, before you get into detailed joinery. It can handle both rip cuts and crosscuts, depending on the tooth pattern.
Panel saws come in different tooth counts. Lower tooth counts are good for rough ripping, while higher ones give you smoother crosscuts.
This isn’t the saw for fine, detailed work. It’s for rough dimensioning, not precision.
Backsaws for Fine Joinery
Backsaws have a stiff metal spine along the top edge. That spine keeps the blade straight and rigid, so you can make precise cuts.
Tenon saws are for cutting bigger joints, like tenons. Dovetail saws are smaller and thinner, perfect for delicate dovetail joints.
| Saw Type | Best Use | Tooth Count |
|---|---|---|
| Tenon Saw | Larger joints, tenons | 10-14 TPI |
| Dovetail Saw | Small, precise joints | 15-20 TPI |
The spine adds weight and control, making it easier to guide the saw right along a marked line. Use backsaws whenever you need a clean, straight cut for joinery.
Saws for Curves and Interior Openings
Some jobs call for a saw that can turn corners or work inside an opening. Coping saws have a thin blade in a metal frame, perfect for tight curves in thin stock.
Fret saws are similar but have a deeper frame and a thinner blade, so you can make very fine curved cuts in delicate work. Compass saws come with a narrow, pointed blade, letting you start a cut inside a board without pre-drilling, which is handy for curves or openings in thicker stuff.
Frame saws hold a narrow blade under tension in a wooden frame, giving you control for curved or straight cuts. Hacksaws are mainly for metal, but they’re useful for little jobs like trimming hardware in wood projects.
Pick your saw based on how tight the curve is and how thick your material is.
Understand Grain Direction, Teeth, and Kerf
Every saw cut comes down to three things: tooth shape, how many teeth hit the wood, and how wide a path the blade clears. Once you get a feel for these basics, you can pick the right saw for the job and avoid rough or split cuts.
Rip vs. Crosscut Tooth Geometry
Rip teeth and crosscut teeth are made for different jobs. Rip teeth are filed straight across, like little chisels. They chop through wood fibers running lengthwise, which makes them ideal for cutting with the grain.
Crosscut teeth are filed at an angle, so every tooth has a sharp point. These points slice through fibers running across the grain, kind of like a knife. That tooth shape stops splintering you’d get if you used rip teeth sideways.
Using the wrong tooth pattern can cause trouble. If you drag a rip saw across the grain, you’ll tear up the surface. If you use a crosscut saw along the grain, it’ll work, but it’s a slog compared to a rip saw.
How TPI Affects Speed and Surface Quality
TPI means teeth per inch. It’s just a count of how many teeth run along one inch of the blade.
Saws with low TPI, usually 4 to 8, cut fast. Each tooth bites out more wood every time. These are best for quick, rough cuts.
High TPI saws, often 10 to 15, cut slower but leave a smoother edge. Each tooth takes a smaller bite, so you get less tear-out.
| TPI Range | Best For | Cut Speed | Surface Finish |
|---|---|---|---|
| 4–8 | Rough rip cuts | Fast | Rough |
| 8–12 | General crosscuts | Medium | Medium |
| 12–15+ | Fine joinery | Slow | Smooth |
Pick based on whether you care more about speed or a clean finish.
Saw Set, Kerf, and Sawdust Clearance
Saw set is how far each tooth bends out from the blade, alternating left and right. This bending creates the kerf, which is just the width of the slot your saw cuts.
A wider kerf gives your blade space to move without binding. It also lets sawdust escape as you cut. If there’s not enough set, the blade will rub and get stuck.
If there’s too much set, the kerf gets wider than you need. That wastes wood and can make your cut wander. A well-set blade should slide smoothly, with sawdust falling away on both sides of the cut.
Check your saw’s kerf before you start, especially if you’re working on joinery where precision is key.
Selecting Teeth for Softwood, Hardwoods, and Green Wood
Different woods need different teeth. Softwoods like pine and cedar cut easily with lower TPI saws because the fibers are soft and give way fast.
Hardwoods like oak and maple need more teeth to avoid rough, torn edges. Higher TPI saws move through dense grain with less splintering and effort.
Green wood (still moist) acts differently from dry lumber. It’s softer but stringier, so it clogs fine-toothed blades with wet sawdust. Saws with fewer teeth and more set clear this stuff better.
If you’re not sure how a saw will handle a certain wood, grab a scrap piece and try it first.
Western and Japanese Saw Systems
Western saws and Japanese saws work in opposite directions and have different blade designs. What you pick changes the kerf, the control you get, and even how you set up your bench.
Using Western Saws on the Push Stroke
Western saws cut when you push the blade forward. The teeth remove material as you drive the saw through the wood.
This design needs a thicker, stiffer blade so it won’t buckle under pressure. That stiffness means a wider kerf, so you’re removing more wood with each pass.
Most Western saws have a pistol-grip handle. You hold it kind of like a handgun, which keeps your elbow steady while you push.
Backsaws like dovetail and tenon saws add a metal spine along the top. That spine keeps the blade from bending and helps you keep the cut straight. The extra weight is nice, honestly, since you can feel a 90-degree angle without checking every stroke.
Using Japanese Pull Saws on the Pull Stroke
Japanese pull saws work the other way. You cut as you pull the blade back toward you, not as you push away.
Since the blade is under tension when you pull, it can be much thinner than a Western blade. That means a narrower kerf and less chance of bending or binding as you cut.
Japanese pull saws often use impulse-hardened teeth. The teeth are heat-treated to stay sharp longer, but you usually can’t resharpen them after they dull.
The handle is often just a long extension of the blade, meant for a two-handed grip like a sword. That grip gives you more control on long cuts and helps keep the saw steady as you pull.
Ryoba, Kataba, and Dozuki Uses
Japanese saws come in a few common styles, each built for a specific job:
- Ryoba: Has teeth on both edges of the blade, one side for rip cuts, one side for crosscuts. It’s a flexible choice for general shop work.
- Kataba: Has teeth on only one edge. It’s usually stiffer than a ryoba and works well for flush cuts or fine detail work.
- Dozuki: A backed saw with a metal spine, kind of like a Western dovetail saw. It’s made for precision cutting on joinery like dovetails and tenons.
Choosing a First Saw System
There’s no single best system. The right one depends on the cuts you need and your workspace.
Western saws work well with benches that use vises, clamps, and bench hooks anchored for a push stroke. Japanese saws often pair with lower sawhorses or simple beam setups, since you can brace the wood with your body instead of hardware.
If your shop space is small, Japanese saws might be a practical option. They also tend to cost less at entry-level price points.
If you already work on a Western-style bench with vises and holdfasts, a Western backsaw may fit your setup with less adjustment. A lot of woodworkers end up owning both and just pick whichever saw fits the job.
Make Accurate Cuts by Hand
Accurate hand saw cuts come down to five things: a clear line, stock that can’t move, a clean starting kerf, steady sawing motion, and careful attention as you finish the cut. Skip any one of these, and you’ll probably end up with a crooked or splintered cut.
Lay Out a Visible Cut Line
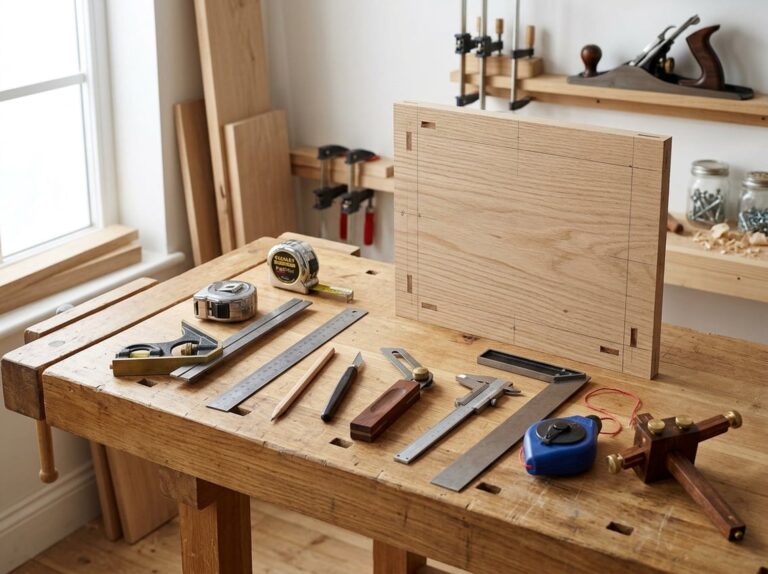
Every accurate cut starts with a line you can actually see. Use a combination square to mark a line square to the edge of your board, and use a measuring tape to set your length.
Mark with a pencil for general work. For fine cuts, like on picture frames or small joinery, switch to a marking knife or scribe line instead. A knife line gives the saw teeth a groove to register in, which helps you stay on track.
Mark all four sides of the board when the cut needs to be square all the way through. This gives you reference lines on the top, bottom, and both edges, so you can check your progress as you saw.
Secure Stock on a Workbench
If the board shifts during a cut, your line won’t survive, no matter how steady your hand is. Clamp your workpiece to a workbench or hold it firmly in a vise before you start sawing.
For small or thin pieces, a bench hook works well. Hook it over the edge of your workbench, place the workpiece against the cleat, and press forward as you saw. This keeps the wood from sliding.
If you don’t have a bench hook or vise, brace the workpiece against a stop clamped to the table, or use a piece of scrap wood as a backer to add support. Never hold a board only with your hand while sawing near your fingers.
Start the Kerf Without Wandering
The first few strokes decide whether the rest of the cut goes smoothly. Set the saw teeth on the far corner of your line, then draw the saw backward first, not forward, to score a small starter notch.
Use your thumb knuckle or the tip of your other thumb as a guide against the blade for the first few strokes. This keeps the saw from skating off the mark before the kerf is deep enough to hold it steady.
Keep your strokes short and light at this stage. Pressing hard before the kerf is established is one of the most common beginner mistakes, and it almost always causes the blade to wander off the line.
Use a Controlled Sawing Motion
Once you start the kerf, lengthen your strokes and let the saw do the work. A steady, full-length sawing motion cuts faster and straighter than short, choppy strokes, and it puts less strain on your arm.
Keep the blade lined up with your cut line, and check both the face and edge of the board as you go. Rip saws cut fastest on the push stroke along the grain, while crosscut saws and Japanese pull saws are designed to cut cleanly across the grain, often on the pull stroke for pull saws.
Grain direction changes how much resistance you feel. Cutting with the grain (ripping) usually feels smoother, while cutting across the grain (crosscutting) takes more control to avoid tear-out at the edges.
| Cut Type | Grain Direction | Typical Stroke |
|---|---|---|
| Rip cut | With the grain | Push (Western saw) |
| Crosscut | Across the grain | Push (Western) or pull (Japanese) |
| Fine/precise cut | Either, in a miter box | Push or pull, guided |
Follow the Line and Finish Without Breakout
Sight down the blade often to confirm you’re tracking your line on both the face and the edge of the board. If the saw starts to drift, ease off pressure, angle the blade slightly, and guide it back instead of forcing it straight across.
Slow down as you approach the end of the cut. This is when splintering and breakout are most likely, especially on the underside of the board.
To prevent tear-out on the exit side, back the workpiece with a piece of scrap wood or clamp it over a cutting board-style backer before the final strokes. A miter box is useful here too, since it supports the blade and keeps straight cuts square as you finish, which matters for precision cutting on parts like picture frame corners.
Cut Joinery and Build Early Skills
Joinery is where hand saw skills really get tested. Tenons, dovetails, and box joints all depend on straight, square cuts that match a marked line exactly.
Sawing Tenons and Shoulders
A tenon has two parts: the cheeks and the shoulders. Cheeks are the long cuts made with the grain, so a rip saw or the rip side of a Japanese Ryoba works best here.
Shoulders are cut across the grain, so switch to a crosscut saw or the crosscut side of your saw.
Start by clamping the workpiece at an angle. Saw down one corner first, then flip the piece and saw the opposite corner. This lets you cut along two lines at once, which keeps the cut straighter.
Finish by lowering the saw to horizontal for the last part of the cut. Always saw on the waste side of your line, not through it.
Cutting Dovetails With Control
Dovetail joints need a saw with fine teeth and a thin blade, like a Western dovetail saw or a Japanese dozuki. Both are backsaws, so they stay rigid and cut straight.
Mark your angles clearly before you start. Saw right up to the line, but leave a hair of waste if you’re not fully confident yet. You can pare it away later with a chisel.
Keep the saw square to the board face as you cut down. Watch both the front and side of the blade to make sure you’re not drifting.
Dovetails reward patience more than speed. Precision joinery like this is a skill that improves fast with repetition, so don’t rush your early attempts.
Making Box and Lap Joints
Box joints and lap joints are simpler than dovetails, which makes them a good next step.
Box joints use straight, evenly spaced cuts across the grain. A crosscut saw or the crosscut side of a Ryoba works well here. Consistent spacing matters more than perfect depth, since a jig or guide block can help keep cuts even.
Lap joints need a cut across the grain plus a shoulder cut, similar to a small tenon. Use a backsaw for control, and saw to a consistent depth on each piece so the two halves sit flush.
Both joints are common in boxes, shelves, and small furniture, making them useful skills for everyday woodworking projects.
Beginner Projects That Build Saw Accuracy
Small, simple projects are the best way to practice these cuts without wasting good material.
- Cutting board: Great for practicing straight rip and crosscut lines on wide stock.
- Picture frames: Teaches clean 45-degree crosscuts and matching miters.
- Birdhouse: Combines crosscuts, rip cuts, and basic lap or butt joints.
- Small box with box joints: Builds confidence with repetitive, evenly spaced cuts.
Work Safely and Maintain Your Saws
A hand saw only works well if you use it safely and keep the blade in good shape. Simple habits like wearing eye protection, checking your teeth for damage, and cleaning your blade after each use will help you cut safely and make your saw last longer.
Essential Hand-Saw Safety Practices
Even though hand saws don’t have a motor, they still cause injuries if you’re careless. Always wear safety glasses when sawing, since wood chips and sawdust can fly up toward your face.
Keep your fingers away from the cutting line and never place your hand in front of the blade’s path. If you use blade guards for storage or transport, remove them fully before you start cutting.
Secure your workpiece with a clamp or vise so it can’t shift while you saw. A saw blade can slip if the wood moves, and this is one of the most common ways beginners get cut.
Clear away sawdust from your work area often. A buildup of sawdust makes the floor slippery and can hide small offcuts or tools.
Recognize Dull or Damaged Teeth
A dull saw is more dangerous than a sharp one because it forces you to push harder, which increases the chance of slipping. Check your teeth regularly for the following signs of wear:
- Shiny or rounded tips instead of sharp points
- Bent or missing teeth along the blade
- Rust spots on high-carbon steel blades
- Uneven cutting, where the saw pulls to one side
If your saw feels like it’s dragging or catching instead of slicing smoothly, stop and inspect the teeth before you keep working. A quick check before each project saves you time and frustration later.
Sharpen Traditional Blades and Replace Hardpoint Blades
How you fix a dull saw really depends on the type of teeth it has. If you have a traditional saw made from high-carbon steel, you can sharpen it by hand using a saw file that matches your blade’s TPI (teeth per inch).
Sharpening takes a bit of practice, but it lets you bring a blade back to life many times. First, joint the teeth level, then file each tooth to the right angle, and reset the teeth so the blade doesn’t bind in the cut.
Saws with impulse-hardened teeth, or hardpoint blades, are a different story. These teeth are too hard for a regular file, so once they’re dull, you just replace the blade instead of sharpening it.
Many Japanese pull saws and some Western panel saws, like the Bahco 244, use replaceable hardpoint blades. It’s simple to swap them out, but you can’t really restore the old blade once it’s worn down.
Clean, Oil, and Store Saws Properly
Cleaning your saw after each use helps prevent rust and keeps the teeth sharp. Wipe the blade with a dry rag first to get rid of sawdust and resin.
After that, put on a light coat of oil to protect the steel. Camellia oil is a favorite among woodworkers, but light machine oil works too.
Skip wood finish products like Danish oil for the blade, since those are for wood, not steel. If your saw has a wooden handle, though, a little oil keeps it from drying out and cracking.
Hang your saws vertically or lay them flat with nothing touching the teeth. Keep Japanese saws in their sleeve, since those thin blades bend easily if you toss them in a drawer with other hand tools.
Avoid Common Beginner Sawing Mistakes
Most beginner mistakes happen because folks rush or grab the wrong saw. Watch out for these:
| Mistake | Why It’s a Problem |
|---|---|
| Using a dull blade | Increases effort and risk of slipping |
| Forcing the saw | Causes wandering cuts and blade damage |
| Skipping a starting notch | Makes it hard to begin the cut accurately |
| Ignoring grain direction | Leads to rough or torn edges |
| Storing saws loosely | Dulls or bends teeth over time |
A good saw like a Lie-Nielsen dovetail saw can last decades if you treat it right. Take your time with each cut, check your blade often, and you’ll get cleaner results without as much effort.
Frequently Asked Questions
Crosscut saws, rip saws, and Japanese pull saws all cut wood differently because of their tooth shapes and designs. Knowing these differences helps you pick the right saw, start a clean cut, and follow your line without wasting wood.
What is the difference between a crosscut saw, a rip saw, and a Japanese pull saw?
A crosscut saw uses teeth shaped like tiny knives, which slice through wood fibers. These are best for cutting across the grain.
A rip saw has teeth shaped more like little chisels. They chop and remove wood, so they’re best for cutting along the grain.
A Japanese pull saw cuts on the pull stroke, not the push. This means the blade can be thinner, so you remove less wood and your cuts stay more accurate.
When should I use a crosscut saw versus a rip saw for woodworking?
Go with a crosscut saw for cutting across the grain, like when you need to shorten a board. The knife-like teeth leave a smoother edge and help avoid tear-out.
Grab a rip saw for cutting along the grain, like when you want to make a board narrower. The chisel teeth clear wood quickly and keep your cut straight.
If you’re just starting out and only have one saw, a crosscut saw covers more everyday tasks. Most beginner projects need more crosscuts than rip cuts, to be honest.
How do I start a hand-saw cut cleanly without splintering the wood?
Use your thumb knuckle as a guide against the saw blade to keep those first strokes steady. Pull the saw back slowly a couple times to make a small notch before pushing forward.
Start the cut at a low angle, almost horizontal, instead of going straight down. This helps the teeth ease in instead of tearing at the fibers.
Keep your first strokes short and light. Once you have a notch, you can make longer strokes and use a bit more pressure.
How can I keep a hand saw accurately on the cut line?
Mark your cut line clearly with a pencil or marking knife. A knife line is easier to follow since the saw can ride in the groove.
Watch the saw blade as you cut, not just the line. Check that the blade stays on the line from both the front and side.
Let the saw do the work with even strokes. If you push too hard or twist the blade, it’ll wander off the line.
How does wood grain direction affect sawing technique and saw selection?
Grain direction tells you whether to rip or crosscut. Ripping goes with the grain and removes long fibers, while crosscutting goes across and severs them.
Wood with tricky grain, like curly or figured wood, can cause tear-out no matter which saw you use. In those cases, take lighter strokes and check the surface as you go.
Always look at the grain pattern before cutting. It’ll help you pick the right saw and angle for the cleanest result.
How do I safely maintain, sharpen, and store woodworking hand saws?
After each use, wipe the blade clean to get rid of sawdust and moisture. I usually add a light coat of oil to the blade, since that helps keep rust away.
Look over the teeth often to spot any dull spots or damage. Sharpening with a saw file is possible, but honestly, it takes some practice. If you’re just starting out, sending your saws to a professional sharpener might be the best bet.
Store saws so the teeth don’t bang into other tools. A saw till, wall rack, or just a simple blade guard can all do the trick.
Keep your saws somewhere dry. Try not to leave them on a damp workbench or out in a humid shed for too long.