When you’re new to woodworking, you might grab one hammer and expect it to do everything. Pretty quickly, though, you’ll see that’s not the case. The right first hammer depends on what you’re building, but a 16-oz claw hammer or a simple wooden mallet usually handles most beginner jobs. For finer woodworking, you’ll want lighter, more precise tools than you’d use for rough framing.
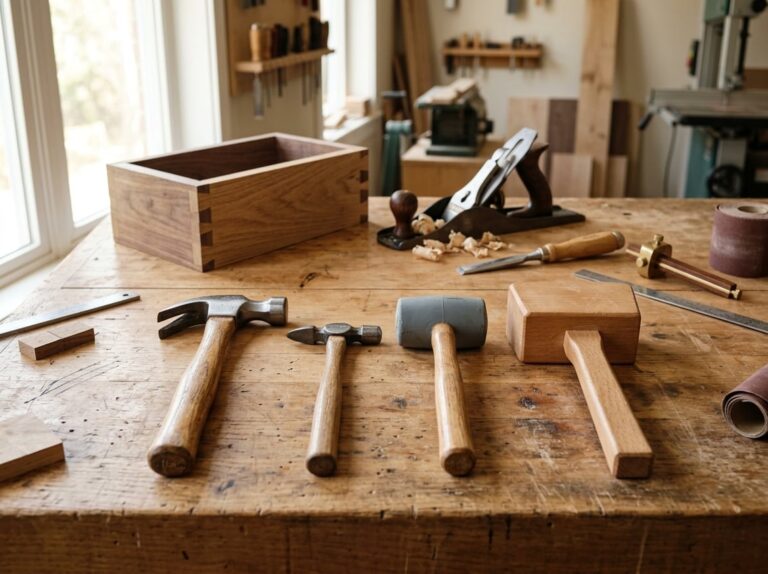
Hammers and mallets are some of the oldest tools in woodworking, and they’re still essential. Each one has its own job. A claw hammer drives and pulls nails. A wooden mallet is for striking chisels without messing up the wood. A dead-blow hammer helps when you need controlled force, like when you’re joining tight-fitting parts.
This guide covers different hammer types, tips for using them, and how to avoid damaging your work or tools. You’ll also get some advice on safe striking, keeping your hammers in good shape, and putting together a basic but handy set for your shop.
The Three Essential Striking Tools
Most woodworkers start with three striking tools: a claw hammer, a wooden mallet, and a dead-blow mallet. Each one’s built for a different task, and using the wrong one can wreck your wood or your tools.
Claw Hammers for Nails and Light Pulling
The claw hammer is your go-to for driving nails. It’s got a metal head with a flat face on one side and a curved claw on the other.
You’ll use the flat face to drive nails and the claw to pull them out if you mess up. Most claw hammers come in at 16 to 20 ounces, which is enough weight to do the job but not so heavy your arm gets tired fast.
For woodworking, stick with a smooth-faced hammer. Waffled faces are for framing and will leave marks if you slip.
Use your claw hammer for framing, rough assembly, or pulling nails. Don’t use it with chisels, though. The hard metal can crack chisel handles over time.
Wooden Mallets for Chisels and Joinery
A wooden mallet is what you want for chisel work. Its wooden head spreads out the force, so you don’t split your chisel handles.
This lets you control your chisels for joinery. Light taps take off thin shavings, and harder blows cut deeper, all without damaging your tools.
They come with round or square heads. Round is good for general work, while square is more traditional for joinery.
Pick a mallet that matches your chisel size. Too heavy, and you’ll lose control. Too light, and you won’t get enough force.
Dead-Blow Hammers for Non-Marring Assembly
Dead-blow mallets cut down on bounce when you strike. The head’s filled with sand or shot, so the force goes into the work instead of rebounding.
These are great for putting furniture together, tapping joints in place, or fitting parts without leaving marks. Most have a rubber or plastic head, which protects the wood.
Grab a dead-blow mallet when you need steady, controlled taps, like when fitting a tight joint or making adjustments during glue-up.
The lack of bounce gives you more control and helps prevent over-hitting or damaging your project.
Match the Tool to the Woodworking Task
Every woodworking hammer has its specialty. Using the wrong one can bend nails, crush wood, or ruin a good chisel handle.
Driving Finish Nails, Brads, and Tacks
For small fasteners, use a tack hammer or a light claw hammer. They usually weigh between 4 and 12 ounces, giving you more control without too much force.
A tack hammer has a narrow face that makes it easier to hit tiny nail heads. It’s handy for trim work and upholstery, especially when setting tacks along fabric edges.
For finish nails and brads, go with a smooth-faced hammer. Textured faces, like those on framing hammers, will leave marks around the nail head.
Chopping Mortises and Cutting Dovetails
Wooden mallets are the way to go for chisels. They give you enough impact without damaging the chisel handle like a steel hammer can.
When you’re chopping mortises, you want steady, repeated blows. The mallet’s broad face helps you hit the chisel squarely, even if you’re not staring right at it.
Dovetails need a lighter touch. Use a small mallet for fine paring and a heavier one for rougher waste removal. Here’s a quick breakdown:
- Small chisels (1/4″ or less): light mallet, 6-10 oz
- Medium chisels (1/2″ to 3/4″): standard mallet, 12-16 oz
- Large chisels (1″ or more): heavier mallet, 16-22 oz
Seating Joints During Dry Fitting and Glue-Up
Dead-blow hammers are perfect for assembling joints. The shot or sand inside the head gives you force without bounce, so you get better control when dry fitting.
The rubber or urethane coating protects your wood from dents, which is especially important during glue-up when you need to work fast.
Use light, even taps. If something won’t seat with moderate force, stop and check for what’s in the way instead of hitting harder.
You can use a wooden mallet for this too, but it doesn’t cushion the blow as much. Go with the dead-blow if you’re working with finished or delicate pieces.
Adjusting Planes, Hardware, and Shop Fixtures
A small dead-blow hammer or a light mallet works for adjusting plane irons. Gentle taps on the blade or adjustment knob help you fine-tune without throwing things out of alignment.
For jigs, fences, or clamps, a claw hammer with a flat face works to nudge parts into place. Keep your swings short and controlled.
When you’re working with metal hardware, skip the wooden mallet. Hitting metal with wood can split the mallet head. A dead-blow hammer with a soft face handles this better and lasts longer.
Other Hammer Types a Woodworker May Encounter
You’ll run into other hammers at the hardware store or in your shop that aren’t really made for woodworking. Some, like cross-peen and ball-peen hammers, still come in handy for detail work. Others, like sledgehammers, are better left for demolition or masonry jobs.
Cross-Peen Hammers for Small Nails and Pins
A cross-peen hammer has a flat face on one end and a wedge-shaped peen running across the head on the other.
The wedge lets you start small nails, brads, or pins without blocking your view, which is great when your fingers are close to the work.
These hammers are light, often under 6 ounces, and are handy for:
- Setting brads in picture frames
- Tapping in small hardware pins
- Fine trim work where a big hammer would do damage
Pick this hammer when you need accuracy more than power.
Ball-Peen Hammers for Hardware and Metal Details
Ball-peen hammers have a rounded end and a flat face. They came from metalworking, where people use them to shape metal and peen rivets.
In the woodshop, you won’t use a ball-peen on wood. It’s for metal parts that go with your project.
You might use it to:
- Strike punches or metal chisels
- Adjust hardware like hinges or drawer slides
- Straighten small bent nails
- Peen over metal rivets or pins
Keep one around for these jobs, but don’t use it on wood.
Lump and Club Hammers for Heavy Bench Work
Lump hammers, or club hammers, have a short handle and a heavy steel head, usually 2 to 4 pounds.
They pack more punch than a claw hammer. In woodworking, you might use one for:
- Knocking apart big joints
- Driving masonry nails into a bench base
- Light demolition, like pulling old trim
Because they’re heavy, lump hammers can split or crush wood if you hit a workpiece directly. Always use a scrap block between the hammer and your project to spread out the force and avoid damage.
Tools Best Reserved for Construction and Masonry
Some hammers just aren’t for woodworking. Sledgehammers, for instance, are made for masonry and demolition, not fine joinery.
They have long handles and heavy heads to deliver massive force, which can:
- Split boards
- Destroy joints
- Crack veneer or plywood
If you need that much power, you’re probably not doing woodworking. Stick with hammers made for wood, and save sledgehammers for breaking concrete or other heavy-duty jobs.
Safe and Accurate Striking Technique
Good striking technique keeps your fingers safe, helps nails go in straight, and stops chisels from splitting wood. How you grip the hammer, control your swing, and let the tool’s weight do the work matter way more than just hitting hard.
Grip, Stance, and Swing Control
Hold the hammer near the end of the handle, not up close to the head. You’ll get more leverage that way, and the head can really pick up speed before it hits the nail or mallet.
Keep your wrist loose and let your elbow and shoulder power the swing, not just your wrist. If you stiffen your wrist, you’ll end up with weak, glancing blows that miss the mark.
Stand with your feet about shoulder-width apart and face your work squarely. That gives you a stable base and helps your swing stay straight.
- Grip firmly but not with a death grip
- Watch the spot you want to hit, not the hammer
- Try to swing in a straight line each time
Starting Nails Without Striking Your Fingers
Pinch the nail between your thumb and finger, close to the head, and give it a couple light taps to set it into the wood. Once it’s standing on its own, move your fingers away.
Use short, careful taps for this first part. Swinging hard here is how most finger injuries happen.
Some folks use pliers or a folded piece of cardboard to hold small nails or brads. That’s handy when your fingers would be right in the hammer’s path.
Once the nail’s started, switch to firmer strikes to drive it in.
Using a Mallet Squarely on Chisels
Hit the chisel handle with the mallet face flat and straight, not at an angle. If you hit at an angle, you’ll push the chisel sideways or even snap the handle.
Line up your eyes with the chisel before you swing, so you know exactly where the mallet will land. Keep those first strikes light and controlled, especially when starting a cut.
| Strike Type | Use Case |
|---|---|
| Light tap | Starting a cut, fine paring work |
| Firm strike | Chopping through waste wood |
| Series of taps | Fine-tuning joint depth |
Start with gentle force and build up as needed. You’ll have better control that way and it’s less likely you’ll overcut your joint.
Letting Tool Weight Deliver the Blow
A hammer or mallet works best when you let its weight do most of the work. Let the head fall naturally and pick up speed as it drops, instead of forcing it down with your arm.
This gives you a more consistent impact and is easier to repeat. Plus, your muscles won’t get tired as quickly since you’re not fighting the tool’s motion.
Heavier hammers and mallets need less swing force than lighter ones. If you’re swinging hard and still not getting anywhere, maybe the tool’s too light for the job.
Prevent Dents, Bruising, and Tool Damage
Wood’s pretty easy to mark up, and the wrong hammer face or a careless swing can leave a dent that sanding won’t fix. Picking the right tool and slowing down when it counts keeps your work looking sharp and your tools in good shape.
Choose Face Material for the Workpiece
Match the striking face to what you’re hitting. A steel hammer face will dent bare wood almost every time, even with a soft touch.
Here’s a quick guide:
- Wooden mallet – great for chisel work and joinery when you want a firm but gentle hit
- Rubber mallet – handy for tapping joints together or seating parts without leaving marks
- Dead-blow mallet – perfect for assembly work since it absorbs energy and doesn’t bounce
- Steel hammer – stick to nails, metal fasteners, or anything where the face won’t touch finished wood
For fine woodworking, stick with softer faces. Save the steel hammer for rougher construction jobs, not joinery.
Use Protective Blocks When Assembling Joints
Put a scrap block between your mallet and the workpiece to spread out the force. This is especially helpful when closing up a tight joint and you need several solid hits.
Pick a block from the same wood species, or close to it, so the density matches. Use softwood blocks for softwood joints, hardwood for hardwood projects.
Keep the block flat and hold it steady with your free hand. If it shifts while you strike, you could still leave a mark, so double-check your grip every time.
Avoid Steel Strikes on Chisel Handles
Don’t hit a wooden chisel handle with a steel hammer. You’ll split or crush the wood fibers at the top, and repeated hits will wreck the tool fast.
Stick with a wooden mallet or one made for chisel work. These give you control without smashing the handle.
Some newer chisels have plastic or resin handles built for steel strikes, but check the instructions. If yours has a wooden handle, treat it as mallet-only for as long as you own it.
Control Force Around Finished Surfaces
Slow down when working near a finished or visible surface. A rushed swing near an edge or corner is how most accidental dents happen.
Use lighter taps and check your work after every few strikes. That way, you can catch any problems before they get worse.
Keep your other hand clear of the impact zone, and rest the mallet head on the wood before you swing to check your angle. A little extra care here can save you from sanding out a dent or, worse, starting over.
Selecting, Maintaining, and Storing Your First Hammer
Pick a hammer that matches your work in weight and handle length, then keep it clean and stored right so it lasts. Taking a few minutes to check and store your tools also keeps you safe and protects your projects.
Choose Head Weight, Handle Length, and Balance
Weight matters more than you might expect. A 16-ounce claw hammer is a solid choice for general carpentry and assembly, but heavier hammers can tire you out fast, especially if you’re just starting.
For a woodworking mallet, look for one that feels balanced when you hold it near the end. You want the weight in the head, not the grip, so your swing relies on momentum, not muscle.
Handle length affects control too. Short handles give you more precision for fine joinery, while longer handles add power for bigger jobs.
Try it out before buying. Hold the hammer and swing it a couple times in the store. If your wrist feels strained after a few swings, it’s probably too heavy.
Inspect Handles, Faces, and Head Attachment
Before each use, check that the head is tight on the handle. A loose head could fly off and hurt someone.
Look for cracks, splinters, or dry wood on wooden handles. These can break under pressure. Fiberglass and steel handles last longer but still check for chips or dents near the head.
Check the striking face too. A worn or chipped face on a claw hammer won’t grip nail heads well and could slip, damaging your wood or your hand. On a dead-blow mallet, make sure the rubber or plastic head isn’t cracked or losing its shot-filled cushioning, since that’s what keeps it from bouncing during assembly.
Swap out or repair any hammer that doesn’t pass these checks before your next project.
Clean and Store Hammers to Prevent Rust and Damage
After using your hammer, wipe the metal head with a dry cloth to get rid of dust, glue, or moisture. Rust shows up fast on bare steel, especially in a garage or basement.
For wooden handles, a quick sanding knocks off splinters, and a coat of linseed oil keeps the wood from drying out. Do this every few months if you use the hammer a lot.
Store hammers somewhere dry, away from sunlight and big temperature swings. Hanging them on a pegboard or tool wall keeps them visible and off damp benches or floors. Don’t toss hammers in a drawer with other metal tools, since that can chip the face or damage a dead-blow mallet’s shell.
Build a Practical Beginner Striking Toolkit
You don’t need a whole wall of hammers when you’re starting out. Three tools will cover most beginner needs:
| Tool | Best Use |
|---|---|
| 16-oz claw hammer | Driving and pulling nails, general DIY tasks |
| Woodworking mallet | Striking chisels, tapping joints together |
| Dead-blow mallet | Assembling furniture without marking wood |
This small set handles joinery, assembly, and basic repairs without breaking the bank. As you pick up more skills, you can add specialty hammers, but these three will get you through most early projects.
Frequently Asked Questions
Here are some answers to common questions about picking, using, and caring for woodworking hammers.
What type of hammer should a beginner woodworker buy first?
Start with a 12- or 13-ounce claw hammer. It’s light enough for good control but strong enough for general nailing.
If you plan to use chisels, pick up a basic wooden mallet too. Those two tools will cover most beginner projects.
When should I use a wooden mallet instead of a claw hammer in woodworking?
Use a wooden mallet whenever you strike a chisel or need to tap wood joints together. Its wide, flat face spreads out the force, so you won’t crush or dent the wood.
A claw hammer’s small metal face can crack chisel handles or leave marks on soft wood. Save the claw hammer for nails and metal fasteners.
What is the best mallet for striking chisels without damaging their handles?
A wooden mallet is your best bet for chisels. Its flat, angled face makes it easy to hit the chisel square, so you can focus on guiding the blade, not just aiming the hammer.
Wooden mallets also protect wooden chisel handles from splitting. A metal hammer face will crush the handle over time.
How is a dead-blow hammer used during furniture assembly and joinery?
A dead-blow hammer helps you join or separate wood parts without leaving marks. The head’s filled with steel shot, so it delivers force without bouncing back.
It’s great for setting dowels, aligning parts, and tapping joints tight. A 14-ounce dead-blow hammer with a urethane coating works well for most furniture projects.
How can I drive nails into wood without denting or splitting the surface?
Use a nail hammer with a smooth, flat face, and set the nail with light, even taps before driving it all the way. That helps you avoid glancing blows that can dent the wood.
For the last few strikes, keep your swing steady and controlled. If you’re close to finished wood, use a nail set to finish the job instead of hitting the wood directly with the hammer head.
How should woodworking hammers and mallets be maintained and stored?
Take a look at your hammer’s handle and head from time to time, just to spot any cracks, looseness, or chips. If you notice damage, that handle or head could slip while you’re working and, honestly, nobody wants that kind of surprise.
Keep hammers and mallets somewhere dry, since moisture can cause rust or make the wood swell. Hanging them on a tool rack or pegboard works well, plus it helps protect the heads and faces from getting dinged up, which can throw off your accuracy.