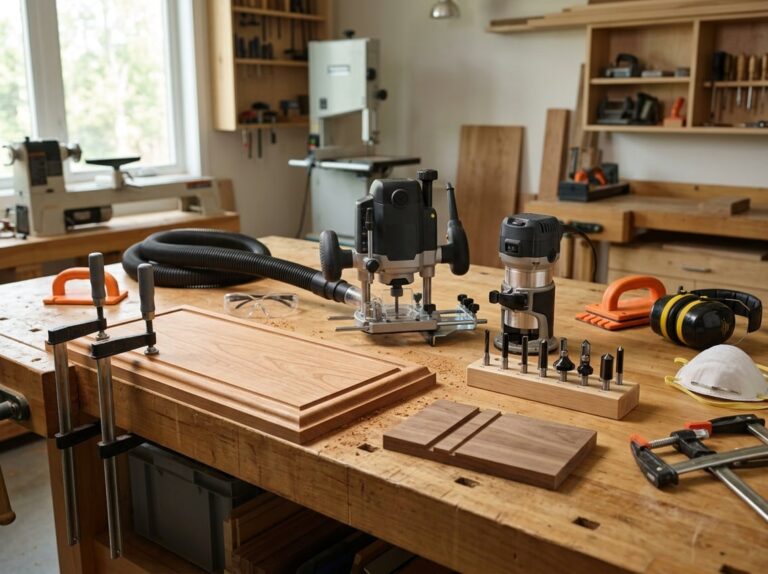
A router is one of the best tools you can add to your woodworking shop. It cuts edges, shapes grooves, and helps you build joints for plenty of woodworking projects.
If you’re just getting into woodworking, picking a router can feel a little overwhelming. The right router for you depends on the base style, bit choice, and the kind of projects you want to tackle. This guide walks you through the differences between fixed-base and plunge routers, common bits, and some straightforward techniques for edge profiling and joinery.
You’ll also see how to set up your router, control the depth, and handle it safely. Once you get the hang of using a router properly, you can dodge mistakes like burn marks and get clean, sharp cuts more often.
Choose the Right Router Style
Every wood router falls into one of four main types, and each one handles depth control and cutting motion a bit differently. The right style really depends on the type of woodworking projects you want to do most.
Fixed-Base Routers for Consistent Edge Cuts
A fixed-base router locks the motor at a set depth before you start. It’s a solid option for edge profiling, chamfering, and other repeat tasks that need the same depth from start to finish.
Since the base stays put during a cut, you get steady, even results without much wobble. A lot of beginners start with a fixed-base router since it’s easier to control than the other types.
This style also works well mounted in a router table, where you feed the wood into the bit instead of moving the tool by hand. If your main projects involve edges, dadoes, or straight cuts, a fixed-base router is probably the way to go.
Plunge Routers for Interior and Stopped Cuts
A plunge router uses a spring-loaded base, so you can lower the bit straight into the wood while it’s running. That makes it perfect for mortises, stopped dadoes, and cuts that start in the middle of a board instead of at the edge.
You can adjust the plunge depth as you go, which gives you more control for detailed stuff like inlays or sign carving.
With a plunge-base router, you can start and stop a cut anywhere on the wood. It’s a better match for joinery work and design details that a fixed base just can’t do.
Combination Routers for Flexible Shop Work
A combination router, or combo router, pairs one motor with two interchangeable bases: a fixed base and a plunge base. You can swap between the two without buying separate tools.
You get the steady, repeatable depth of a fixed-base router for edge work, and the plunge feature for mortises and interior cuts. Swapping bases usually takes just a couple minutes.
This flexibility makes a combo router pretty practical if your projects change up often. It costs more upfront than a single-base router, but honestly, it can replace two tools in your shop. If you do both edge profiling and joinery regularly, this style covers most of what you’ll need.
Trim Routers for Lightweight Detail Work
A trim router, or palm router, is a small, lightweight tool made for one-handed control. It’s great for light-duty jobs like trimming laminate, cleaning up edges, or detail work that doesn’t need a full-size router.
Because it’s so compact, a trim router is easier to maneuver than the bigger ones, especially in tight spots or on small workpieces. It’s not for heavy stock removal or deep cuts, but it’s fantastic for precision tasks.
Lots of woodworkers keep a trim router around along with a bigger fixed-base or plunge router. It fills a specific role that bigger tools just can’t handle as easily, especially for veneers, small edges, or tiny adjustments.
Match Power and Features to Your Projects
Router power, speed control, and depth systems all play a part in how clean your cuts turn out. Choosing the right features up front saves you money and usually gives you better results.
Horsepower, Motor Size, and Router Power
Router power shows up as horsepower, which tells you how much work the tool can handle. A router with 1 to 1.5 horsepower is fine for edge profiles, small grooves, and light trim work.
For bigger jobs like raised panels or deep mortises, you’ll want something with 2 to 3.25 horsepower. More horsepower means you can push larger bits through hardwood without bogging down.
Router power also ties into motor size. A high-speed motor with more power handles heat better during long cuts, which matters most when you’re working with dense woods like oak or maple.
If you mostly do small projects, you really don’t need the biggest motor. Just match the horsepower to your usual project size, not the most powerful option on the shelf.
Variable Speed and Electronic Feedback
Variable speed control lets you change how fast the bit spins. That’s important because different bits and materials need different speeds for a clean cut.
Large bits should spin slower, while small bits can run faster. Most routers give you a range between 8,000 and 24,000 RPM. You’ll tweak this depending on bit size, wood, and how deep you’re cutting.
Some routers, like the 1613EVS plunge router, have electronic feedback systems. This keeps the motor speed steady even when the wood pushes back against the bit. Without it, the router can slow down under heavy loads, which leads to rough cuts or burn marks.
If you plan to use a variety of bit sizes and wood types, variable speed control is definitely worth it.
Collet Sizes and Bit Compatibility
The collet holds the bit inside the router. Most routers use either a 1/4-inch or a 1/2-inch collet, and some come with both.
A 1/2-inch collet grips the bit shank over more area, which reduces vibration and lets you use bigger, heavier bits safely. A 1/4-inch collet is fine for smaller bits but can’t handle the same sizes as a 1/2-inch.
Before buying new bits or accessories, check what collet size your router uses. Here’s a quick comparison:
| Collet Size | Best For | Bit Size Limit |
|---|---|---|
| 1/4-inch | Small trim work, light bits | Smaller shank bits only |
| 1/2-inch | Heavy-duty cuts, large bits | Handles bigger shank sizes |
Always tighten the collet nut all the way before starting a cut. A loose collet nut can let the bit slip or wobble during use.
Depth Controls, Stops, and Micro-Adjustments
The depth adjustment controls how deep the bit cuts into the wood. A solid depth adjustment lets you set the cut depth accurately and repeat it across different boards.
Look for a router with a clear depth stop. This locks the bit at a set depth so you don’t accidentally cut too deep. Depth stops matter most when you’re cutting joinery or grooves that have to match.
Micro-adjustments give you fine control over small depth changes. Instead of guessing, you can turn a dial to move the bit up or down by tiny amounts. This helps when you’re testing cuts on scrap wood before you go for the final piece.
A router with good depth control features will save you time and cut down on mistakes in detailed projects.
Build a Practical Starter Bit Collection
You don’t need a giant box of router bits to get started. A small, smart set covers most beginner projects and gives you room to grow as you get better.
Straight Bits for Grooves and Joinery
A straight bit is the most basic router bit out there, and honestly, still one of the most useful. It cuts a flat-bottomed groove or dado, making it great for shelving, drawer bottoms, and T-track slots.
Pick up a 1/4-inch and a 1/2-inch straight bit to start. The smaller one handles narrow grooves and light joinery, while the bigger one clears material faster in wider cuts.
Go for carbide-tipped bits instead of high-speed steel. Carbide holds an edge much longer, especially in hardwood, and it resists burning if you slow down your feed rate.
Straight bits also work with an edge guide, so you can cut a groove parallel to a board’s edge without messing with a fence.
Edge-Profile Bits for Finished Edges
Edge-profile bits turn a plain square edge into a finished detail. A roundover bit softens a sharp corner into a curve, and you can get them in different sizes to change how strong that curve looks.
A 1/8-inch roundover gives a light, subtle break in the edge. A 3/8-inch roundover creates a bigger, more rounded profile that you can really feel, which is nice on trays and cutting boards.
A chamfer bit cuts a flat angled edge instead of a curve, usually at 45 degrees. It’s a simple way to add a decorative touch or knock down a sharp corner for safety.
With just one roundover and one chamfer bit, you can handle most edge profiling for beginner furniture and shop projects.
Flush-Trim and Pattern Bits for Templates
A flush-trim bit has a bearing mounted on the bit itself, either at the top or bottom, that rides against a template as you cut. This lets you copy a shape exactly, over and over, without measuring each piece by hand.
Template routing makes sense when you need several identical parts, like matching legs, curved brackets, or repeated cutting boards. You trace the pattern once, then let the bearing guide the bit along the template edge.
Pattern work with a flush-trim bit also helps clean up glued-up panels. If one board sticks out past another, the bit trims it flush without extra sanding.
Buy a flush-trim bit with a bearing that matches your usual material thickness for the best results.
Specialty Bits for Advanced Work
Once you’re comfortable with the basics, a few specialty bits open up more advanced joinery and detail work. A dovetail bit cuts the angled sides needed for dovetail joints, often used with a jig for drawers and boxes.
Raised panel bits shape the sloped, decorative face on cabinet doors and paneled furniture. These bits are bigger and usually need a router table for safe, controlled use.
Both of these bits take more setup time and a bit of practice than basic straight or edge-profile bits. Wait until you feel good about feed direction and depth control before adding them to your collection.
Set Up the Router for Accurate Cuts
Good setup starts before you even turn the router on. Check your collet, set your cutting depth, and pick the right guide for the job so every pass comes out clean.
Install Bits and Tighten the Collet Correctly
The collet is what holds your bit in place, and it really needs to grip the shank fully. Push the bit shank into the collet until it seats, then pull it back out about 1/16 to 1/8 inch. That little gap keeps the bit from bottoming out and getting stuck.
Don’t insert the bit so it touches the bottom of the collet. Over time, this can crack the collet or mess up the bit shank.
Grab two wrenches (or use the router’s shaft lock) to tighten the collet nut. Turn it snug, but don’t crank down with all your strength. If you overtighten, the bit can get stuck and you might damage the threads.
Unplug the router before swapping bits. It’s basic safety, but easy to forget.
Set Cutting Depth and Make Test Cuts
Cutting depth decides how much material the bit removes in one pass. For most jobs, especially with hardwood, keep each pass around 1/8 to 1/4 inch deep. If you go too deep, you risk burning the wood, overworking the motor, or tearing out fibers.
If you need to remove a lot of material, plan on making several shallow passes, lowering the bit a little each time, and making a couple of runs through the cut.
Here’s a quick depth guide for common cuts:
| Task | Suggested Depth Per Pass |
|---|---|
| Edge profiling | 1/8 to 3/16 inch |
| Dado or groove | 1/4 inch |
| Deep mortise | 1/8 inch per pass |
Before you go at your real project, make a few test cuts on scrap wood that’s the same thickness. That way, you can check the depth, bit alignment, and feed speed without risking your good material.
Use Guides, Fences, and Templates
An edge guide attaches to the router base and rides along your board’s edge. It keeps your cut straight and the same distance from the edge, which is super handy for grooves, slots, and rabbets.
For straight cuts that aren’t along an edge, clamp a straightedge to your workpiece and run the router base up against it.
Templates and guide bushings let you repeat the same shape over and over. The bushing attaches to the router base and follows the template as the bit cuts the pattern into your wood.
These router accessories are honestly worth having:
- Edge guide with fine adjustment
- Guide bushing set
- Straightedge clamp
- Circle-cutting jig
Prepare a Router Table for Repeatable Work
A router table setup turns your handheld router into a stationary tool. You move the wood across the table instead of moving the router, which gives you better control for small or narrow pieces.
Mount the router base to the table underside, then adjust the bit height from above using the depth knob. Set the fence to your cut width, and check that it’s parallel to the miter slot if your table has one.
Try the setup with scrap wood before you cut your real project. If your table has a dust port, hook up dust collection, since router tables kick up a lot of fine dust.
Just remember, a router table isn’t for drilling holes. Use a drill press or handheld drill for that. The router table is for edge and surface cuts only.
Make Beginner-Friendly Woodworking Cuts
Once you know how to set up your router and control depth, you can start making real cuts. Start with edge work, then move on to grooves, joinery, and template routing as you get more comfortable.
Shape Edges With Roundovers and Chamfers
Edge profiling is probably the easiest way to get the hang of a router. A roundover bit softens a sharp corner and makes edges look finished. You’ll see this a lot on tabletops, shelves, and furniture that gets handled often.
A chamfer bit cuts a flat, angled edge instead of a curve. Chamfers look good on picture frames and boxes when you want a crisp, angled line.
Both bits usually have a bearing that rides along the edge of the board, controlling the depth of the cut. Move at a steady pace to avoid burn marks or wavy edges. It’s not hard, but you’ll get better with practice.
Cut Grooves, Dados, and Rabbets
Grooves are slots cut into the middle of a board, often for holding panels or shelves. A stopped groove ends before the edge, hiding the cut for a cleaner look.
Dados (sometimes spelled dadoes) are similar but go across the grain. You see these in bookshelves and cabinets, where a shelf fits into a dado for a strong joint.
Rabbets are cuts along the edge of a board, making an L-shaped step. These show up in cabinet backs or picture frame joints.
| Cut Type | Location | Common Use |
|---|---|---|
| Groove | Along the grain | Panel slots |
| Dado | Across the grain | Shelf joints |
| Rabbet | Edge of board | Backs, frame joints |
Use a straight bit and an edge guide for all three. That keeps your cuts straight and consistent.
Route Mortises, Hinge Recesses, and Inlays
Mortises are square or rectangular holes cut into wood, usually paired with a tenon for strong joinery. Doing mortises by hand takes time, but a router with a straight bit and a simple jig makes it much easier and more accurate.
Mortising jigs steady the router and guide it to the right size and depth. This is a lifesaver for beginners who are still figuring out plunge depth.
Hinge mortising is similar. You cut a shallow recess so the hinge sits flush with the wood. Hinge recesses need to be shallow and precise, so take light passes and check the fit as you go.
Inlays use a router to cut a shallow pocket for decorative material, like a contrasting wood strip. It’s a nice way to add detail without deep carving.
Use Templates for Flush Trimming and Repeated Shapes
Template routing lets you copy a shape exactly, which is handy when you need several identical parts. You trace a pattern with a flush-trim bit, which has a bearing that rides the template edge while the cutter shapes the wood.
This method works great for curved parts like stair stringers, brackets, or decorative pieces that need to match. If you’re making multiples, the template keeps everything consistent.
To use this, attach the template to your workpiece with clamps or double-sided tape. Guide the router slowly around the edge, letting the bearing ride against the template. You’ll get consistent results every time.
Route Safely, Avoid Defects, and Maintain Your Tools
Good results come from moving the router in the right direction, wearing the right gear, and taking care of your bits and tools. Follow these steps for clean cuts and longer tool life.
Control Feed Direction and Avoid Climb Cuts
Feed direction is more important than you might think. Always move the router against the bit’s rotation, not with it.
Check the bit’s cutting edge. If it faces forward, push the router forward against that edge. This keeps things under control and gives you a smoother cut.
If you move the router the wrong way, that’s called a climb cut. The bit grabs the wood and pulls the router along, which can get out of hand fast.
Climb cuts do have their place, but they’re best left to experienced woodworkers. If you try it, clamp your workpiece down first. Don’t just rely on friction pads or hand pressure.
Prevent Tear-Out, Burn Marks, and Rough Cuts
Tear-out happens when the bit rips wood fibers instead of cutting cleanly. It’s common on end grain and with woods like walnut or oak.
To avoid it, rout the end grain edges of a board first, then rout the long grain edges after. That way, any chips at the corners get cleaned up by the long grain cut.
Burn marks show up when the bit spins too slowly for your cut, or if you move too slowly. Use sharp bits and keep a steady pace to avoid this.
Make several shallow passes instead of one deep cut. You’ll put less strain on the motor and bit, and end up with a smoother result and fewer rough spots.
Use Essential Personal Protective Equipment
Routers spin bits fast, which means dust, noise, and flying debris. Protect yourself every time.
Wear safety glasses to keep wood chips and dust out of your eyes. Hearing protection matters too, since routers are loud.
A dust mask keeps fine particles out of your lungs, especially with MDF or treated wood. Pair this with dust collection at the source, like a shop vac attached to your router’s dust port.
If you’re using a router table, always use push blocks to guide the wood. This keeps your hands safely away from the spinning bit.
Clean, Store, and Inspect Routers and Bits
After each use, wipe down your router to get rid of dust and debris. Check the base and collet for buildup, since dried resin can slow down the bit.
Look over your router bits for chips, dull edges, or resin. Clean carbide-tipped bits with a bit cleaner or mild solvent, and dry them before putting them away.
High-speed steel bits dull faster than carbide, so check them more often if you use them a lot. Dull bits burn wood and strain the motor, so swap or sharpen as needed.
Store bits in a case or wooden holder to protect the edges and bit shank. Keep your wood routers in a dry place, away from moisture that could cause rust.
Frequently Asked Questions
These common questions cover router types, bits, depth, and care. Use these quick answers if you’re unsure about something before you start a project.
What is the difference between a fixed-base router and a plunge router for woodworking?
A fixed-base router locks the bit at one set depth before you start cutting. You set the depth, then move the router across the wood in a flat, level motion.
A plunge router works differently. Its base has springs so you can lower the bit straight down into the wood while it’s running. This makes it better for cuts that start in the middle of a board, like mortises or inlays.
Fixed-base routers feel more stable for edge work. Plunge routers give you more control for deep or hidden cuts.
Which type of woodworking router is best for a beginner?
If you’re just getting started, a fixed-base router makes things a lot easier. The depth stays locked in place, so you don’t have to fuss with a moving base while you guide the tool.
This setup lets you focus on holding the router steady and moving it at a steady pace. Once you feel good about basic cuts, maybe try a plunge router for trickier stuff.
Some routers come as combo kits. These include both a fixed base and a plunge base that attach to the same motor, so you don’t need to buy two separate tools.
What are the most useful router bits for edge profiling and basic joinery?
Honestly, you only need a few bits to cover most beginner projects. Here are the ones you’ll actually use:
- Straight bit: cuts flat-bottomed grooves and dadoes
- Round-over bit: rounds sharp edges for a smoother look and feel
- Chamfer bit: cuts a flat angled edge, usually at 45 degrees
- Rabbet bit: cuts a step-shaped notch along an edge, often used for joints
- Flush trim bit: trims one material even with another, using a bearing to guide the cut
Stick with these five to start, and add specialty bits later if you need them.
How do you set and control router bit depth safely?
Set the bit depth before plugging in the router. Measure from the base to the tip of the bit, and adjust until you hit the depth your project needs.
For deeper cuts, take it slow and work in stages. Remove the material in a couple of shallow passes instead of trying to do it all at once.
Why does a router burn wood, and how can you prevent it?
Burn marks usually show up when the bit spins in one spot too long or you move too slowly. Friction builds up heat, and that scorches the wood.
Dull bits make this worse, since they need more pressure and time to cut. Keep your bits sharp, and swap them out or sharpen them when they start to drag.
Move the router at a steady, even pace, and try not to pause while the bit’s spinning against the wood. If you’re unsure, test your speed on a scrap piece first.
How should woodworking router bits be cleaned, maintained, and stored?
After each use, wipe bits down to get rid of resin, pitch, and sawdust. Usually, a soft brush with a bit-cleaning solution or just mild soap and water does the trick.
Once they’re clean, check the cutting edges for any nicks or dull spots. If a bit feels dull, it’ll cut poorly and might even leave burn marks or cause kickback.
Keep bits in a dedicated case or organizer with individual slots. That way, the sharp edges won’t bang together and get chipped or dull over time.