Sanding is a crucial step in any woodworking project, but honestly, a lot of folks rush through it or skip around. The secret to a smooth, flawless finish? Stick to the right grit order, use steady pressure, and always sand with the grain. If you skip grits or press too hard, you’ll notice swirl marks or rough patches once you add stain or paint.
This guide covers everything about wood sanding, from picking the right sander or sanding block to protecting your lungs from dust. You’ll see how to sand edges without rounding them by accident, keep sanding pads in good shape, and avoid common beginner mistakes.
Start With the Right Grit Progression
Choosing the right grit and moving through it in order sets you up for a smooth, even surface. If you start at the wrong point or skip steps, you end up fixing problems instead of finishing your project.
Read the Sandpaper Grit Numbers
Sandpaper grit numbers show how coarse or fine the abrasive is. Lower numbers mean it’s rougher, higher numbers mean it’s finer.
Coarse grit, like 40-80, takes off material fast. Save it for heavy stock removal or when you’re flattening rough lumber.
Medium grit, about 100-150, handles general smoothing and gets rid of marks left by coarser paper. Fine grit, usually 180 and up, smooths the surface and preps it for stain or finish.
Here’s a basic grit guide:
- 40-80 grit: heavy removal, rough shaping
- 100-150 grit: smoothing, removing mill marks
- 180-220 grit: pre-finish sanding
- 240 and up: fine finish work for special projects
Choose a Starting Grit Based on the Surface
Your starting grit depends on the wood’s condition. Rough lumber from the mill usually has saw marks, so start with 80-grit or even 60-grit if it’s really uneven.
If the wood just has mill marks from a planer or jointer but no big flaws, 100 or 120-grit is usually enough. This removes marks without taking off too much material.
For wood that’s already smooth, like pre-sanded plywood, skip the coarse grits. Starting at 150 or 180-grit keeps you from removing too much and protects thin veneer layers.
Check the surface before you begin. Run your hand across it and look for dents, scratches, or ridges. That’ll tell you how aggressive your starting grit needs to be.
Follow a Practical Grit Sequence
Once you pick a starting grit, move up in small, steady steps. A typical progression is 80, 120, 150, 180, then 220.
Don’t skip more than one grit at a time. Jumping from 80 to 220 leaves deep scratches that finer paper can’t fix.
At each grit, sand until the scratch pattern from the last grit disappears. Usually, a minute or two per section does the trick, but it depends on the wood and your tool.
Here’s a quick guide based on your finish:
| Finish Type | Recommended Final Grit |
|---|---|
| Stain or dye | 180-220 |
| Oil-based clear coat | 150 |
| Water-based clear coat | 220 |
| Paint | 150-180 |
Know When Final Sanding Is Complete
You’re done sanding when the surface feels smooth and even, with no scratch marks from earlier grits. Run your hand over the wood in good light and check for rough spots.
Wipe the surface with a clean or tack cloth to get rid of dust. This helps you spot any areas you missed.
Don’t sand past the recommended final grit for your finish. If you go too fine, especially past 220 for water-based finishes, you can burnish the wood and make it harder for stain or finish to soak in.
On end grain, sand one grit finer than the rest. That helps it match the color and texture of the face grain when you finish it.
Sand in the Correct Direction With Controlled Pressure
The way you sand and how much pressure you use really changes how your final surface looks. If you get these right, you avoid scratches, swirl marks, and uneven spots that stand out under stain or finish.
Identify the Wood Grain Direction
Before sanding, take a close look at the wood grain. Grain lines usually run in long, visible streaks across the board.
Always sand with the grain, not against it. If you sand across the lines, you’ll get cross-grain scratches. These are tough to see on bare wood, but they jump out after you add stain.
On some boards, the grain changes direction in different spots, especially near knots or curves. Check the whole surface first. If you’re not sure, run your fingers lightly over the wood. Usually, you can feel which way is smoother.
Use the Right Hand-Sanding Motion
When sanding by hand, move in straight lines that follow the grain. Avoid circles, since those create swirl marks that are hard to get rid of later.
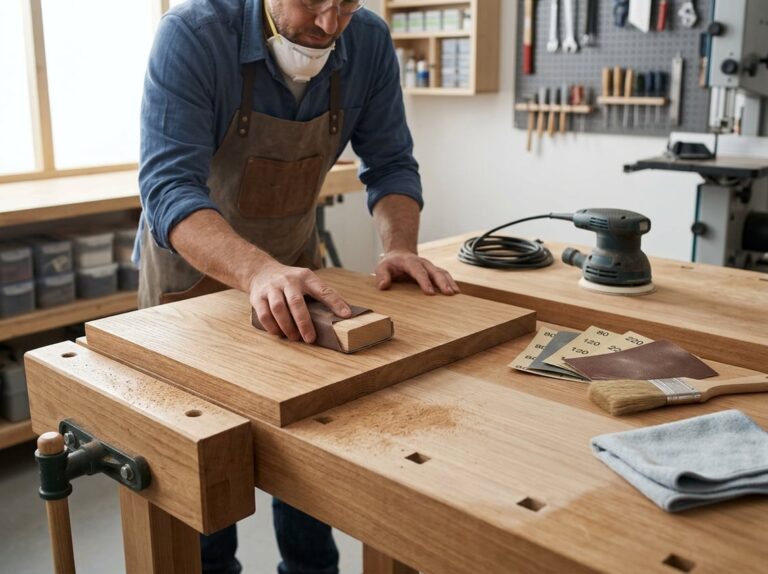
Always use a sanding block on flat surfaces. It spreads pressure evenly and keeps you from digging into softer spots. For curved or contoured areas, a sanding sponge shapes to the surface better than a flat block.
Try to keep your strokes long and even. Short, choppy strokes can wear out the sandpaper unevenly and leave inconsistent marks. This works whether you’re sanding a tiny trim piece or a big tabletop.
Control Pressure to Prevent Uneven Surfaces
If you press too hard, you’ll cause more problems than you solve. Heavy pressure can make low spots, especially on softer woods like pine.
Let the sandpaper or sander do the work. Use light, even pressure across the whole surface. This matters even more with power sanders, since extra weight can make dips or grooves.
If you spend too long on one area, especially near edges or corners, you’ll end up with uneven surfaces. Move steadily so you sand each spot about the same.
Too much pressure can also burnish the wood. That’s when friction heats up the surface and closes the pores, making it harder for stain to soak in evenly.
Protect Edges, Veneers, and Detailed Profiles
Edges and veneers need a gentle touch. Sanding too hard on an edge rounds it over or can even cut through a thin veneer.
Use a sanding block on edges to keep them straight and square. For detailed profiles or curved trim, a sanding sponge fits the shape without flattening the details.
Watch for tear-out near edges and corners, especially on softer woods or where the grain changes. Light, careful strokes help avoid this. If the grain raises a bit after sanding, that’s called raised grain. It’s common after using water-based products or wiping the wood with a damp cloth. A quick pass with fine-grit paper smooths it back down.
Choose the Best Sanding Tool for the Job
Different sanding jobs need different tools. Picking the right one saves time and gives better results than forcing one tool to do everything.
When a Sanding Block Is the Best Choice
A sanding block is great for small, controlled jobs. Use one when you need to smooth a tight area or fix a small flaw by hand.
Sanding blocks give you more control than loose sandpaper. They keep pressure even, which helps you avoid gouges or uneven spots.
Hand sanding with a block lets you feel the wood as you go. You can stop as soon as the surface feels smooth, without worrying about power tool marks.
Keep a few blocks with different grits nearby. That way, you can switch grits fast without stopping to swap sandpaper every time.
Use a Random Orbital Sander on Broad Flat Surfaces
Random orbital sanders are perfect for large, flat surfaces like tabletops, doors, or cabinet panels. They move in a random pattern, so you won’t get the swirl marks you see with a regular orbital sander.
This tool uses round sanding discs that attach with hook-and-loop backing. Switching grits takes just seconds.
Power sanding with a random orbital sander speeds things up without hurting quality. It removes material evenly and blends well between passes.
Keep the sander flat and let it work for you. Pressing down too hard slows the motor and makes results uneven.
Reserve Belt Sanders for Heavy Stock Removal
Belt sanders are built for fast, heavy removal. Use one when you need to level rough boards, strip old finish, or flatten warped stock.
Belt sanders move quickly and remove wood fast, so they’re not for fine finishing. Use a light touch and keep moving, since they can dig in if you stop.
Always sand with the grain when using a belt sander. Going across the grain leaves deep scratches that are tough to fix.
Save this tool for rough shaping. Once the surface is close to flat, switch to a random orbital sander or sanding block.
Sand Corners and Contours With Detail Tools
Corners, edges, and curved parts need a different approach. Detail sanders, sometimes called mouse sanders, have small pointed pads that reach into tight spaces bigger sanders can’t touch.
Some detail sanders use interchangeable pads shaped for corners or contours. That helps you match the tool to the exact shape you’re working on.
A finish sander or sheet sander also works for light detail work on flat edges. It uses standard sheets of sandpaper cut to fit the pad.
For carved or curved profiles, folding sandpaper and sanding by hand usually gives you the most control. You can follow the shape closely without flattening the details.
Prevent Swirl Marks, Scratches, and Other Sanding Damage
Swirl marks, cross-grain scratches, and uneven surfaces usually show up because of a few classic mistakes: picking the wrong tool speed, skipping grits, or letting dust pile up on your sandpaper. You can dodge most sanding disasters by controlling your tools, sticking to a logical grit progression, and checking your work as you go.
Avoid Swirl Marks From Power Sanders
A random orbital sander is your best shot at avoiding swirl marks. It spins and moves in small circles at the same time, which helps break up that telltale swirl pattern.
Let the sander’s weight do the heavy lifting. If you press down, you’ll just tilt the pad and dig in deeper scratches than you want.
Keep the sander moving. If you pause while it’s spinning, you’ll probably scorch a mark right into the wood.
Move slowly in overlapping passes. Too fast and you’ll miss spots, too slow and you build up heat, making swirls worse.
Remove the Previous Grit’s Scratch Pattern
Every grit leaves its own scratch pattern. Before you jump to a finer grit, sand out the marks from the last one.
Check your progress under a strong side light. Scratches hide under normal lighting, but raking light shows them clearly.
Skipping grits is a classic mistake. If you go from 80-grit straight to 220, the fine paper can’t erase the deeper scratches left behind.
Stick with a steady sequence, like:
- 80 or 100 grit (for mill marks and rough spots)
- 120 grit
- 150 grit
- 180 or 220 grit (final pass before finishing)
Wipe away dust between each grit so you can see what you’re working with.
Keep Sandpaper and Pads Clean
Clogged sandpaper and dirty pads make scratches, not smooth surfaces. When dust and fibers build up, the paper stops cutting evenly and drags debris around.
Tap or brush your sanding discs often to clear out buildup. For power sanding, a vacuum attachment or dust extractor pulls dust away as you go.
Swap out sandpaper as soon as it feels smooth or stops cutting. Worn-out grit just slows you down and makes it easy to over-sand one spot while trying to make up for it.
Store sanding pads flat and keep them dry. A warped or damp pad won’t sit flat on the wood, which leads to uneven pressure and weird results.
Correct Dips, Rounded Edges, and Sand-Throughs
Power sanders can make low spots or round over edges if you linger too long in one area, especially near corners where the pad tips and takes off more wood.
If you’ve got a dip, sand the surrounding area down to match it. For small dips or tear-out, a cabinet scraper works better since it removes thin layers without making things worse.
Sand-throughs happen when you go too far and hit a different layer, like veneer backing. If that happens, stop sanding that spot and gently blend the edges with a fine grit.
Rounded edges show up a lot when sanding by hand near corners. A sanding block helps keep pressure even and edges sharp.
Clean the Surface and Prepare It for Finish
Dust left on wood after sanding can ruin your finish in ways that are tough to fix later. The grit you stop at, how you handle raised grain, and how you sand between coats all shape how the final finish turns out.
Remove Dust Between Every Grit
Wood dust left behind just gets pushed around by the next grit, making fine scratches that pop out under stain or clear coat.
Start with a shop vacuum to pull dust out of the pores. Then use a tack cloth to grab what’s left. Tack cloths are a bit sticky, so they pick up fine dust without leaving gunk behind.
Don’t just use a dry rag. It mostly just moves dust around instead of removing it.
If you’re prepping for an oil-based finish, wipe the surface with a rag dampened in mineral spirits. That lifts dust out of the grain and helps you spot scratches or blotchy patches before you finish.
Raise the Grain Before Water-Based Finishes
Water-based finishes soak in and make wood fibers swell, which leaves a rough, fuzzy texture called raised grain.
You can get ahead of this by wiping the sanded wood with a damp (not soaked) rag. Let it dry fully, usually a few hours.
The water raises the fibers on purpose, so you can knock them down. Once it’s dry, sand lightly with 220-grit to smooth the fuzz.
If you skip this, the first coat of finish will raise the grain instead, which is tougher to fix. Sanding a wet or finished surface can mess up the finish.
Oil-based finishes don’t raise grain much, but doing a light pre-raise helps on softer woods anyway.
Choose the Final Grit for Stain, Oil, or Clear Coat
The finish you pick decides how fine you should sand.
| Finish Type | Stop At | Reason |
|---|---|---|
| Stain (oil or water-based) | 150-grit | Keeps pores open for stain absorption |
| Tung oil, danish oil | 150–180-grit | Needs open pores to soak in |
| Polyurethane, varnish, lacquer, shellac | 180–220-grit | Bonds to the surface instead of soaking in |
Sanding past 150-grit before staining compresses the fibers and closes the pores. That’s called burnishing, and it leads to blotchy stain because the wood can’t absorb pigment evenly.
Clear coats like polyurethane and varnish don’t soak in, they sit on top and need some texture to grip. A finer grit up to 220 actually helps them stick better.
Sand Lightly Between Finish Coats
Once your first coat of finish cures, you don’t have to worry about wood pores anymore. Now you just need to help the next coat stick to the first.
Use 320- to 400-grit sandpaper, ideally silicon carbide since it holds up on cured finishes. Sand lightly, just enough to scuff the surface. You’re not trying to remove much, just create tiny scratches for grip.
Most sanding between coats is dry, but wet sanding with water or mineral spirits can cut down dust and give a smoother result on later coats. Always let each coat cure fully before sanding, and vacuum or wipe away dust before the next layer.
Work Safely and Maintain Sanding Equipment
Sanding makes fine wood dust that’s rough on your lungs and eyes. Good habits and clean tools keep you safe and make your gear last longer.
Control Wood Dust at the Source
Wood dust piles up fast, so catch it before it spreads. Hook up a shop vacuum or dust collector to your sander if it has a port. Most orbital sanders have this built in.
A dust collector grabs fine particles as you work, so less ends up floating around or settling on your bench. If you don’t have a collector, a shop vacuum with a fine filter works pretty well too.
Sand somewhere with good airflow. Open a window or door, or set up a fan to push dust outside. It’s just easier to breathe and keeps your space cleaner.
Wear Effective Respiratory and Eye Protection
Wood dust can mess with your lungs, even in small amounts. A basic dust mask helps, but an N95 respirator blocks smaller stuff better. Go for an N95 or better if you’re sanding for a while, especially with fine grits that make lots of dust.
Your eyes need protection too. Wear safety glasses every time, whether you’re sanding by hand or with a power tool. Dust and little wood chips fly up fast and can sting or scratch.
Check your respirator and glasses before each use. Swap out a respirator if the straps are loose or the filter looks bad. Clean your glasses often so you can actually see what you’re doing.
Inspect and Replace Worn Abrasives
Worn sandpaper doesn’t cut well and can leave swirl marks and uneven spots. Check your sandpaper as you go.
Here’s when to replace it:
- Smooth, shiny spots where the grit is gone
- Clogged surfaces packed with sawdust
- Torn or ripped edges that catch on the wood
- Uneven wear that leaves some spots smoother than others
Aluminum oxide sandpaper lasts longer than most and works for most wood projects. Silicon carbide is great for fine finishing or sanding between coats. Swap out worn sheets or discs right away to keep your results even.
Care for Sanding Pads, Discs, and Sanders
Your sanding pads and power sanders need some care to stay in good shape. After each use, brush off dust from pads and discs. Too much dust cuts grip and makes pressure uneven.
Store discs flat and dry. Curled or bent discs won’t sit right and can leave an uneven finish. Keep sandpaper sheets flat too.
Check your sanders for dust inside the housing. Clean out the dust port and bag often, since a clogged system cuts suction and lets more dust float around. Wipe down the base of orbital sanders after each project to keep the pad flat and clean.
Avoid Common Beginner Sanding Mistakes
Little mistakes during sanding can ruin an otherwise good project. Most problems come from rushing through grits, pressing too hard, or trusting your hands instead of your eyes.
Starting Too Coarse or Skipping Grits
Jumping straight to coarse sandpaper on a surface that’s already pretty smooth just wastes wood and time. If the wood feels decent, start with a medium grit instead of tearing it up with 60-grit.
Skipping steps in your grit sequence is just as risky. Going from 80 straight to 220 leaves deep scratches that fine paper can’t erase.
Each grit is supposed to erase the scratches from the one before it. Stick with small steps like 80, 120, then 220. This matters even more on hardwoods like walnut, where scratches really show under a finish.
Sanding Too Fine Before Staining
More grit isn’t always better, especially before staining. Sanding past 220 closes the pores, which is called burnishing.
Burnished wood won’t absorb stain well, so you get blotchy color. This happens a lot with softwoods like pine, which already soak up stain unevenly.
For most projects, stop at 220 before staining. If you’re working with pine or other tricky woods, try a pre-stain conditioner to help even things out. Save anything finer than 220 for sanding between finish coats, not for prepping raw wood.
Applying Excessive Pressure or Staying in One Spot
Pressing down hard doesn’t speed up sanding. It just increases your risk of gouging the wood or creating uneven low spots.
Let the sandpaper’s grit do the work instead of forcing it. With power sanders, staying in one spot for too long can quickly wear a dip into the surface.
It’s easy to over-sand edges and corners, rounding them off by accident. Keep the sander or sanding block moving, using light, even strokes. Move steadily across the whole surface, not just in a few places. You’ll get a flatter, more even result that way.
Relying Only on Touch Instead of Inspection
Running your hand over the wood tells you a lot, but it doesn’t catch everything. Swirl marks and cross-grain scratches often hide until you apply stain or finish.
Check your work under a bright, angled light rather than just by feel. That lighting trick reveals scratches and uneven spots that are easy to miss otherwise.
If you care about the final look, inspect the surface after each grit change. It’s worth a few extra minutes to catch problems early instead of finding them when it’s too late to fix.
Frequently Asked Questions
Here are some common questions about grit choices, sanding direction, pressure, tool selection, and dust control. Each answer gives you a practical fix for a problem that pops up often in sanding projects.
What grit progression should I use when sanding wood before staining, painting, or applying a clear finish?
Start at 100 or 120 grit for most projects. This removes old finish and small surface flaws without leaving deep scratches.
Move to 150 or 180 grit next. This step smooths out the marks left by the first grit.
Finish with 220 grit before you stain, paint, or seal the wood. This grit gives you a smooth surface that takes finish evenly.
Don’t skip grits in this order. If you jump from 100 to 220, the coarse scratches stay in the wood, and stain will make them stand out.
Should I sand wood with or against the grain, and how can I prevent visible scratch marks?
Always sand in the same direction as the wood grain. The grain is the line pattern you see on the wood surface.
If you sand across the grain, you cut into the wood fibers at an angle. This creates scratches that run the wrong way. Stain and finish will make these scratches stand out clearly.
With a random orbital sander, direction doesn’t matter as much since it moves in small circles that go in many directions at once.
When sanding by hand, keep your strokes parallel to the grain lines. On curved parts or panels where the grain changes direction, use a fine grit like 150 or higher, and finish with a light pass along the main grain direction.
How much pressure should I apply when sanding by hand or with an electric sander?
Use light, steady pressure. Let the sandpaper or the sander do the work instead of pushing hard.
Pressing too hard builds up heat, which clogs the sandpaper faster. It also creates uneven spots and small dips in the wood surface.
Keep the sander moving while it touches the wood. If you stop in one spot, even briefly, you’ll wear down that area more than the rest.
Which type of sander or sanding block is best for flat surfaces, edges, corners, and detailed woodworking projects?
For flat surfaces like tabletops, doors, and panels, use a random orbital sander. It works quickly and doesn’t leave a pattern like a sander that only moves in one direction.
For curved edges or shapes cut with a scroll saw, use an oscillating spindle sander. A flat sanding pad can’t match a curved edge, but a spindle sander can follow the shape without flattening it.
For corners and tight spaces, a small detail sander works best. These sanders have a pointed pad that reaches into areas a larger sander can’t.
For edges, moldings, and final smoothing passes, sand by hand with a sanding block. A block keeps the paper flat and helps you avoid rounding off edges that should stay sharp.
How can I avoid swirl marks, uneven spots, and rounded edges while sanding wood?
Swirl marks often come from sanders that move in a single circular pattern, or from pressing down too hard. Use light pressure and keep the sander moving across the surface.
To avoid uneven spots, sand the whole surface at one grit before switching to the next. If you only sand one problem area at a coarse grit while the rest is already finer, you’ll end up with spots that don’t match.
To prevent rounded edges, always sand with a block instead of holding sandpaper directly in your hand. A block spreads out the pressure so edges stay straight instead of curving inward.
What is the best way to control sanding dust and clean a wood surface before finishing?
Vacuum the surface after every grit change. That way, you get rid of loose dust and particles before switching to a finer grit.
After vacuuming, wipe the surface with a tack cloth. Since it’s a bit sticky, it grabs the fine dust that the vacuum leaves behind.
If you skip this part, small dust from the coarser grit can scratch the surface again when you use finer sandpaper. These scratches might show up as random deep marks once you put on stain or finish, even though the rest of the wood looks smooth.