Every piece of wood has its own grain, and that grain really decides how your tools will cut. If you cut against the grain, wood fibers lift and break away, leaving rough, torn patches on your surface. Cut with the grain, and you’ll get a clean, smooth result. It’s one of those skills that can mean the difference between a project you’re proud of and a board you want to toss.
Reading grain direction isn’t all that tricky once you know what to look for. You can spot curved patterns on the board’s face, check the end grain, or just run your fingers along the surface to feel which way is smoothest. Grain doesn’t always run in a straight line, and sometimes it changes direction mid-board.
This guide will show you how to spot grain direction, why it matters for cutting, planing, sanding, and chiseling, and how to avoid tear-out before it ruins your work. You’ll also see how different woods act and what mistakes to steer clear of if you’re new to this.
Grain Direction and Its Effect on Cuts
Wood is made of long fibers running in a general direction through each board. When you cut, plane, or sand with these fibers, you get a smoother result and less resistance.
Long Grain, Cross Grain, and End Grain
Long grain runs parallel to the fibers along the board’s length. This is the strongest direction, and you’ll get the cleanest cuts here.
Cross grain runs across the fibers, perpendicular to their length. Working across the grain takes more effort and usually leaves a rougher surface than cutting with the long grain.
End grain is what you see when you cut right through the fibers and expose their tips, which is on the ends of boards. End grain acts differently:
- It soaks up finish and glue faster
- It’s harder to sand smooth
- It’s more likely to split if you don’t support it during cuts
Knowing which grain you’re working with helps you predict resistance and how the finished surface will look.
Why Fibers Lift and Cause Tear-Out
Tear-out happens when your tool catches the fibers and lifts them, instead of slicing them cleanly. That’s when you get chips, splinters, or rough spots.
Wood fibers don’t grow perfectly straight. They’re angled, kind of like hairs lying flat but tilted in one direction. If you cut or plane against their lean, your tool lifts and breaks them instead of shearing them off.
The steeper the angle, the worse the tear-out. That’s why a board might plane smoothly in one direction and tear up in the other. Sharp tools help, but if you’re going against the fibers, you’ll still get tear-out.
Using Growth Rings to Understand Board Structure
Growth rings make up the visible grain lines you see on a board’s surface and ends. These rings help you figure out how the board was cut from the tree, which affects both stability and appearance.
On the end of a board, growth rings show up as curved or straight lines. If you follow those rings to the face, you’ll see the patterns most people call “grain.” This gives you clues about fiber direction, though it’s not always perfect.
Boards with rings running parallel to the wide face are plainsawn or flatsawn. Boards with rings running perpendicular to the face are quartersawn. Each reacts differently to moisture and shows different grain patterns. Knowing how the rings run can help you guess how a board will behave while you’re working on it.
Identify the Direction Before You Cut
Before you make any cut, pause and check the grain direction. Look at the wood surface, check the edge, run your hand over it, and if you’re still not sure, try a light cut.
Read Grain Lines on the Board Face
Start with the face of the board. Grain lines are those long, thin marks running across the wood. They show which way the fibers point.
Usually, the grain lines angle a bit in one direction. Follow them from one end to the other. If the lines climb as they move toward you, the grain is “uphill” in that direction.
Hardwoods like oak and ash show bold grain lines. Softwoods like pine can be fainter, so use good lighting and take your time.
Use the Edge to Predict the Face Grain
The board’s edge gives more clues than the face sometimes. Check the end grain to see the tree’s growth rings.
The rings will curve in one direction, and that curve tells you how the grain runs across the face. If the rings curve up on the left, the face grain probably runs that way too.
This method works for hardwoods and softwoods. It’s handy when the face grain is hard to spot. Always check both edge and face for the best guess.
Quick reference for edge grain:
- Rings curve up on one side, grain rises in that direction
- Rings run flat or straight, grain is probably straight and easier to cut
- Rings curve sharply, grain may tear out more easily
Feel for the Smooth Direction
Your hands can pick up things your eyes might miss. Run your fingers or palm across the surface both ways.
One way feels smooth. The other feels a bit rough, almost like tiny bumps. The smooth direction is the way the grain runs, and that’s the direction you want for cutting, planing, or sanding.
This works on any wood, but it’s especially helpful for softwoods with faint grain lines. If you can’t feel a difference, try a light test cut instead.
Test an Uncertain Board With a Light Pass
Sometimes, grain direction just isn’t obvious. If you’re stuck, make a light test cut or pass with your plane, sander, or router.
Pick a small, hidden spot. Take a light pass and check the surface. If it’s smooth, you’re going with the grain.
If you see rough spots, fuzz, or chips, you’re going against the grain. That’s tear-out. Try reversing direction and test again. This quick check can save your whole project.
Follow the Grain With Hand Tools
Hand tools give you feedback that power tools just don’t. You’ll feel resistance change the moment you go against the grain, so you can fix your direction before anything goes wrong.
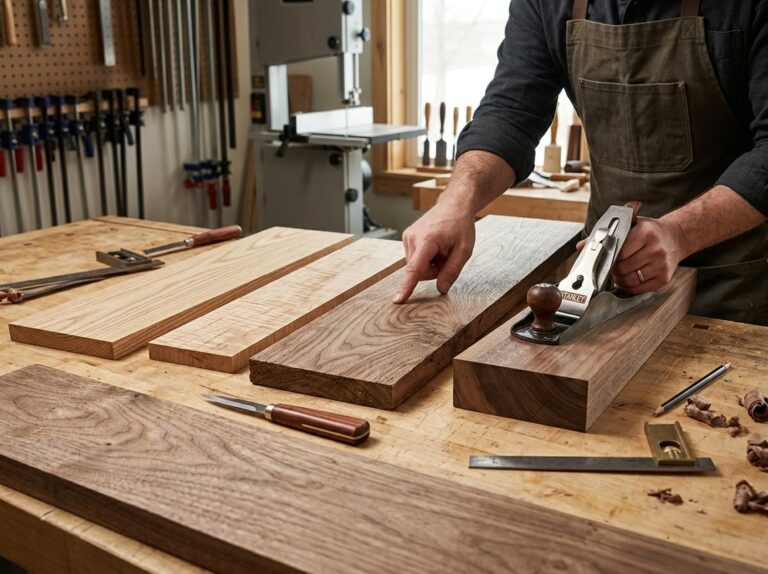
Set Up a Hand Plane for a Clean Surface
Your hand plane needs a sharp blade set for a thin shaving. A dull blade or heavy cut is a recipe for tear-out, no matter which way you push.
Check the grain direction on the edge before you start. Push the plane so the blade meets the grain at a rising angle, like petting a cat the right way.
If you get thin, curling ribbons, you’re doing it right. If the surface turns rough or chunks come out, stop and try the other direction.
Narrow the plane’s mouth for tricky, figured wood. This supports fibers right before the blade hits, so you get less tear-out.
Chisel Along and Across Fibers Without Splitting
A chisel can cut with or across the grain, and each way needs a different touch to avoid splits.
When paring with the grain, like cleaning up a tenon cheek, work from the high point of the grain toward the low point. It’s the same idea as planing—you want to cut downhill through the fibers, not lift them up.
When chopping across the grain, like making a mortise, take small, careful cuts. Deep chops across fibers can split the wood past your line.
For tenon shoulders, always cut with the grain running toward the shoulder. That keeps fibers supported and prevents splintering at the joint.
Adjust Direction When Grain Reverses
Some boards don’t have grain that runs just one way. The grain might shift in the middle, especially near knots or in figured woods like curly maple.
In those cases, plane from each end toward the center. That way, you’re cutting with the grain on both halves, even if the direction changes.
Keep an eye on your shavings. If they suddenly go from smooth ribbons to torn chunks, the grain has reversed, and you need to flip your approach.
Take lighter passes in these tricky spots. Thin shavings lower the risk of tear-out when the grain keeps changing.
Work Safely Around Knots and Curves
Knots and curved grain patterns need extra care because the fibers don’t run in a straight line. Cutting through a knot with a chisel can make the tool skip or bind, which isn’t great for your hands.
Cut with less force near knots and take smaller bites each pass. That gives you more control if the tool suddenly hits harder or softer wood.
For curved grain, like around a branch or crotch, check the direction in several spots. Grain near a curve often runs at a different angle than the rest of the board.
Keep your hand tools sharp for these areas. A sharp edge needs less force, which lowers the chance of slipping or tearing fibers by accident.
Machine Wood Without Tear-Out
Power tools remove wood quickly, so if you go against the grain, you’ll see the mistake just as fast. Setting the feed direction right on each machine keeps your surface clean and saves good boards from disaster.
Feed Boards Correctly Through a Jointer
Before you use a jointer, check the grain along the edge. You want the grain lines to slope down and away from you as the board moves over the cutterhead.
If the lines point up and toward you, flip the board around. Feeding it the wrong way lets the blades catch and lift the fibers, which causes tear-out.
If the lines are hard to see, run your fingers along the edge. It’ll feel smooth in one direction and a bit rough in the other. Smooth means you’re feeding it right.
Choose the Best Direction for a Planer
A planer works a lot like a jointer, but instead of an edge, you’re feeding a flat board through. Take a good look at the board’s face and check the grain direction before you set it on the bed.
Here’s a quick way to figure it out:
- Look at the edge grain to see which way it angles.
- Feed the board so the angle points down and away from the cutterhead.
- Take light passes, especially if you spot figured or interlocked grain.
- Flip the board if you see fuzzing or chipping as you go.
Thinner passes really help with tricky grain. If one direction keeps causing problems, just try planing the other way and see what happens.
Control Grain During Routing and Shaping
Routers move fast and can tear wood up if you cut against the grain. Feed the router so the bit rotation pushes into the wood, not away from it.
On straight edges, that usually means moving the router from left to right when the bit’s in front of you. On curves, the direction changes as you move around, so double-check as you go.
Take lighter cuts on figured wood or end grain. Shallow passes give the bit less to grab, leaving a cleaner edge. If you notice chipping, stop and change direction for that spot.
Use Support and Hold-Downs for Safer Cuts
If a board shifts or wobbles during a cut, you’re more likely to get tear-out and it’s just not safe. A featherboard keeps the board tight against the fence or table, so your feed rate stays steady and your hands stay away from the blade.
Use outfeed support for long boards so they don’t dip or lift as they clear the table. This keeps pressure steady and helps the cutterhead follow the grain the way you want.
Push blocks and grippers help you control small pieces. They give you a steady grip without putting your fingers close to the blades or bit.
Adapt Your Technique to Wood Species and Grain Patterns
Every wood species reacts a little differently to your blade. Growth rings, vessel size, and fiber structure all change how much force you need and how careful you have to be to avoid tear-out.
Hardwood Versus Softwood Behavior
Hardwoods and softwoods don’t just differ in hardness. Their fibers hold together differently, and they respond differently to cutting tools.
Softwoods like pine and cedar have long, uniform fibers with fewer surprises. Grain direction is usually easy to spot and follow, but softwoods can crush or fuzz up if your blade isn’t sharp.
Hardwoods such as oak and maple have denser fibers and bigger vessels. They often show tear-out more dramatically if you cut against the grain.
Here’s a quick comparison:
| Trait | Softwood | Hardwood |
|---|---|---|
| Fiber length | Long, uniform | Shorter, denser |
| Tear-out risk | Moderate | Higher |
| Blade sharpness needed | Sharp | Very sharp |
Change your cutting angle and keep your blade sharp, depending on what you’re working with.
Managing Interlocked, Figured, and Reversing Grain
Some wood just won’t follow a simple direction. Interlocked grain shifts direction in alternating layers as the tree grows. One pass with a plane might be great, but the next section could tear out badly.
Figured wood, like curly maple or bird’s-eye, adds even more challenge. The fibers twist and dip, so there’s rarely one “right” direction to cut.
For these, take lighter passes. Cut shallow and make more passes. A sharp blade really matters here, since dull edges just grab and tear these unpredictable patterns.
Sanding is usually your best last step for interlocked or figured grain, because it doesn’t care which way the fibers run. Start with a coarser grit and work up slowly.
Species Notes for Oak, Maple, Walnut, and Mahogany
Each of these woods has its own quirks.
Oak has big, open vessels and strong grain lines. Tear-out often shows up along the ray fleck areas.
Maple is dense and usually straight-grained, but figured types like curly or quilted maple need extra care and lighter cuts.
Walnut is pretty forgiving. Its moderate density and steady grain make it a nice choice for practicing grain-reading skills.
Mahogany can have interlocked grain, especially in genuine mahogany. That can cause surprise tear-out even if the surface looks straight-grained.
Do some test cuts on scrap pieces from the same board if you want to catch these issues before working on your final piece.
Special Considerations for End Grain and Turned Vessels
End grain acts differently than face grain because you’re cutting across the wood fibers, not along them. So the usual “with the grain” rules don’t really apply.
For end grain, use very sharp tools and take light cuts. Skewing your blade at an angle, instead of pushing straight in, helps reduce tear-out a lot.
Turned vessels are a special case since the grain direction keeps changing as the piece spins. You’re cutting with the grain on one side of the bowl and against it on the other, all in one revolution.
Go slow and use sharp turning tools to manage these shifts. Light finishing passes, not heavy cuts, will give you cleaner results on curved or rotating pieces.
Sanding, Finishing, and Common Beginner Errors
Sanding is your last chance to fix mistakes before the finish goes on. If you sand against the grain, use dull tools, or skip inspection, little issues can turn into permanent flaws.
Sand With the Grain to Reduce Visible Scratches
Always sand in the same direction as the wood grain, not across or in circles. Cross-grain scratches go deeper and show up once you add stain or finish.
Start with a lower grit, like 100 or 120, if there are tool marks from a plane or chisel. Move up through 150, 180, and 220, always sanding parallel to the grain at each stage.
Check your work with raking light. Hold a light at a low angle across the surface and look for scratches that run against the grain. They’ll pop out even if you can’t see them in normal light.
Inspect Surfaces Before Applying Finish
Don’t put finish on a surface you haven’t checked closely. Finish makes flaws more obvious, not less, since it darkens the wood and highlights rough spots.
Run your hand over the wood in both directions. It should feel smooth, with no rough patches or leftover scratches.
Look from different angles under bright light. Pay extra attention near knots, curly grain, or grain direction changes, since these spots hide small defects.
A simple pre-finish checklist:
- Feel for rough or raised grain
- Check for cross-grain scratches
- Look for tear-out near knots or grain reversals
- Wipe with a damp cloth to raise grain, then re-sand lightly once dry
Avoid Dull Tools and Heavy Passes
Dull blades and worn sandpaper do more harm than good. A dull chisel or plane blade tears wood fibers, especially where the grain changes direction.
Sharpen plane blades and chisels often. A sharp edge slices through the grain smoothly, even in tough spots like curly or interlocked wood.
Heavy passes cause problems too. Taking thick shavings with a plane or pressing hard with coarse sandpaper raises the risk of tear-out and deep scratches.
Stick to light, controlled passes. This goes for planing, chiseling, and sanding. You’ll have more control over how the tool moves through the grain.
Correct Tear-Out Before It Ruins a Project
Tear-out happens when a cutting tool lifts wood fibers instead of slicing them, usually from cutting against the grain. Small tear-out can often be fixed, but you need to catch it early.
For light tear-out, switch to sanding instead of using a plane or chisel. Sand across the damaged area first with a coarse grit, then blend it into the rest of the wood with finer grits.
For deeper tear-out, you might need to plane from the other direction to remove the damaged fibers. Try it on scrap wood first if you’re not sure which way works better.
If you ignore tear-out and put finish over it, the damage will show even more. Finish pools in torn fibers, making the defect stand out.
Frequently Asked Questions
Grain direction affects how wood cuts, how joints hold up, and how smooth a surface turns out. Here are answers to the most common questions woodworkers ask about reading and working with grain.
What is wood grain direction, and why does it matter when cutting or shaping a board?
Grain direction is the way wood fibers line up as they grow in the tree. These fibers mostly run in one direction, but they can angle up or down as they move through a board.
If you cut or plane with the grain, the fibers stay smooth and connected. Cut against the grain, and your tool can catch the fibers and rip them out, leaving rough patches called tear-out.
Grain direction also affects how strong a piece of wood is. A board with grain running along its length holds more weight than one cut across the grain.
How can I identify which way the grain runs before planing, chiseling, or sanding?
Look at the edge of the board first. You’ll see thin lines running along the surface, and these lines often point slightly up or down across the board.
Run your fingers along the surface in both directions. The smooth side is the direction you want to cut. If it feels rough or snags your skin, you’re going against the grain.
You can also make a test cut with a chisel or plane. If the tool glides and leaves a clean surface, you’re going the right way. If it digs in or lifts little chunks, flip your direction.
How do I prevent tear-out when using a plane, chisel, router, or hand tool?
Always take light passes, not deep ones. Thin shavings are easier to control and put less stress on the fibers.
Sharp tools matter more than most people think. A dull blade tears fibers instead of slicing them, so sharpen your plane irons and chisels often.
For tricky or figured wood, try planing at a slight angle instead of straight down the board. Skewing can reduce tear-out when the grain changes direction.
When using a router, feed the bit in the same direction as the wood grain if you can. Climb cutting, where you move against the bit’s rotation, can cause the wood to grab and split.
Which direction should I sand wood to achieve a smooth surface without visible scratches?
Always sand in the same direction as the grain, not across it. Sanding across the grain leaves scratches that stand out once you stain or finish the piece.
Start with a coarser grit to remove rough spots or tool marks. Then move to finer grits, always sanding with the grain each time.
If your board has grain that changes direction, adjust your sanding motion to match each section. It takes more time, but it prevents visible cross-grain marks.
How does grain direction affect the strength of a woodworking joint or finished piece?
Wood holds up best along the length of its grain and tends to give way more easily across it. That’s why joints like mortise and tenon keep the long grain pointing right where the stress goes.
If you cut a joint so the grain runs across a thin section, that part can snap when you put weight on it. You’ll see this happen with broken chair legs or table aprons way more often than you’d like.
When you glue boards together, try to match the grain direction of each piece as much as you can. This way, the wood moves more evenly with humidity changes, so you’re less likely to end up with cracks down the road.
Do different wood species require different techniques for working with the grain?
Yeah, different species act pretty differently, depending on their grain and density. Straight-grained woods like pine or poplar are usually simple to work with, and they rarely tear out.
Figured woods, like curly maple, bird’s-eye maple, or burls, have grain that changes direction all the time. For these, you’ll want lighter cuts, sharper tools, and sometimes it’s better to grab a scraper instead of a plane if you want a smooth surface.
Exotic hardwoods with interlocking grain, like some mahogany or sapele, seem determined to tear out no matter which way you go. For those, take really light passes and try things out on scrap first.
Air-dried wood usually feels more forgiving than kiln-dried, even when the grain is wild. If you’re dealing with a tricky species, slow down, check your results often, and don’t expect one approach to work for the whole project.