Drilling a clean hole in wood isn’t just about pointing a drill at a board and pulling the trigger. To get clean, precise holes, you need the right bit, steady speed, and a good backing to stop splinters before they happen. Splintering is a super common headache in woodworking, but honestly, it’s easy to avoid once you know what’s behind it.
This guide covers the whole process, from choosing a brad-point bit to marking pilot holes and clamping your workpiece so it doesn’t shift. You’ll see how grain direction changes your results, why countersinking helps with a neat finish, and how to keep your drill moving straight through the wood.
Choose the Right Bit for the Hole
Your choice of drill bit really decides how clean your hole will be. Match the bit type, material, and size to your wood and project before drilling.
Why Brad-Point Bits Deliver the Cleanest Results
Brad-point bits have a sharp center and two spurs on the outside. The center keeps the bit from slipping when you start. Those spurs cut the wood fibers first, so the edges stay clean instead of tearing up.
This design makes brad-point bits the go-to for furniture, cabinets, and any project where looks count. Standard twist bits just push through fibers, which often leaves rough or splintered edges.
Brad-point bits work best in solid wood, usually from about 1/8″ to 1/2″. Brands like Irwin and Fisch offer sets that cover most sizes you’ll need.
When to Use Forstner, Spade, Auger, and Twist Bits
Each bit has its specialty. Here’s how to pick:
- Forstner bits: Great for flat-bottomed holes, like for hinges or dowels. They cut crisp edges, even in tight spots.
- Spade bits: Fast and cheap for rough holes where appearance doesn’t matter, like running wires through studs.
- Auger bits: Ideal for deep holes in thick boards. The screw tip pulls the bit through, so you don’t have to push hard.
- Twist bits: All-purpose for wood, metal, and plastic. Good for pilot holes but not the best when you want clean edges.
Irwin Speedbor bits are a common pick for spade-style boring in rough carpentry.
Bit Materials for Solid Wood, Laminates, and Engineered Wood
Bit material changes how long it stays sharp and how clean it cuts. High-speed steel (HSS) bits work well for solid wood and keep an edge with regular use. They’re cheaper than carbide bits and work for most home shops.
Carbide-tipped bits handle laminates and engineered wood without dulling as quickly. Those materials have glue and resin that wear down HSS bits fast.
If you work with plywood, MDF, or laminate a lot, carbide-tipped bits save money in the long run. For regular solid wood, HSS bits are fine and cost less.
Match Bit Diameter to the Hole and Hardware
Always match your bit size to your hardware. Too big, and you get a loose fit. Too small, and you risk splitting the wood when you drive in a screw or dowel.
Check the packaging or measure the screw or dowel with calipers before picking a bit. For pocket screws, dowels, and shelf pins, use the size the manufacturer lists.
For pilot holes, go a bit smaller than the screw’s shank. This lets the threads bite into the wood without splitting it apart.
Prepare the Workpiece for Accurate Drilling
The real prep work happens before the drill even touches the wood. Marking the hole, checking grain direction, clamping, and using a backing board all help prevent tear-out and give you clean holes.
Mark Centers and Use an Awl for Precise Starts
Measure your hole spot twice, then mark an X with a pencil. Find the exact center and press an awl or nail into it to make a small dent. This gives your bit a place to start so it won’t slip around.
This step is especially important with twist bits, since they don’t have a center point. Brad-point bits are a bit more forgiving, but starting with an indent still helps. Skip this, and you’ll probably end up with off-center or crooked holes at some point.
Read Grain Direction Before Positioning the Hole
Wood grain really affects how a hole turns out and how strong it’ll be. Drilling parallel to the grain, instead of straight across, usually lowers the chance of cracks around the hole.
Look at the wood and spot the grain lines. That’s the direction you want to keep in mind.
Holes near the edge of a board, close to the grain, are more likely to split. If you can, move the hole away from the edge and in line with the grain. This gives you a stronger, cleaner result, especially on hardwoods and thin boards where splitting is more common.
Clamp the Workpiece Securely
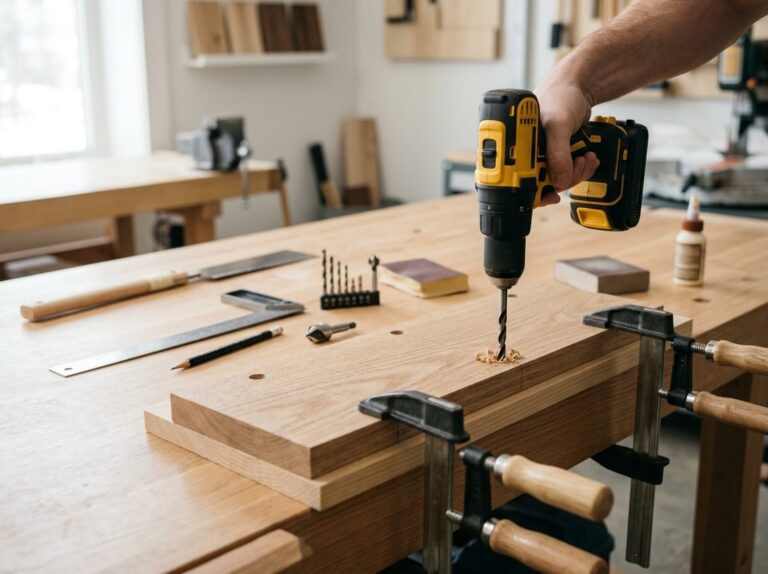
Clamping stops your workpiece from shifting while you drill. Even a tiny movement can make the bit wander and mess up your hole.
Use two clamps if you can, on opposite sides. This spreads out the pressure and keeps the board flat on your work surface.
Quick clamping checklist:
- Keep clamps far enough from the hole so they don’t get in the way
- Make sure the workpiece sits flat, no gaps underneath
- Tighten clamps enough to stop movement, but don’t crush soft wood
- Try to wiggle the board by hand before drilling to double-check
Clamping also lets you use both hands to guide the drill, which really helps.
Set Up a Backing Board for Through-Holes
Exit tearout happens when the bit pushes through the back and splinters the wood. A backing board solves this.
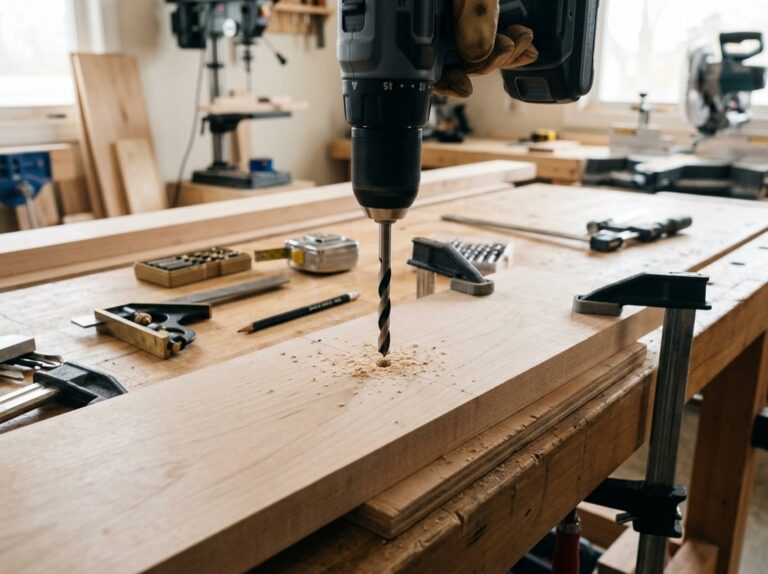
Place a flat scrap board right behind your workpiece, where the bit will exit. Clamp both together so nothing moves.
As the bit goes through, it keeps cutting into the backing board instead of empty air. The wood fibers get support, so the exit hole stays clean. Skipping the backing board is a main cause of splintering on the underside of the hole.
Test the Setup on Matching Scrap Wood
Before you drill your final piece, try everything out on a scrap of the same wood and thickness. You can check your speed, bit choice, and clamping without risking your real project.
Drill a test hole and check both sides. Look for clean edges, no splinters, and a straight hole.
If you see tear-out or roughness, tweak your speed, pressure, or backing board before moving on. It takes a few extra minutes, but it’s worth it, especially with new woods or unfamiliar bits.
Drill Straight, Clean Holes Step by Step
Getting a clean hole really comes down to a few basics: the right pilot hole, the right speed, and steady control. Follow these steps, and you’ll avoid most of the usual problems.
Start With a Pilot Hole When It Improves Control
A pilot hole gives your bit a starting spot and keeps it from drifting. This matters most in hardwood or near an edge, where the bit can slip before biting in.
Use a small bit, maybe 1/8 inch, to start. Then step up to your final size. This puts less strain on the bigger bit and helps keep things centered.
Pilot holes are also key for screws. They stop wood from splitting, especially near the end grain. You can skip this on soft, thick wood if splitting isn’t a worry.
Set Drill Speed for Bit Size and Wood Density
Drill speed depends on your bit size and wood type. Bigger bits need slower speeds. Small bits can run faster without overheating.
Hardwoods like oak need lower speeds than soft woods like pine. Go too fast on dense wood, and you might burn the bit or the wood.
Quick guide:
- Small bits (1/8″ or less): high speed
- Medium bits (1/4″ to 1/2″): medium speed
- Large bits (over 1/2″): low speed
- Hardwood: slower speed
- Softwood: can go faster
Cordless drills usually have a speed dial or you can feather the trigger. Drill presses give you more precise speed settings, which is handy for repeat cuts.
Keep the Bit Perpendicular to the Surface
Crooked holes are a classic mistake. The bit should stay at a 90-degree angle to the wood unless you want an angled hole.
A drill guide helps keep the angle steady. It attaches to the bit and keeps things straight, especially on curved or uneven surfaces.
A drill press takes care of this for you, since it only moves up and down. If you’re using a handheld drill, check your angle from two sides, not just one. Looking from the front can hide a tilt.
Use Steady Pressure and Clear Chips Often
Apply even pressure as you drill. Too much force overheats or jams the bit. Too little, and the bit just skates across the surface.
Chip clearance is more important than most people think. As you drill, chips pile up inside the hole. If you don’t clear them, they can jam the bit or rough up the hole walls.
Pull the bit out every few seconds on deep holes. This clears chips and lets air cool the bit. For really deep or tight holes, a bit of lubricant can help reduce friction and heat.
Control Depth for Blind Holes and Countersinks
Blind holes stop partway into the wood instead of going all the way through. You need a clear way to control depth so every hole matches.
A drill press has a depth stop built in, making this simple. For a cordless or corded drill, just wrap a strip of tape around the bit to mark your depth. Stop drilling once the tape touches the wood surface.
Depth control matters for countersinking, too, when you want a flat-bottomed hole so the screw head sits flush. Pair a countersink bit with a depth stop and you’ll get clean holes without sinking the screw too deep or leaving it sticking out.
Prevent Splintering and Tear-Out at Both Faces
Tear-out happens on both sides of a board, not just the exit point. You can stop it by controlling how the bit enters and exits the wood.
Score the Surface Before Drilling
Before drilling, score the wood along your marked hole with a utility knife or awl. This cuts the top fibers so the bit doesn’t rip them on entry.
Press firmly and trace a full circle around your mark. A shallow cut is all you need, not a deep groove.
This step is especially helpful on softwoods and cross-grain cuts where fibers tear easily. It takes seconds and spares you from a rough entry hole.
Brad point bits help reduce splintering because their sharp center point and spurs cut wood before the flutes remove material. Scoring just adds a bit of extra insurance, especially with twist bits that don’t have spurs.
Stop Before Breakthrough and Finish From the Reverse Side
One reliable method is to drill most of the way through, then flip the board over and finish the hole from the other side.
- Drill until the bit tip just pokes through the back face.
- Stop and pull the bit out carefully.
- Flip the board.
- Line up the small exit mark left by the tip.
- Finish drilling from that side.
This avoids exit tearout because you never force the bit all the way through unsupported wood. Each side gets a clean entry cut instead of a rough blowout.
This method works best on thicker stock where you can track the bit’s position accurately.
Use Sacrificial Support at the Exit Point
A backing board is one of the simplest ways to beat tear-out. Clamp a scrap piece tightly to the back face of your workpiece before drilling.
The backing board supports the fibers as the bit exits, so they get cut instead of torn. Any splintering happens in the scrap, not your project piece.
For best results:
| Backing Material | Best Use |
|---|---|
| Scrap plywood | General-purpose backing for most drilling |
| Solid wood scrap | Matches grain direction of workpiece |
| MDF offcut | Flat, dense surface for smooth cutting edges |
Make sure the backing board sits flush against the workpiece with no gaps. Clamp both pieces down so they can’t shift while you drill.
Adjust Technique for End Grain and Veneered Panels
End grain splinters more easily than long grain because the fibers run straight down. Slow your drill speed and use lighter pressure when drilling into end grain to avoid pushing fibers apart.
Veneered panels and other engineered wood need a different approach. The thin veneer or laminate on top can chip or peel if you drill too fast or use a dull bit.
For these materials:
- Use a sharp brad point or specialty laminate bit.
- Apply painter’s tape over the drill mark to hold surface fibers in place.
- Reduce speed and let the bit do the work without forcing it.
- Always back the panel with scrap wood to support the exit side.
These small adjustments protect thin surface layers that solid wood techniques might damage.
Adapt the Method to Wood Species and Joinery
Different woods react differently to drilling, so you’ll want to adjust your speed, bit choice, and pressure based on the material. Joinery work also demands extra precision, since loose dowels or crooked hinge mortises can weaken your project.
Drilling Softwoods Without Crushing or Fuzzing Fibers
Softwoods like pine, cedar, and fir have loose fibers that crush or fuzz up if you drill too fast. Use a sharp brad point bit and slow down your speed to keep fibers from tearing.
Light pressure works best. Softwood cuts easily, so forcing the bit only causes rough edges and splintering.
Back up your workpiece with scrap wood underneath. This gives the fibers something to push against as the bit exits and stops blowout on the bottom side.
If you see fuzzy edges around the hole, your bit might be dull or you’re drilling too fast. Slow down and let the bit do the work.
Drilling Hardwoods Without Burning the Bit
Hardwoods like oak, maple, and walnut are dense and generate more friction and heat while drilling. This heat can burn the wood and dull your bit fast if you’re not careful.
Use a slower drill speed than you would with softwood. A drill press gives you better control here than a handheld drill, since you can set a consistent, slower RPM.
Take breaks during deep holes to let the bit cool down. Back the bit out every half inch or so to clear chips and reduce heat buildup.
Signs you’re drilling too fast in hardwood:
- Smoke or a burning smell
- Dark scorch marks around the hole
- A bit that feels hot after use
Sharp bits cut cleaner and generate less friction, so keep them sharpened before working with dense hardwoods.
Making Accurate Holes for Dowels and Hardware
Dowel joints depend on precise, matching holes. A dowel jig keeps your bit centered and square, so both pieces line up correctly when joined.
Use a brad point bit for dowel holes. The center point stops the bit from wandering, which keeps your holes accurately placed.
Match your bit size exactly to your dowel diameter. A hole that’s too loose weakens the joint, while one that’s too tight can split the wood when you insert the dowel.
For hardware like shelf pins or bolts, measure twice before drilling. Mark your depth on the bit with tape so you don’t drill too deep and come out the other side.
Boring Clean Recesses for Hinges and Other Joinery
Hinge mortises and similar recesses need flat-bottomed holes with clean edges. Forstner bits are the best choice here, since they cut flat-bottomed holes with smooth sides, unlike twist bits that leave a pointed bottom.
A drill press gives you the control needed for consistent depth across multiple holes. This matters for hinges, since uneven depths cause doors to sit crooked.
Set a depth stop on your drill press before starting. This keeps every hole the same depth without measuring each one by hand.
Drill slowly and let the Forstner bit clear chips. Rushing through hinge recesses can leave rough edges that need extra sanding to fix.
Use Safe Practices and Maintain Sharp Bits
Drilling clean holes depends as much on how you protect yourself as it does on the condition of your tools. Sharp bits and safe habits work together to reduce splintering, prevent accidents, and extend the life of your equipment.
Protect Eyes, Secure Loose Clothing, and Keep Hands Clear
Always wear safety glasses when drilling wood. Small chips and dust can fly out fast, even from a slow-speed hole.
Tie back long hair and remove loose sleeves, gloves, or jewelry before you start. These items might catch in the drill chuck or bit, especially with a corded drill that has a longer cord to snag on.
Keep both hands on the tool and away from the bit. Never hold the workpiece with your hand near the drilling area.
Use clamps to secure your wood instead. This frees your hands for control and keeps them clear of the spinning bit.
Avoid Overheating, Binding, and Forcing the Drill
Pushing a drill too hard overheats the bit and can burn the wood around the hole. Let the bit’s cutting edges do the work at a steady, moderate speed.
If the bit binds or stalls, stop and back it out slowly. Forcing a stuck bit can snap it or strip the hole.
A cordless drill with adjustable torque settings helps prevent this. Set the clutch lower for softwoods and higher for dense hardwoods.
Watch for chip clearance as you drill. If chips build up inside the hole, pull the bit out partway to clear them before continuing.
Clean Resin and Debris From Flutes and Cutting Edges
Resin, sap, and wood dust build up in the flutes of a drill bit over time. This buildup slows chip removal and causes friction, which dulls the bit faster.
Wipe bits down with a dry cloth after each use. For sticky resin, use a bit cleaner or mineral spirits on a rag to loosen the residue.
A stiff brush works well for clearing debris from the flutes and grooves. Make sure the bit is completely dry before storing it, since moisture leads to rust.
Check the cutting edges for buildup before every project. Clean edges cut smoother and reduce the risk of tear-out.
Sharpen or Replace Dull Bits Before They Damage Wood
A dull bit tears wood fibers instead of cutting them cleanly. This leads to rough edges, splintering, and extra effort on your part.
High-speed steel (HSS) bits can be sharpened with a diamond file or a bench grinder made for bit sharpening. Match the file angle to the bit’s original edge angle for the best results.
Carbide-tipped bits stay sharp longer but need a diamond file or specialty sharpening tool since regular files won’t cut the hard carbide surface.
Replace any bit with chipped edges, a bent shaft, or a worn point. A damaged bit can wander off-mark and ruin an otherwise clean cut, so it’s not worth trying to save one that’s beyond repair.
Frequently Asked Questions
Drilling clean holes in wood really comes down to picking the right bit, supporting the wood correctly, and controlling your speed and pressure. Here are answers to some of the most common questions you’ll run into working on your own projects.
What type of drill bit produces the cleanest holes in wood?
Brad-point bits give you the cleanest, most accurate holes for small to medium sizes. The sharp center point keeps the bit from wandering, and the outer spurs slice through wood fibers instead of tearing them.
For flat-bottomed holes, like ones you’d use for hinges or dowels, Forstner bits are your best bet. They cut smooth sides and leave very little tear-out on the surface.
How do I prevent tear-out when drilling through a wooden board?
Place a piece of scrap wood underneath your workpiece before you drill. This backing board supports the fibers as the bit exits, so they don’t splinter or blow out.
Also, slow down as the bit nears the bottom of the board. Reducing your speed and pressure right before breakthrough gives you a cleaner exit hole every time.
When should I use a pilot hole before drilling in wood?
If you’re driving a screw, especially in hardwood or anywhere close to the edge, go ahead and make a pilot hole. Trying to skip it? The wood might split as the screw pushes through, and that’s a headache nobody wants.
Pilot holes also make it easier to keep screws straight and centered. Usually, I go for a hole just a bit smaller than the screw’s diameter so the threads still bite into the wood.
How can I drill a straight, accurate hole without a drill press?
Mark your spot first with an awl or even a nail, so the bit doesn’t wander all over the place. Sometimes I grab a speed square or a doweling jig to help guide the bit vertically.
If you check your angle from the front and the side as you drill, you’ll catch any tilt before it gets out of hand. It’s easy to miss if you only look from one direction, and then the hole’s crooked before you know it.
How do I countersink screw holes in wood for a flush finish?
After you drill the pilot hole, grab a countersink bit. It’ll cut a little cone-shaped dip at the surface, letting the screw head sit flush or maybe a hair below the wood.
Some countersink bits actually drill the pilot hole and the countersink at the same time, which is pretty handy. That way, the countersink lines up perfectly with the pilot hole, and you can move on to the next step faster.
Which drill bits are best for drilling large holes in wood?
Spade bits are great if you want quick, rough holes between 1/2 inch and 1.5 inches. They cut through wood fast, but honestly, the edges might look a bit messy compared to other bits.
If you care about a cleaner finish and need larger holes, hole saws usually do the trick. They’re designed for wide, neat cuts and come in handy for stuff like installing door locks or making pipe openings.