A hand plane shaves off thin layers of wood, leaving a flat, smooth surface. Wood planes use a sharp blade set at an angle to cut and lift wood fibers, and honestly, learning to use them well just makes every project feel more satisfying. Power tools remove material fast, but a hand plane gives you a level of control and precision that sanding just can’t match.
This guide covers the basics to help you get started. You’ll pick up how planes work, how to adjust them, and how to read grain direction so you avoid nasty tear-out. There are also tips for smoothing, trimming, fitting, sharpening, and keeping your planes in good shape for the long haul.
Maybe you already have power tools, or maybe you’re just starting to build your hand tool collection. Either way, you’ll find what you need here. Once you get the hang of hand planing, you’ll see these simple tools can save you hours of sanding and give you a better finish.
How Hand Planes Cut and Control Wood
A hand plane holds a sharp blade at a fixed angle and you pull it across the wood in a controlled path. Once you see how the parts work together, you can tweak the tool for the job and the wood you’re working on.
What the Sole, Mouth, and Cutter Do
The sole is the flat bottom of the plane. It glides over the wood and keeps the blade moving straight and level.
If the sole is flat, you get even cuts. A warped or rough sole? You’ll fight with uneven results.
The mouth is the opening in the sole where the blade pokes through. A narrow mouth supports the wood fibers right at the edge, which helps prevent tearout. Open it wider and you can take thicker shavings, handy for rough work.
The cutter, or plane iron (sometimes called the blade), does the actual cutting. It’s held in the plane body by a cap iron and a locking lever or screw. The cheeks are the sides of the plane body, keeping the blade steady and aligned while you work.
Cutting Angle, Blade Bevel, and Bevel Orientation
The cutting angle is the angle where the blade meets the wood. This really affects how clean your cut turns out.
Most bench planes use a bevel-down setup, with the blade’s beveled edge facing the wood. That gives you a standard 45 degree cutting angle, called common pitch.
Block planes usually go the bevel-up route. The blade lays flat with the bevel up, and the cutting angle depends on the bed and blade bevel angles together. You can change the effective angle just by sharpening the bevel differently, which is pretty clever.
Here’s a quick comparison:
| Setup | Typical Use | Effective Angle |
|---|---|---|
| Bevel-down | Bench planes, smoothing | 45° (fixed by bed) |
| Bevel-up | Block planes, end grain | 37°–50° (varies by bevel) |
Steeper blade angles help with tricky grain. Lower angles work better on end grain.
Reading Grain Direction and Preventing Tearout
Wood grain always runs a certain way, and you want to plane with the grain, not against it. Planing the wrong direction lets the blade lift and tear the fibers instead of slicing them cleanly. That’s tearout, and it’s annoying.
Check the edge of your board for faint angled lines. Follow those lines uphill with your plane. If you’re unsure, take a light test pass. If the shaving is smooth, you’re good. If it tears or feels rough, try the other way.
Grain sometimes changes direction across the board, especially near knots or curly spots. In those areas, take lighter cuts and maybe use a higher cutting angle to help avoid tearout.
Shavings, Depth of Cut, and Reference Surfaces
The depth of cut sets how thick your shavings will be. You tweak this with a knob or screw behind the blade.
For smoothing, aim for thin, almost see-through shavings. They’re usually no thicker than paper. Thick shavings are fine for rough work, but you’ll risk tearout and the plane gets harder to push.
A reference surface is just a flat, true surface you use to guide or measure your other cuts. When you’re flattening a board, your first flat face becomes your reference for everything else. Always check it with a straightedge before moving on. A little wobble early on can haunt you later.
Choosing Block Planes and Bench Planes
Every plane in your shop has a job. Picking the right size and type saves time and gives you better results than forcing one tool to do everything.
When a Block Plane Is the Right Choice
A block plane is what you grab for quick fixes and small jobs. It fits in one hand, so you can control it easily while trimming a door or knocking down a sharp corner.
Low-angle block planes cut end grain well because the blade sits lower than in a standard block plane. That means less force needed to slice through those tough fibers.
Use a block plane for:
- Chamfering edges
- Fitting drawers and doors
- Trimming small bits of end grain
- Cleaning up joints after glue dries
Brands like Lie-Nielsen and Veritas make block planes with tight tolerances and adjustable mouths. Those features let you take super thin shavings, which really helps when you’re fine-tuning a fit.
The Versatility of the No. 5 Jack Plane
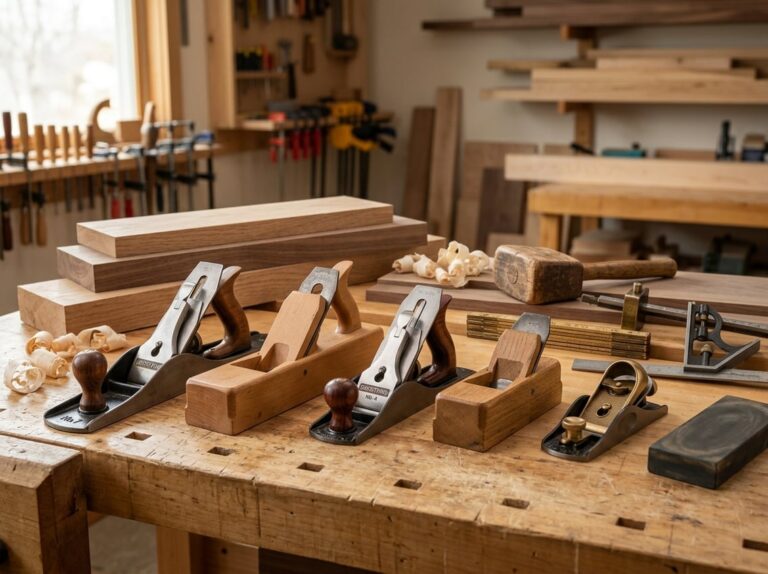
The no. 5 jack plane sits right between a smoothing plane and a jointer in size. Most people buy it first, since it handles lots of jobs, even if it’s not the absolute best at any one thing.
You can use a jack plane to take off rough saw marks, flatten smaller boards, or smooth a surface before finishing. It won’t level a huge tabletop like a jointer, and it won’t leave a finish as fine as a smoothing plane, but honestly, it gets you close enough for most projects.
If you sharpen the blade with a slight curve, called a cambered edge, the jack plane becomes great for removing stock quickly. That lets you take thicker shavings and speed up the work when you’re bringing rough lumber down to size.
Using Smoothing and Jointer Planes
A smoothing plane, like the no. 4, is built for one thing: leaving a finished surface. Set it for a thin shaving, and you’ll get a board that feels smooth right off the tool, no sanding needed.
Jointer planes are longer, so they’re better at straightening edges and flattening big surfaces. The extra length bridges low spots and only cuts the high points, so you end up with a flat, straight result. That’s important when you’re joining two boards edge to edge for a glue-up.
For rough lumber, start with a scrub plane. Scrub planes have a narrow, heavily curved blade and remove wood fast. Use one before a jack or jointer, not instead of them.
Here’s how these planes usually fit into a typical workflow:
| Plane Type | Purpose | When to Use |
|---|---|---|
| Scrub plane | Fast stock removal | First step on rough lumber |
| Jack plane | General flattening and smoothing | After scrub plane, or as a first step on lightly rough boards |
| Jointer plane | Straightening edges, flattening large surfaces | Before glue-up or final leveling |
| Smoothing plane | Final surface prep | Last step before finishing |
A Practical First-Plane Buying Strategy
If you’re building a basic kit, start with a no. 5 jack plane and a standard block plane. That combo will get you through most beginner projects, from smoothing boards to trimming joints.
As you get more comfortable, add a smoothing plane for finish work and a jointer for edge-joining and flattening panels. A low-angle plane is also worth picking up if you start working with lots of end grain, like on drawer fronts or box joints.
You don’t have to buy premium tools right away. A well-tuned vintage plane can work just as well as a fancy new one from Lie-Nielsen or Veritas, though you might need to spend more time setting it up.
Wooden planes and Japanese planes are also worth trying once you know how a properly tuned plane feels. They use different adjustment systems than metal-bodied bench planes, so they’re usually better for folks who already have some experience.
Setting Up a Plane for Clean Shavings
A plane only cuts well if the sole is flat, the blade is sharp, and your settings actually fit the wood in front of you. Get those basics right, and you’ll pull thin, even shavings instead of fighting tear-out or chatter.
Flattening the Sole and Checking the Blade
Check the plane sole before anything else. Lay a straightedge along its length and across its width to spot any gaps or rocking.
If the sole isn’t flat, it won’t ride evenly on the wood and you’ll get uneven cuts, no matter how sharp your blade is.
If you find high or low spots, flatten the sole with sandpaper on a flat surface, like glass or a machined table. Work through a few grits until the sole sits flat and true.
Next, check the plane blade. It should have a straight, sharp edge without nicks or chips.
Run your thumb lightly across the edge, or look under a bright light. A dull or chipped edge will just tear the wood instead of slicing it.
Setting Lateral Adjustment and Blade Projection
Once you sharpen the blade, set it in the plane and adjust it for an even cut.
Use the lateral adjustment lever to center the blade in the mouth. Sight down the sole and check that the edge sits parallel to it on both sides.
Set the depth of cut with the depth adjustment knob. Turn it slowly until the blade just barely projects past the sole.
Take a test shaving. If it’s too thick, back the blade off a bit.
For smoothing, you want shavings you can see through. Thicker shavings work for rougher stock removal, but always check for even thickness across the width.
Matching the Mouth Opening to the Cut
The mouth opening controls how much wood the blade can remove in one pass.
A narrow mouth is best for fine, light cuts, supporting the wood fibers right at the cutting edge and helping prevent tear-out.
A wider mouth lets thicker shavings pass through. This works for rough stock removal, but it can increase the risk of tear-out on difficult woods with reversing or irregular grain.
Adjust the mouth by moving the frog forward or backward. Move the frog forward to narrow the mouth opening, or back to widen it.
| Task | Mouth Opening |
|---|---|
| Rough stock removal | Wide |
| General smoothing | Medium |
| Fine finishing cuts | Narrow |
Loosen the lever cap before adjusting the frog, then retighten it once you’re happy with the setting.
Using the Cap Iron to Manage Difficult Grain
The cap iron, or chip breaker, sits just above the cutting edge of the blade. Its job is to break shavings as they curl, which helps reduce tear-out.
Set the cap iron close to the edge, usually within a hair’s width, when working on difficult wood with reversing grain. A tighter setting reduces tear-out but makes the plane harder to push.
For straight-grained wood, back the cap iron off a bit for easier cutting.
If you still get tear-out or chatter on tricky grain, try a cambered iron. A slight camber on the blade edge lets you take a heavier cut in the center while feathering the edges, which helps avoid digging in.
For extremely difficult grain, some woodworkers switch to high-angle scraping instead of standard planing, since a steeper cutting angle handles reversing grain more predictably.
Core Techniques for Smoothing, Trimming, and Jointing
Each planing task calls for a different tool and body movement. Flattening a wide board, cleaning up end grain, jointing an edge for glue-up, and cutting a small chamfer all use separate setups, but they share the same core skill: reading grain direction and controlling the cut.
Planing Faces and Edges Flat
Set your workbench at a height where you can lean into the plane without bending your back. Secure the board with a vise or bench dogs so it doesn’t shift while you work.
Check the grain direction before you make a cut. Look at the edge of the board and follow the grain lines; plane in the direction they rise toward the surface, not against it. Planing against the grain causes tearout, where the iron lifts and tears wood fibers instead of slicing them cleanly.
For flattening wide faces, grab a jack plane with a slightly cambered iron to remove material fast. Then follow up with a smoothing plane set for a fine cut. Work in overlapping passes, and check flatness often with a straightedge.
Trimming End Grain Without Breaking Corners
End grain fibers are brittle and prone to splitting at the edges. A low-angle block plane works best here, since its lower cutting angle slices through end grain fibers instead of tearing them.
Don’t plane straight across the full width of a board in one direction. When the iron reaches the far corner, it can blow out the fibers and leave a ragged edge. Instead, plane in from both sides toward the middle, or clamp a sacrificial scrap block against the far edge to back up the cut.
A shooting board is one of the most reliable tools for this. It holds the workpiece square while guiding the plane along a fixed track, giving you a flat, square edge every time. This setup is especially handy for trimming small parts like drawer fronts or box sides.
Edge Jointing Boards for Glue-Ups
Edge jointing prepares two boards to fit together with no visible gap. A jointer plane, with its long sole, is the tool for this job because it rides over low spots and only cuts the high points, producing a straight edge.
Clamp the board on edge in a vise so it’s stable and at a comfortable height. Take full-length passes, keeping even pressure on the front knob at the start and shifting weight to the rear handle as you finish.
Aim for a very slight hollow in the center of the edge, not a perfectly flat line. This creates tighter contact at the ends, pulling the joint closed under clamp pressure. Check your progress by holding two edges together and looking for gaps against a light source.
Chamfering Edges and Fitting Trim Work
Chamfering removes the sharp corner from an edge, both for looks and to prevent splintering during handling. A block plane is great for this since it’s small, easy to control at odd angles, and works well on both end grain and long grain.
Set the plane for a light cut and guide it at a consistent angle, usually 45 degrees, along the edge. Try to keep your strokes even in length and pressure so the chamfer stays uniform from end to end.
For fitting trim work, like door casings or shelf edges, small adjustments matter more than speed. Use the block plane to sneak up on the fit, taking thin shavings and testing the piece often until it seats just right.
Specialty Planes for Joinery and Shaping
Specialty planes handle jobs that bench planes just can’t. Each one is built for a specific cut, like fitting a joint, cutting a groove, or shaping a decorative edge.
Fitting Tenons, Shoulders, and Dovetails
A shoulder plane is your best tool for fine-tuning tenons and dovetails. Its blade runs the full width of the body, so you can cut into a corner without leaving a step.
Use it to trim tenon cheeks and shoulders until they fit snugly into a mortise. You can also clean up dovetail sockets and adjust dovetail pins for a tight fit.
Shoulder planes work best when you take light, controlled passes. Check your progress often with the mating piece so you don’t remove too much.
Cutting Rabbets, Grooves, and Dadoes
A rabbet plane cuts a rabbet joint along the edge or end of a board. Its blade extends past the edges of the body, letting you cut right into a corner.
A plow plane is for cutting grooves along the length of a board, often for panels or shelving. It has an adjustable fence that rides against the board’s edge to keep the groove straight.
For dadoes, which run across the grain, a router plane works well. It cleans out the waste and gives you a flat-bottomed dado at a consistent depth. Some woodworkers also use a plow plane fitted with the right blade for narrow dadoes.
Leveling Recesses and Hinge Mortises
A router plane is the standard tool for leveling recesses, including hinge mortises. Its blade sticks down from a flat base, so it cuts to a set depth no matter how the surrounding wood is shaped.
Set the blade depth with the adjustment knob. Then guide the plane over the recess, taking light passes until the bottom is flat and even.
This tool is handy anytime you need a mortise or recess to sit at an exact depth. It works well for door hinges, box hardware, and inlay work.
Creating Profiles With Molding and Shaping Planes
A molding plane cuts a fixed profile into the edge of a board. Each plane is shaped to produce one specific pattern, like a bead, cove, or ogee.
Shaping planes, including spokeshaves and compass planes, handle curved or contoured surfaces. A spokeshave works well on chair legs, curved rails, and other rounded parts. A compass plane has a flexible sole that adjusts to concave or convex curves.
If you don’t have the exact molding plane you need, a scratch stock can fill the gap. This simple tool uses a shaped scraper blade to cut small profiles, and you can make one yourself for a specific job.
Sharpening, Care, Storage, and Common Mistakes
A sharp plane iron makes the difference between smooth shavings and rough, torn wood. Regular care and correct storage keep your hand planes working well for years, while knowing common mistakes helps you fix problems fast.
Sharpening and Honing a Plane Iron
A dull blade is the top reason planes perform poorly. You’ll need a sharpening stone with at least two grits: one coarse for shaping the bevel, one fine for honing the edge.
Check your blade bevel angle. Most plane irons use a 25-degree bevel, with a slightly steeper micro-bevel of 30 degrees added during honing.
Hold the cutting iron at a steady angle and push it across the stone in smooth, even strokes. Keep your wrists locked so the angle doesn’t wobble.
After honing, flip the blade and flatten the back on your finest stone. This removes the wire edge left from sharpening.
Test sharpness by shaving a bit of end grain or feeling for a slight bite on your fingernail.
Cleaning, Lubricating, and Storing Planes
After each use, wipe down the sole and blade to remove sawdust and resin buildup.
Apply a thin coat of machine oil to the sole, frog, and blade before storing your plane. This prevents rust, especially in humid shops.
Store planes on their side, not resting on the sole. This protects the cutting edge from nicks and keeps the sole flat.
Keep planes in a dry spot away from your workbench edge, where they could get knocked off.
Basic care checklist:
- Wipe sole and blade after each session
- Oil metal parts monthly
- Store blade retracted
- Check screws on lever cap and frog for looseness
Diagnosing Chatter, Chatter, and Tearout
Chatter pops up when the blade vibrates instead of slicing cleanly, leaving a rippled surface behind. Usually, this means your lever cap is too loose or your chip breaker (cap iron) sits too far from the cutting edge.
Try moving the cap iron closer to the blade edge, about 1/16 inch for smoothing work.
Clogs happen when shavings jam into the mouth of the plane. Take a lighter cut and double-check that the mouth opening isn’t too tight for the shavings you’re making.
Tearout shows up as rough, torn patches instead of a smooth surface. This usually happens if you plane against the grain, not with it.
| Problem | Likely Cause | Fix |
|---|---|---|
| Chatter | Loose lever cap, thin iron | Tighten cap, add chip breaker support |
| Clogging | Mouth too narrow, deep cut | Widen mouth, reduce depth of cut |
| Tearout | Wrong grain direction | Reverse planing direction |
Beginner Errors That Limit Plane Performance
Lots of new woodworkers put off sharpening until the blade is really dull. Honestly, it’s worth sharpening more often, even if you think you can wait.
Setting the depth of cut too deep is another classic mistake. Start with thin shavings, then bump it up if you need more.
Some folks ignore the frog adjustment, which actually controls the mouth opening. If the frog is loose, the blade can shift while you’re using the plane.
Skipping lubrication can lead to rusty tools if they sit unused for a while.
And don’t forget to check grain direction before planing. Planing against the grain is a fast way to get tearout and mess up a nice surface.
Frequently Asked Questions
New woodworkers tend to ask the same questions about plane types, blade adjustment, grain reading, and sharpening. Here are some direct answers to help you get started or sort out those annoying problems.
What types of hand planes do beginners need for woodworking?
You really only need three planes to start most projects. A block plane handles trimming jobs like end grain and chamfers. A jack plane, usually 14 inches long, is good for rough flattening and general shaping.
A smoothing plane, about 9 to 10 inches long, gives you a clean final surface before finishing. With these three, you’ll cover almost everything in a basic shop.
If you’re on a budget, pick up used planes from brands like Stanley or Record. A well-tuned old plane can work just as well as a new one that costs a lot more.
How does a hand plane work, and how do you adjust it for a fine shaving?
A plane holds a metal blade, or iron, at an angle inside a metal or wooden body. When you push the plane forward, the iron slices a thin layer off the wood. The mouth opening in front of the blade controls shaving thickness.
Turn the depth knob at the back of the plane to adjust the cut. Turn it clockwise to push the blade out for a thicker cut, or counterclockwise to pull the blade back for a thinner shaving.
The lateral lever next to the depth knob tilts the blade side to side so it sits level with the sole. If the blade’s not even, you’ll cut deeper on one side and leave ridges.
Start with the blade retracted. Advance it slowly while testing on scrap wood until you get a thin, even shaving that comes off in one piece.
How can you read wood grain direction to avoid tear-out when planing?
Check the edge of your board to see which way the grain lines run. They’ll angle up or down along the length. You want to plane in the direction the grain rises toward the surface, not against it.
Try running your hand along the board too. It’ll feel smoother one way and a bit rougher or catchy the other. Plane in the smooth direction.
If you plane against the grain, the blade can lift and tear chunks out instead of slicing cleanly. That leaves rough spots that are tough to fix. Grain direction might change partway down a board, especially near knots, so keep an eye out as you work.
What are the main differences between block planes, jack planes, jointer planes, and smoothing planes?
Block planes are small, about 6 to 7 inches, and fit in one hand. With a low blade angle, around 12 to 21 degrees, they’re great for end grain and trimming small pieces.
Jack planes are 12 to 15 inches long and handle general-purpose work. Use them for rough flattening, knocking down high spots, and initial shaping.
Jointer planes are the longest, usually 22 to 24 inches. Their length lets them ride over high and low spots, so they’re perfect for straightening edges before glue-ups.
Smoothing planes are shorter, around 9 to 10 inches, and take very thin shavings. Use these last, after flattening and jointing, to get a surface ready for finish.
How do you sharpen and maintain a hand-plane iron for clean, accurate cuts?
If the edge is dull or nicked, start with a coarse stone, then move to medium and fine grits. Hold the blade at a steady angle, usually about 25 to 30 degrees, and push it across the stone in smooth strokes.
After sharpening the bevel, check for a burr on the back edge. Flip the blade and lightly rub the flat back on your finest stone to get rid of that burr. This step, called honing, gives you a sharp edge.
Wipe the blade dry after sharpening to keep rust away. If you’re not going to use the plane for a while, store it with a light coat of oil. Keep the sole clean and rust-free too, since a smooth sole glides much better over the wood.
What are the most common hand-planing mistakes, and how can they be avoided?
Lots of folks new to hand planing set the blade way too deep, and then the plane jams up or tears the wood. It’s better to start with a really shallow cut, then work your way deeper until it feels just right.
Pushing the plane at an angle instead of straight ahead is another mistake. That uneven pressure can leave you with a surface that’s higher on one side. Try to keep your strokes straight and spread your pressure evenly across the sole. Easier said than done sometimes, but it’s worth paying attention to.
If you skip checking the grain direction, you’ll probably get tear-out, especially with tricky or figured wood. It’s smart to test a small spot first before going over the whole board.
Using a dull blade is a headache too. Dull irons make you push harder and give you rough, torn shavings instead of those nice, clean curls. Sharpen your blade often, especially if you’re about to start a new project. Honestly, it’s worth the extra few minutes.