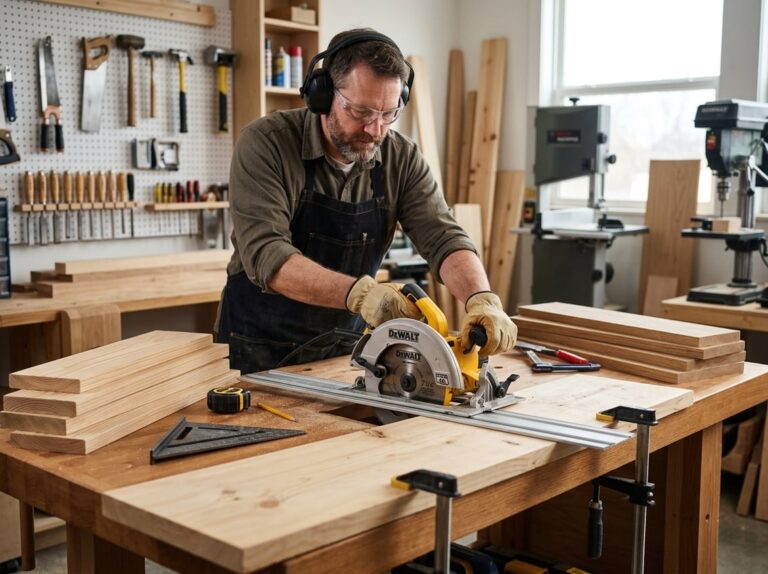
A circular saw is one of the best woodworking tools you can own. It cuts fast, works on many materials, and fits most budgets. The right blade, a steady setup, and a few simple techniques will help you get clean, accurate cuts every time.
Some woodworkers avoid circular saws because they worry about crooked cuts or splintered edges, but honestly, those problems usually come from the wrong blade or a rushed setup, not the tool itself. Once you figure out how to pick the right blade and guide your saw, you can tackle almost any woodworking project with a lot more confidence.
This guide covers blade types, tooth counts, cutting guides, and safe handling steps. You’ll also see how to set cutting depth, avoid splintering, and keep your blade sharp. After reading, you’ll know how to use your circular saw to make straight, clean cuts for any woodworking task.
Choose the Right Saw and Blade Specifications
Choosing a circular saw means matching the blade diameter, arbor size, and base plate to your saw model. You’ll also want to pick between thin kerf and full kerf blades, depending on what you’re working on.
Match Blade Diameter and Arbor Size to the Saw
Your circular saw only takes certain blade diameters. Most woodworking saws use a 7-1/4 inch blade, but some compact models need a 6-1/2 inch blade instead. Check your saw’s manual before grabbing a new blade.
The arbor size is important too. That’s the hole in the center of the blade that fits onto the saw’s spindle. Most 7-1/4 inch blades use a 5/8 inch arbor, but it can vary by brand.
If you try to install a blade with the wrong arbor size, it won’t sit right on the spindle. That’s a safety risk and can mess up your saw. Always double-check both measurements before buying.
Compare Base Plate Materials and Useful Saw Features
The base plate (or shoe) affects how stable the saw feels as you cut. Base plates usually come in two flavors:
- Steel: Heavier and more durable. It stands up to repeated use.
- Aluminum: Lighter and easier to move around. Great for long cutting sessions.
As for features, look for an electric brake. It stops the blade within seconds after you let go of the trigger, which really cuts down on accidents.
A blade guard covers the blade when you’re not cutting. It retracts as you push the saw forward and snaps back when you finish. Some saws even have a dust port that hooks up to a vacuum, helping clear sawdust from your workspace.
Select Thin Kerf or Full Kerf Blades
Kerf is just the width of the cut your blade makes. Thin kerf blades remove less material, so they put less strain on your saw’s motor. They’re good for smaller or less powerful saws.
Full kerf blades are thicker and more rigid, which helps them stay straight during long cuts and reduces wobble. They’re a solid pick for bigger, more powerful saws.
Thin kerf blades can lead to more sawdust buildup in tight cuts, since less material gets cleared out. Full kerf blades cut a wider path, so sawdust escapes easier. The right choice depends on your saw’s power and the wood you’re cutting.
Match Blade Design to Wood and Cut Direction
Every blade is meant for a specific job. Tooth count, tooth shape, and cut direction all play a part in how clean and fast your cut turns out.
Use Tooth Count to Balance Speed and Surface Quality
Tooth count tells you a lot about how a blade will cut. Fewer teeth cut faster but leave a rougher edge. More teeth mean a slower cut but a smoother finish.
A 24-tooth blade is built for speed and works well when ripping lumber or moving through thick stock.
A 40–60 tooth blade lands in the middle and handles most woodworking tasks, both rip cuts and crosscuts.
An 80-tooth blade is for fine finish work. Use it on plywood, veneer, or laminate when you’re worried about splintering.
If you only want one blade for most things, a combination blade in the 40 to 50 tooth range gives you a decent mix of speed and smoothness.
Choose Tooth Grinds for Ripping and Crosscutting
Tooth shape (or grind) decides how the blade slices through wood fibers. Here’s a quick rundown:
- FTG (Flat Top Grind): Teeth are flat across the top, removing material fast. Best for rip cuts along the grain.
- ATB (Alternate Top Bevel): Teeth alternate at an angle, creating a slicing action that’s great for crosscuts and leaves a cleaner edge.
- TCG (Triple Chip Grind): Teeth alternate between a flat tooth and a beveled tooth, holding up well against dense or abrasive materials like MDF and laminate.
For most projects, a crosscut blade with ATB teeth gives you the smoothest results across the grain. A rip blade with FTG teeth clears material faster when you’re cutting with the grain.
Pick Blades for Plywood, Hardwood, and Sheet Goods
The wood you’re cutting changes what kind of blade you need. Softwoods like pine and cedar cut easily and don’t need as many teeth. Hardwoods like oak and maple need sharp, carbide-tipped blades to avoid burning or dulling too quickly.
Sheet goods need special care. Here’s a quick reference:
| Material | Recommended Blade |
|---|---|
| Plywood, veneer | 80-tooth fine-finish blade |
| Hardwood (oak, maple) | 40–60 tooth ATB blade |
| Softwood (pine, cedar) | 24–40 tooth blade |
| MDF, laminate | TCG carbide blade |
A plywood blade with a high tooth count helps reduce tear-out on thin veneer layers. If the edge will show in your project, always go with a fine-finish blade instead of a general-purpose one.
Set Up the Workpiece for Precise Results
Good cuts start before the saw even touches the wood. You need a clear cut line, solid support under the board, and the right blade depth and angle for the job.
Mark a Reliable Cut Line and Verify Square Layout
Start with a sharp pencil and mark your cut line clearly on the workpiece. If your line is thick or fuzzy, your accuracy will suffer, even by a small amount.
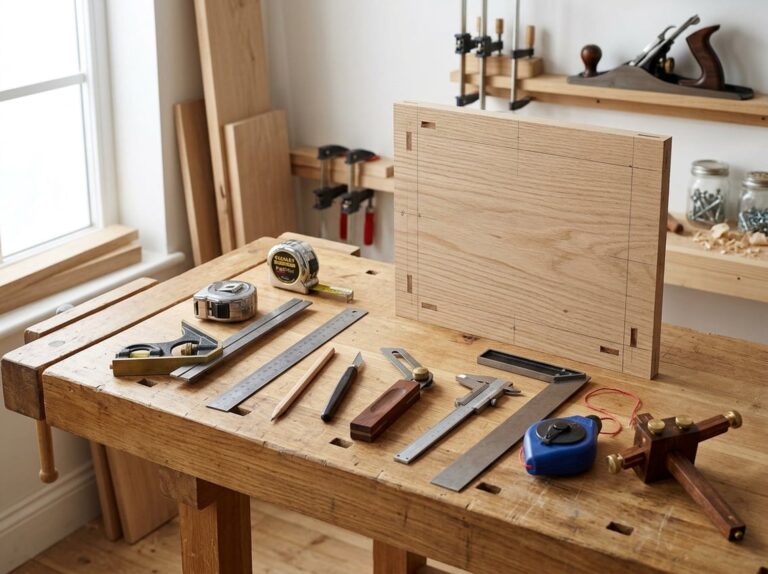
Use a speed square to check if your line is actually square to the edge. Place the square’s lip against the edge, then draw your line along the blade of the tool.
This step really matters when you need square cuts for joints or panels that have to fit together. Skipping it can lead to gaps or uneven edges later on.
Double-check your line before cutting. Once you start the cut, there’s no going back if you mess up the layout.
Support Boards and Panels Without Pinching the Blade
The way you support your material affects both safety and accuracy. Use sawhorses to hold boards and panels above the ground, so you have space to cut without hitting the surface below.
Set up two sawhorses under the workpiece so the cut falls between them, not right on top of one. That keeps both sides supported until the very end.
Watch for blade pinching as you cut. If the wood sags or shifts, the two halves can press against the blade and cause it to bind or kick back.
For sheet goods like plywood, add extra support near the cut line to keep the panel from flexing. This helps you keep a steady hand from start to finish.
Set Blade Depth and Bevel Angle Correctly
Set the blade depth so it sticks out just past the bottom of your workpiece, usually by about a quarter inch. That reduces friction, keeps heat down, and gives you cleaner cuts.
Too much depth shows more blade than you need and raises the risk of injury. Too little depth can make the saw bog down or stall halfway through.
If you need a bevel cut, check the bevel angle. Loosen the bevel adjustment, set the angle using the scale on the saw, then tighten it before cutting.
Test your settings on a scrap piece first. That way, you know the blade depth and bevel angle match your plan before you cut the real workpiece.
Make Straight, Clean Woodworking Cuts
Getting a straight, smooth cut comes down to three things: a solid guide, steady saw control, and the right blade for the job. Once you’ve got the basics, you can handle bevels and plunge cuts without destroying your workpiece.
Use a Saw Guide for Long Straight Cuts
A circular saw guide keeps your blade on track for long, straight cuts. Freehand cutting almost always drifts off the line, even if you’re careful.
Clamp a straightedge to your board, offset from the cut line by the distance between your blade and the edge of the saw shoe. Measure this offset at both ends before clamping anything down.
For sheet goods like plywood, a track saw guide or a simple homemade jig does the job. Rip cuts especially benefit from a guide, since they run the length of the board and small errors add up fast.
Quick tip: Test your guide setup on scrap wood first to make sure the offset is right.
Control the Saw Through Rip Cuts and Crosscuts
Rip cuts and crosscuts each need a different approach. A rip cut goes with the wood grain, while a crosscut goes across it.
For rip cuts, feed the saw at a steady, even pace. If you push too fast, the blade can bind or wander off the line.
Crosscutting needs more attention to blade support, since cutting across the grain puts stress on the wood fibers on both sides. Use a layout square as a guide for short, precise crosscuts.
Cutting hardwood adds resistance, so slow your feed rate a bit and let the blade do the work. Forcing the saw through dense wood raises the risk of kickback and rough edges.
Keep both hands on the saw at all times, and don’t take your hand off the trigger switch mid-cut.
Reduce Tear-Out and Splintering on Finished Faces
Tear-out and splintering show up when wood fibers rip apart instead of slicing cleanly. You’ll notice this most on the underside of the cut, where the blade exits the wood.
If you’re using a standard blade, cut with the good face down. The saw blade spins upward on the underside, so any tear-out is less visible on the bottom face.
Some ways to get smoother cuts:
- Score the cut line first with a utility knife to slice through surface fibers before you saw.
- Use painter’s tape along the cut line to help hold fibers in place.
- Pick a fine-tooth blade with a high tooth count for cleaner results on plywood or veneered panels.
- Support the board fully underneath to keep it from flexing, which can cause splintering.
Cut Bevels and Plunge Openings With Control
Bevel cuts tilt the blade instead of the wood. Most circular saws let you angle the shoe up to 45 degrees or more. Set your bevel angle before you start, and check it with a reference square.
Plunge cuts let you start a cut in the middle of a board. You’ll use this for things like cutting openings for inlays or notches.
To plunge cut, tilt the saw forward on the front of the shoe with the blade retracted. Lower the spinning blade into the wood slowly, keeping firm pressure on the front of the saw until it sits flat.
If you need tighter curves or detailed cutouts, just grab a jigsaw instead. Circular saws really only handle straight plunge cuts well.
Practice Safe Circular Saw Handling
Staying safe with a circular saw means wearing the right gear, keeping control to avoid kickback, and using good form every time. These habits don’t just keep you safe, they help you cut straighter too.
Wear Essential Personal Protective Equipment
Before you even plug in a circular saw, throw on some safety glasses. Sawdust and chips shoot out fast, and your eyes aren’t going to be happy if they take a hit.
Hearing protection matters too. Circular saws are loud, and without ear plugs or earmuffs, you’ll notice your hearing gets worse over time.
A dust mask helps a lot. Sawdust floats everywhere, and you don’t want that stuff in your lungs.
Quick checklist:
- Safety glasses: block flying debris
- Hearing protection: cut down on noise
- Dust mask: keep sawdust out of your lungs
- Snug-fitting clothes: loose sleeves can get caught
- No gloves: gloves make it harder to grip the saw
Prevent Binding, Kickback, and Loss of Control
Kickback is when the blade binds and the saw jumps back toward you. It’s one of the worst things that can happen with a circular saw.
Check your blade depth before cutting. Set the blade about a quarter inch deeper than your wood thickness. That gives you a clean cut but doesn’t leave too much blade sticking out below.
Make sure the blade guard works smoothly. Before you cut, pull it back by hand to see if it moves freely and snaps back.
Support your wood so it doesn’t pinch the blade. Keep the base plate flat on the material, and don’t force the saw faster than it wants to go.
Start, Guide, and Finish Each Cut Safely
Line up your blade with your mark before starting the saw. Let the blade get up to full speed before it touches the wood.
Keep the base plate flat on the board the whole time. Guide the saw along a straightedge or cutting guide if you can, instead of freehanding it.
Push forward steadily. If you go too fast, you’ll get rough cuts or binding. Too slow, and you might burn the wood.
Once you finish, let go of the trigger and wait for the blade to stop before setting the saw down. Don’t pick up the saw while the blade’s still spinning.
Maintain Blades and Avoid Common Mistakes
A dull or dirty blade makes rough cuts, burns the wood, and strains your saw’s motor. Most beginner mistakes come from ignoring blade care or rushing through a cut without checking your setup.
Recognize Dull, Dirty, or Damaged Blade Symptoms
You’ll know a dull blade by how it feels, not just how it looks. If your saw starts smoking, burns the wood, or needs more force to push through, it’s time for a new blade.
Carbide-tipped blades last longer than steel, but they still dull eventually. Look for chipped, cracked, or missing carbide tips. Even one damaged tooth can cause uneven cuts or kickback.
Sawdust and resin stick to the blade and slow it down. If you see dark, sticky gunk between the teeth, clean the blade before your next cut.
Clean, Store, and Replace Circular Saw Blades
After heavy use, especially with resinous woods like pine, clean your blade. Soak it in warm water and dish soap for ten minutes, then scrub the teeth with an old toothbrush. Dry it well before storing to prevent rust.
Store blades flat or hang them on a hook, away from other tools that could ding the teeth. Keep a blade cover on when not in use.
Swap out a blade when sharpening doesn’t bring back clean cuts. A combo or fine-finish blade usually lasts through several projects, but higher tooth counts wear down faster on rough lumber. You’ll notice smoother edges on finish work with a fresh blade.
Correct Frequent Beginner Accuracy Problems
If your cuts drift off the line, your cutting guide probably isn’t stable, or your blade depth is off. Make sure your straightedge or guide is clamped tight and doesn’t move during the cut.
Splintering and tear-out often happen when the blade depth is too high or the tooth count is too low. Lower the blade so it just clears the bottom of the board, and switch to a fine-finish blade for plywood or veneer.
Don’t rush the cut. If you push too fast, the blade bogs down and wanders. Let the blade do its work, and support the offcut side to prevent binding.
Frequently Asked Questions
Blade choice, guide setup, depth settings, and splintering all tie back to one thing: getting clean, accurate cuts. Here are some straight answers to common questions about circular saws.
How do I choose the right circular saw blade type and tooth count for different woodworking cuts?
Pick a blade for the job. For ripping through solid wood, a blade with 24 to 40 teeth cuts fast. For crosscuts and miters, go for 50 to 60 teeth. More teeth make a smoother cut, though the saw moves slower.
Look at the tooth grind: Flat Top (FT) blades rip with the grain. Alternate Top Bevel (ATB) blades are best for crosscuts. Triple Chip Grind (TCG) blades handle manufactured wood like particleboard.
Carbide-tipped blades stay sharp longer and handle hardwood better than basic steel.
What is the best cutting guide for making accurate straight cuts with a circular saw?
A straightedge clamped to your workpiece gives you a reliable line. First, measure the offset between your blade and the edge of your saw shoe.
Mark that offset from your actual cut line. Clamp your straightedge along those marks, not right on the cut line.
Rip guides that attach to the saw are good for short cuts. On long boards or sheet goods, a clamped straightedge or track saw guide gives you steadier control.
How should I set the blade depth and adjust the saw before cutting wood?
Set the blade so it sticks out about 1/8 to 1/4 inch below your board. That’s enough for a clean cut without extra blade exposed.
Too much blade increases kickback and rough edges. Too little, and you won’t cut all the way through.
Always check depth before every cut, especially if you switch board thickness. Make this adjustment with the saw unplugged.
How can I prevent splintering and tear-out when cutting plywood and hardwood?
Use a fine-tooth blade (60+ teeth) on plywood or veneer. These blades leave a cleaner edge.
Score the cut line with a utility knife before sawing. That breaks the surface fibers and keeps them from tearing.
Painter’s tape along the cut line on plywood helps hold fibers down and cuts down on splintering.
When your saw blade spins upward, cut with the good side facing down. This puts rough tear-out on the back, where you won’t see it.
What safety practices should beginners follow when using a circular saw for woodworking?
Wear safety glasses every time. Sawdust and chips can hurt your eyes in seconds.
Check the lower blade guard before each use. Unplug the saw, then make sure the guard moves back and springs forward smoothly.
Keep both hands on the saw while cutting. Don’t put your hand or body behind the blade path.
Let the blade get up to full speed before it touches the wood. Starting with a slow blade can cause kickback.
Unplug the saw before changing blades, adjusting depth, or making any changes.
How do I clean, maintain, and store circular saw blades to keep them cutting accurately?
After each use, grab a soft brush and a blade cleaning solution to scrub off any pitch or resin that’s built up. It doesn’t take long, and it really helps.
Before you dive into a new project, take a look at the teeth. If they seem dull or chipped, it’s probably time to do something about it. A dull blade makes your saw work overtime and can burn the wood, which nobody wants.
Store your blades flat or hang them on a wall rack, but keep them away from other metal tools so you don’t accidentally nick the teeth. Make sure the spot is dry so rust doesn’t sneak in.
When you notice the teeth looking worn or chipped, just swap out the blade. You’ll get safer and more accurate cuts with a sharp one, every time.