Clamping is one of the most important steps in any woodworking project, but it’s surprisingly easy to mess up. The right clamping method spreads even pressure across a joint, keeps boards aligned, and stops panels from bowing as the glue dries. Rush this step or grab the wrong number of clamps, and you’ll probably end up with warped panels, weak joints, or gaps that ruin hours of careful work.
Good clamping isn’t just about squeezing wood together. It shapes how strong your glue-ups turn out and how professional your finished piece looks. You have to think about clamp spacing, how you’ll protect the surface, and how much glue squeeze-out is normal. Small mistakes, like using too few clamps or pressing down unevenly, can throw off an entire assembly.
This guide covers each part of the clamping process, from picking the right clamps to checking your project for square. You’ll find practical tips for flat panels, boxes, even full cabinets.
Prepare the Joint and Clamping Setup
Before you even touch a bottle of glue, make sure your edges are flat, square, and ready to meet without gaps. Doing a good dry fit and having a clear clamping plan will save you a lot of grief after the glue is already on.
Mill, Joint, and Inspect Mating Edges
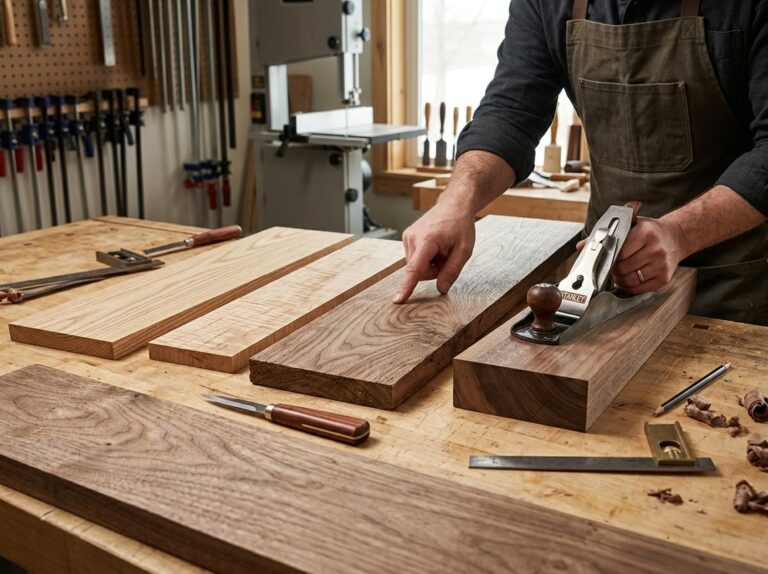
Start with stock that’s milled flat on both faces. A jointer or hand plane gives you a straight, square edge that’s ready for glue.
Check each edge with a straightedge for high spots or gaps. Even a small gap can keep the joint from closing tight under clamp pressure.
Grain direction matters. Match boards so the grain runs the same way, which helps with planing later and keeps the panel looking even.
Check moisture content before you glue. Boards that are too wet or too dry can shrink or swell after assembly, which pulls joints apart or causes bowing.
If you’re cutting joinery on a table saw or router table, do it before the final glue-up. Trying to fix a cut after glue-up rarely goes well.
Run a Complete Dry Fit Before Applying Glue
Always assemble the entire project without glue first. This dry fit shows you problems while you can still fix them.
Clamp every joint the same way you plan to during the real glue-up. Check that:
- Joints close fully with no visible gaps
- Clamps reach every spot without hitting obstructions
- The assembly sits flat and doesn’t rock
- You have enough clamps on hand before starting
Time yourself during the dry fit. Glue sets fast, so knowing how long assembly takes tells you if you’ll need a slower-setting glue or maybe a second pair of hands.
If something doesn’t fit right, fix it now. Sand, plane, or re-cut the joint instead of forcing it together with clamps once glue is involved.
Plan Clamp Placement, Spacing, and Workflow
Clamp placement controls how pressure spreads across a joint. For edge-gluing boards into a panel, space clamps so the pressure lines from each clamp overlap along the seam.
As a general rule, put clamps every 12 to 18 inches along the joint. Narrower boards need clamps closer together, while wider panels can handle a bit more distance.
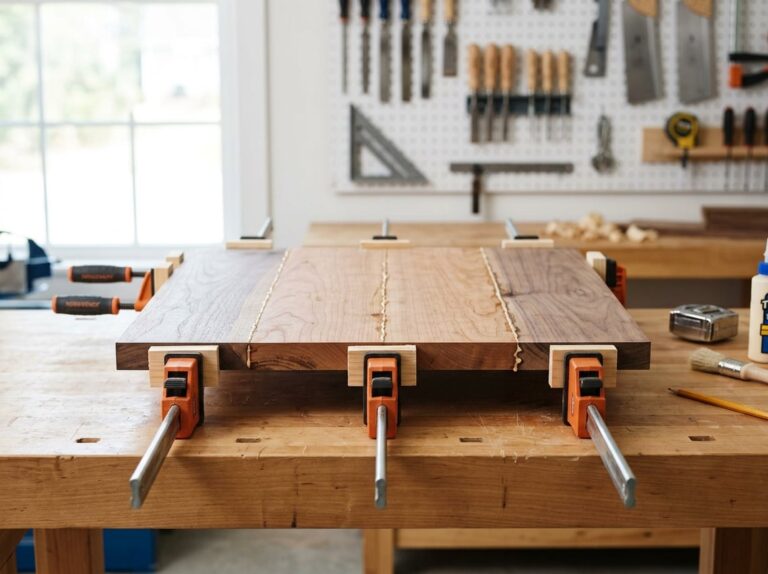
Alternate clamps above and below the panel. This balances pressure and helps keep the boards from bowing up or down as you pull them together.
Decide your order of operations before you start. Figure out which clamps go on first, where you’ll need cauls, and how you’ll check for square once everything’s tight.
Lay out your clamps, cauls, and glue within reach before you start. Scrambling for tools mid-glue-up wastes the precious time you just don’t have.
Choose a Flat Support Surface for Assembly
Your work surface needs to be flat, or your project will end up warped no matter how well you clamp it. A sturdy workbench or a torsion box is ideal.
Check the surface with a straightedge before you begin. Any dip or high spot in the table can transfer into your panel or carcase as it dries.
Raise your project off the table with risers or scrap wood strips. This gives clamp heads room to work at the ends and keeps glue drips off your bench.
Cover the surface with wax paper, kraft paper, or plastic sheeting first. This protects your bench and keeps the project from getting glued to the table by accident.
Choose the Right Clamp for Each Assembly
Different assemblies need different clamps. Panels need long, even pressure. Frames need to pull corners tight. Small parts require a gentle, controlled grip.
Use Bar, Pipe, and Parallel Clamps for Panels
Bar clamps and pipe clamps are great for edge-gluing boards into panels. They span long distances and give you enough reach to clamp wide glue-ups.
Pipe clamps are a budget-friendly choice. You buy the clamp jaws separately, then thread them onto standard pipe cut to the length you need. That way, you can build clamps in almost any size.
Parallel clamps, also called parallel jaw clamps, keep their jaws flat and even as you tighten them. This spreads pressure across the full width of the board instead of pushing down at one point. That even pressure really helps prevent bowing, especially on wide panels.
Use these clamps in pairs, spaced about every 12 to 16 inches. Alternate them on the top and bottom of the panel to balance the pressure.
Use F-Clamps and C-Clamps for General Workholding
F-clamps and C-clamps are good all-purpose tools for smaller jobs. They work well when you need to hold a jig, secure a workpiece to a bench, or clamp a joint that doesn’t need long reach.
C-clamps have a simple screw design and strong grip. They’re solid for metal-to-wood clamping or holding thick stock, but they can be slow to adjust.
F-clamps open and close faster. You slide the bar to the rough position, then tighten with the screw handle. This makes them handy for face frames, small joinery, and quick clamping tasks during assembly.
Both types can leave marks on wood if you clamp directly onto a finished surface. Use a scrap block between the clamp and your workpiece to protect it.
Use Band Clamps for Frames, Boxes, and Irregular Shapes
Band clamps, sometimes called ratchet straps, wrap around an entire assembly instead of pressing from two fixed points. They’re perfect for mitered frames, picture frames, boxes, and other shapes with angled corners.
The strap loops around all four sides, and you tighten it with a ratchet mechanism until the corners pull together evenly. This even pull is tough to get with straight bar clamps on angled joints.
For picture frames or small mitered boxes, add corner blocks or triangle clips where the strap meets each corner. These stop the strap from crushing the edges and help keep the corners square as you tighten.
Band clamps also work well on curved or segmented assemblies, since the strap follows the shape instead of forcing straight-line pressure.
Use Spring and Handscrew Clamps for Light or Awkward Work
Spring clamps work like heavy-duty clothespins. Squeeze the handles to open the jaws, then release to clamp. They’re fast and useful for light-duty jobs, like holding thin veneer, small parts, or edge banding in place while glue sets.
Handscrew clamps use two wooden jaws and two screws, which let you angle the jaws to match uneven or irregular surfaces. This makes them useful for curved cauls, odd-shaped parts, or joints that aren’t flat.
Neither clamp applies heavy pressure, so don’t rely on them for structural glue-ups like panels or frames. Use them for holding parts steady, supporting jigs, or handling small assembly tasks where a bar or pipe clamp would be too bulky.
Apply Even Pressure Without Starving the Joint
Getting clamp pressure right means finding the middle ground. You want enough force to close the joint and spread glue evenly, but not so much that you push out all the adhesive and leave the wood dry.
Use Glue Squeeze-Out as a Visual Pressure Check
Squeeze-out tells you if your pressure is working. As you tighten clamps, look for a thin, steady line of glue along the joint.
A small, even bead means you have good pressure and full glue coverage. If you see no squeeze-out at all, you probably need more clamping force or maybe just more glue.
If glue pours out heavily and keeps running, you likely added too much glue or clamped too hard. Heavy squeeze-out combined with a loose-fitting joint often means a glue-starved joint underneath, since most of the adhesive escaped instead of staying between the wood fibers.
Check squeeze-out along the full length of the joint, not just at the ends. Gaps in the squeeze-out line often point to uneven pressure.
Avoid Over-Tightening Clamps
More force isn’t always better. Over-tightening clamps can crush wood fibers, especially in softer woods like pine.
This crushing weakens the wood at the joint, even if the glue bond looks fine on the surface. It can also push out too much glue, leaving thin, dry spots that reduce strength.
A good rule: tighten until you see light, even squeeze-out, then stop. You don’t need to force the clamp handle as hard as you can.
Signs of over-tightening include:
- Visible dents or crush marks near the clamp jaws
- Boards that bow slightly inward at the clamp points
- Almost no glue left in the joint after squeeze-out
- Wood fibers that look flattened or shiny
If you spot these signs, back off the pressure a bit and move your clamps around.
Match Pressure to Wood Species and Joint Quality
Different woods need different amounts of clamping force. Soft woods like pine need lighter pressure, since their fibers compress more easily.
Harder woods like hard maple, oak, walnut, and cherry can handle more clamping force without crushing. Hard maple especially resists denting better than pine or most softwoods.
Quartersawn oak is stable and dense, so it tolerates firm clamping pressure well. Still, joint quality matters as much as wood type.
A tight, well-fitted joint needs less pressure to close fully. A loose or uneven joint might tempt you to over-tighten clamps to force it shut, but that usually just crushes wood or starves the glue line instead of fixing the fit.
Always improve the joint fit first, then use moderate, even pressure.
Understand Glue Choice, Open Time, and Clamp Time
Your glue choice really determines how much pressure and time you’ll need. PVA glue, like Titebond II and Titebond III, likes firm, even clamping and does a great job closing up gaps when the joint fits tight.
Polyurethane glue expands as it cures, so you don’t need as much initial pressure. Too much force can actually push the expanding foam right out of the joint. Hide glue sets up quickly, so you have to clamp fast and evenly before it grabs.
Open time, meaning how long you have before glue starts to set, controls how much time you get to fiddle with clamps. PVA wood glue usually gives you a few minutes, but polyurethane and hide glue can set up faster or slower, depending on the weather and humidity.
Always check the manufacturer’s clamp time before you remove pressure. If you take clamps off too soon, even if the squeeze-out looks fine, you can weaken the joint.
Clamp Panels Flat and Keep Parts Aligned
You only get flat panels when you spread pressure out well, not just by cranking down tight. If you get your clamp placement, spacing, and alignment right at the start, you’ll dodge gaps, bowing, and seams that go wonky later.
Alternate Clamps Above and Below the Work
For panel glue-ups, alternate your clamps above and below the workpiece. Put one clamp under the panel, then the next on top, and keep going back and forth down the length.
This balances the up and down pressure on the boards. If you only clamp from one side, the panel bows that way as the boards pull up or down under pressure.
For wide joints or bigger glue-ups, space clamps every 8 to 12 inches. Wider boards need more clamps to keep things even across the whole panel.
Check your clamp spacing before adding glue. That way, you can tweak things without rushing while the glue is going off.
Use Cauls to Prevent Bowing and Spread Force
Cauls are just straight or slightly curved boards you clamp across a panel to spread out the pressure. They keep panels from cupping or bowing when you tighten the clamps.
Put cauls perpendicular to your clamps, across the top and bottom of the panel. This spreads out the clamp force instead of pressing in just one spot.
Curved cauls are great for wide panels where the middle needs more pressure than the edges. That curve presses down harder in the center, fighting the natural urge of boards to lift in the middle.
Wax paper between the caul and the panel keeps them from sticking together if glue oozes out.
Align Edges Before Fully Tightening the Clamps
Snug up your clamps just enough to hold things together, but don’t go all-in yet. This way, you can check the alignment of each seam first.
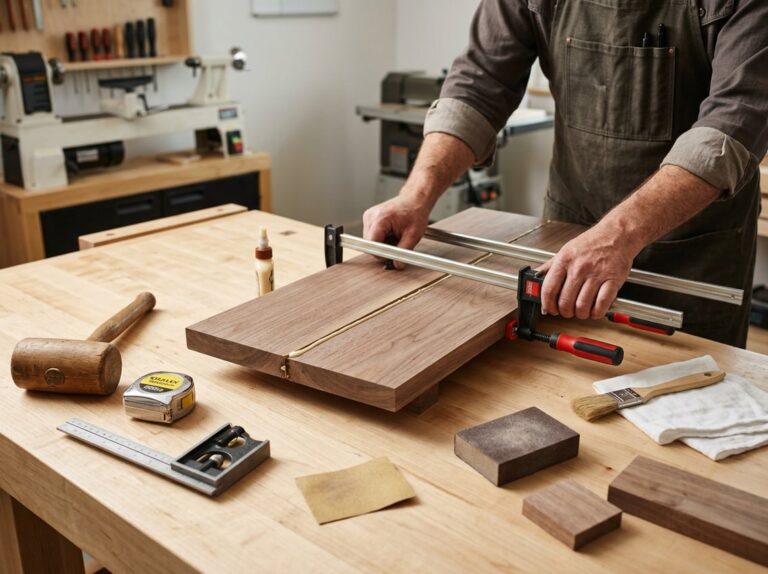
Use your fingers or a straightedge to feel across each joint. If one board’s higher than its neighbor, tap it down gently with a mallet and a wood block before tightening more.
Alignment blocks can help too. Clamp them to the panel edges to stop boards from sliding out of place as you add pressure.
Once every seam feels flush, tighten the clamps fully in stages, working from the center outward. This step matters a lot for cutting boards and panels where you want a perfectly flat surface at the end.
Correct Cupping, Twist, and Uneven Seams During Assembly
Check your panel with a straightedge before the glue sets up. Lay it across the width and length to spot any cupping or twist.
If you see an edge lifting off the straightedge, loosen the clamps near that spot and adjust the pressure. Sometimes just shifting a clamp a bit or adding a caul there sorts it out.
Twist can be hard to spot by eye, so check the panel from a few different angles under good light. If it rocks when you set it on a flat surface, you’ve got twist.
Fix uneven seams while the glue’s still wet. Once it cures, you’ll have to sand or plane out any high spots, which is more work and wastes more wood than needed.
Execute a Reliable Glue-Up Step by Step
A good glue-up really comes down to doing things in the right order. Get your gear ready first, spread the glue before it starts to set, tighten clamps the right way, and clean up any mess before it dries.
Stage Clamps, Cauls, Pads, and Cleanup Supplies
Get everything ready before you even open the glue. Once glue’s on the wood, you won’t have time to hunt for a missing clamp or a rag.
Lay out all your clamps in the open position, spaced along your workpiece. For boards about 4 inches wide, put a clamp every 12 inches or so.
Have your cauls ready if you need them. Cauls are just straight boards you clamp across a panel to keep pressure even and stop bowing in the middle.
Grab some clamp pads or scrap wood to protect your project from clamp jaw marks. Set out a damp rag, a scraper, and some paper towels for cleanup. Cover your bench with craft paper or plastic to catch drips.
Spread Glue Evenly and Assemble Within the Open Time
Wood glue only gives you so much open time, which is that short window before it starts to set and lose grip. PVA glue like Titebond III usually gives 8 to 10 minutes, but less if it’s hot or dry.
Put a thin, even layer of glue on one edge of each joint. Use your finger or a brush to spread it, then rub the two edges together. That helps get glue on both faces without piling it on.
Work quick after you start. Get all pieces together and clamps loosely in place before the glue skins over. If you’re gluing up several boards, do a dry run first so you know how fast you’ll need to move.
Tighten Clamps Gradually From the Center Outward
Start tightening from the middle and work toward the ends. This helps keep everything lined up and stops the panel from bowing.
Turn each clamp just enough to bring the joint together. Most joints just need light clamp pressure, since well-fitted wood already sits flush. If you over-tighten, you can squeeze out too much glue and end up with a weak joint.
Make sure boards sit flat on the clamp bars, and that the clamps themselves sit flat on your bench. Sight down the panel for gaps or twist. Adjust now, not after the glue sets.
Watch for little, even beads of glue along the seams. That’s a good sign you’ve got enough squeeze-out, not too much or too little.
Clean Up Excess Adhesive Without Smearing It Into the Grain
Wipe up glue squeeze-out as soon as you see it, using a damp cloth or scraper. Wipe along the seam, not across, so you don’t push glue into the wood pores.
A putty knife or plastic scraper works great for lifting off beads of glue without smearing them. Don’t use a soaking wet rag, since too much water can weaken the joint and raise the grain.
If you miss some glue while it’s wet, wait until it turns rubbery, usually after 15 or 20 minutes, then peel it off in strips. That’s easier and less messy.
Check your clamp pads and cauls for glue buildup too, and clean them right away. A little paste wax on cauls before you start keeps glue from sticking in the first place.
Check Assemblies for Square and Protect Your Clamps
A square glue-up comes down to quick checks and having the right protection between your clamps and the wood. Spending a few extra minutes here really saves you from ruined joints or banged-up clamps later.
Verify Square With Diagonal Measurements
The fastest way to check for square is to measure both diagonals of your assembly. If they match, your corners are square. If not, one side is longer, and you’ll need to adjust.
To fix it, put a clamp across the longer diagonal. Tighten slowly and re-measure as you go. This pulls the frame back into shape without wrecking the joints.
This trick works well for picture frames and other mitered frames, since even tiny gaps stand out on those joints. Always check diagonals before the glue sets. After it dries, you’re stuck with whatever you clamped.
Prevent Clamp Marks, Stains, and Stuck Cauls
Clamp pads and cauls keep your wood safe from dents, stains, and pressure marks. Metal clamp jaws can leave black marks, especially if glue mixes with damp wood touching the metal.
Use wood or rubber pads between the clamp and your project. Scrap wood cauls work and don’t cost anything. Here’s a quick reference:
| Problem | Solution |
|---|---|
| Dents from metal jaws | Add wood or rubber pads |
| Black stains from steel | Wipe glue squeeze-out right away |
| Cauls sticking to project | Rub paste wax on the caul face |
A light coat of paste wax on your cauls keeps glue from sticking. This makes cleanup faster and protects the wood underneath.
Fix Common Beginner Mistakes
Over-tightening clamps is a classic beginner mistake. Too much pressure squeezes out most of the glue, leaving a starved joint that might fail later.
You want firm, even pressure, not brute force. A steady drip or small bead of glue squeeze-out along the joint line is normal and shows you’ve got enough glue.
Using too few clamps is another common issue, leaving gaps in the middle of long joints. Space your clamps evenly for consistent pressure. Also, check that clamp pads sit flat against the wood, since angled pressure can twist things out of square as you tighten.
Don’t rush the setup. Dry-fit your parts first so you’re not scrambling with alignment after glue is already on the wood.
Clean, Maintain, and Store Clamps for Long Service
Clean your clamps right after each use. Dried glue on bar clamps, pipe clamps, or parallel jaw clamps makes them harder to adjust and can scratch your next project.
Wipe metal bars and jaws with a damp cloth, then dry them well to prevent rust. A little paste wax on metal bars helps clamps slide smoothly and resists moisture.
Check moving parts on f-clamps and c-clamps for smooth action. Add a drop of oil to stiff screws or sliding jaws if needed.
Store clamps on a rack instead of tossing them in a pile. This keeps jaws aligned, prevents damage, and makes it way easier to grab the right clamp when you need it.
Frequently Asked Questions
Clamping wood joints usually comes down to a few big questions: how much pressure, which clamps, and how to keep boards flat and square. Here are some answers to the most common clamping questions you’ll probably run into.
How tight should clamps be when gluing wood joints?
For softwood, aim for about 100 to 150 psi of clamping pressure. Hardwoods can take more, usually 175 to 250 psi.
You don’t need a gauge to get this right. Tighten your clamps until you see a thin, steady line of glue squeeze-out along the joint. That’s your sign the pressure is good and strong enough for a solid bond.
Stop tightening when you see this squeeze-out. More pressure won’t make the joint stronger, but it can crush wood fibers or push out too much glue, which actually weakens the bond.
What types of woodworking clamps are best for glue-ups and assemblies?
Bar clamps and pipe clamps work great for edge-gluing panels or wide boards. They put pressure across a long span, which really helps keep everything flush and flat.
C-clamps come in handy for smaller assemblies or spots where you want a tight, focused grip. If you build a lot of panels, pipe clamp fixtures are pretty useful since you can swap out the pipe for different lengths depending on your project.
When you’re working on box assemblies or frames, corner clamps or band clamps hold multiple angles at once. That makes it much easier to keep things square while the glue dries.
How can I prevent boards from bowing or slipping while clamping a panel?
Try alternating your clamps above and below the panel. Putting clamps on both sides balances the pressure and stops boards from bowing up or down.
Space your clamps about 6 to 8 inches apart along the joint. That way, the pressure spreads out evenly instead of just squeezing a few spots.
Before tightening, set flat cauls across the top and bottom of the panel. Cauls help spread the pressure and keep the panel flat while the glue sets up.
How do I clamp a wood glue-up so the pieces stay aligned and square?
Always dry-fit your pieces before you add glue. It gives you a chance to check the fit and figure out where to put your clamps, without any sticky surprises.
Spread the glue evenly, then start clamping from the center and work your way out. That keeps the boards from sliding out of place as you tighten things up.
Once the clamps feel snug, measure the diagonals if you’re making a frame or box. If both diagonals match, your project is square. If not, tweak the clamps a bit until the numbers line up.
How can I protect wood surfaces from clamp marks and glue squeeze-out?
Put clamp pads or scrap wood blocks between the clamp jaws and your workpiece. This spreads out the pressure and keeps the metal jaws from leaving dents or marks.
Softwoods tend to get marked up more easily than hardwoods, so padding is even more important for those. A thin piece of cork or leather glued to a wood block makes a simple, reusable pad that works well.
For glue squeeze-out, just wipe it away with a damp cloth as soon as you see it along the joint. If you wait until it dries, cleaning up gets a lot tougher and it can mess with how stain or finish soaks in later.
How long should glued wood remain clamped before removing the clamps?
Most wood glues need at least 30 minutes to an hour in the clamps before the joint will hold on its own. Always check your glue’s label, since set times can really vary by brand and formula.
Even when you take the clamps off, the glue hasn’t reached full strength yet. Try not to put heavy stress on the joint for about 24 hours so the bond can really cure.
Temperature and humidity play a role, too. If your shop is cold or damp, expect things to move slower, so maybe leave the clamps on a bit longer just to be safe.