Staining wood sounds easy, but getting a nice, even color across the whole piece? That takes a bit of skill. The real secret is in prepping the wood before you even think about opening a can of stain. Sanding, conditioning, and running some tests on scrap wood all make a difference in how your final color turns out.
Wood grain really changes how stain soaks in. Some woods, like pine, cherry, and birch, have grain patterns that just don’t take stain evenly. You can end up with blotchy patches instead of a smooth color. If you know how your wood reacts before you start, you’ll avoid a lot of headaches and patchy finishes.
This guide covers all the basics, from picking the right sanding grit to wiping techniques and drying times. You’ll see how to dodge the usual rookie mistakes, keep your brushes and rags in good shape, and stay safe while you work with finishes. With a little practice, you’ll feel more confident and get results that look clean and professional.
Why Wood Takes Stain Unevenly
Wood isn’t uniform. Its grain, density, and natural chemicals all affect how much stain it soaks up. That’s why the same stain can look totally different on two pieces from the same board.
How Wood Grain and Porosity Affect Color
Wood grain controls how deep stain can get into a board. Open, porous woods like oak and walnut have bigger cell structures, so they pull in more stain and usually end up darker and richer in color.
Maple and birch, with their tighter grain, have smaller pores. They just don’t absorb as much stain, so the color often comes out lighter and more even.
Sometimes, even one board has different porosity in spots. Swirls, knots, or tight grain patches can soak up stain at different rates, leaving blotches instead of a smooth color.
Sap and resin pockets complicate things further. These spots resist stain, so they stay lighter while the rest of the wood darkens up.
Why End Grain Turns Darker Than Face Grain
End grain is the exposed tip of wood fibers, kind of like looking at the end of a straw. These open ends suck up stain much faster than the flat face grain.
That’s why end grain can end up almost black after staining, even if the rest of the board looks normal. It’s not a different stain, just a lot more of it soaked in.
Here’s how you can tone down that effect:
- Sand end grain to a higher grit (one or two steps finer) than the rest of the piece.
- Brush on a thin glue size (mix 10 parts water to 1 part glue) before staining.
- Seal with sanding sealer or diluted shellac to partially close up those open fibers.
Try these on a scrap first to see how the color turns out before you commit to your project.
Species Most Likely to Blotch
Some woods are just more prone to blotching because of their grain. Pine, for example, can be a real pain. The uneven density between growth rings makes stain soak in unpredictably.
Here are a few species that often give people trouble:
| Wood Species | Blotching Risk | Notes |
|---|---|---|
| Pine | High | Common softwood, needs conditioner |
| Cherry | High | Blotches even when sanded well |
| Maple | High | Tight grain causes patchy color |
| Birch | Moderate | Similar issues to maple |
| Poplar | Moderate | Uneven color in soft areas |
| Oak | Low | Open grain takes stain evenly |
| Walnut | Low | Naturally dark, hides unevenness |
| Mahogany | Low | Consistent grain structure |
Hardwoods with open, regular grain like oak, walnut, and mahogany usually give you a more even stain. If you’re working with a blotch-prone wood, using a conditioner before staining can help the color go on smoother.
Choose Compatible Stain and Finish Products
Not every stain pairs well with every finish, and picking the wrong combo can undo a lot of careful prep. Your final look depends on three things: stain type, color, and the finish you put on top.
Oil-Based, Water-Based, Gel, and Dye Stains
Stains fall into a few main types, and each one acts a bit differently.
Oil-based stain is a pigment stain that soaks deep into the grain. It gives a rich, even color and works under most topcoats, like oil-based polyurethane or varnish. It does take longer to dry, though.
Water-based stain dries quickly, smells less, and cleans up with soap and water. It can raise the grain a bit, so a quick sanding after it dries helps.
Gel stain mostly sits on the surface instead of soaking in, which makes it a good pick for woods that tend to blotch, like pine, cherry, or birch.
Dye stain uses tiny particles that dissolve right into the wood. It gives a clearer, more vibrant color and is great if you want something bright or unusual.
Selecting a Stain Color With Test Samples
Stain colors always look different on different woods, so the color on the can lid isn’t reliable. Dark walnut on oak doesn’t look the same as dark walnut on pine or maple.
Always test your stain on a scrap piece of the same wood. If you don’t have any, try a hidden spot, like the underside of a table or the back of a drawer.
Put on two coats for your test, since the color can look lighter after just one. Let it dry all the way before you decide if you like it, because wet stain looks darker than it will once it’s dry.
Golden oak is a popular warm, light color, and classic oak shades are always a safe bet. If you want to hide the grain a bit, dark stains like dark walnut work well, especially on plainer woods.
Matching the Stain to a Protective Topcoat
Once the stain dries, you’ll need a clear finish to protect your work. Not all finishes play nice with every stain, so check the labels before you buy.
Oil-based polyurethane pairs well with oil-based stains and adds a warm, amber glow. Water-based polyurethane stays clear and works over most stains once they’re fully dry, but double-check the label if you used an oil-based stain.
Varnish gives you a hard, durable layer and comes in both oil- and water-based versions. Lacquer dries fast and leaves a smooth, thin coat, but it can react badly with some stains if you put it on too soon.
Shellac, especially dewaxed shellac, works as a sealer between stain and topcoat and helps prevent blotching on some woods. For a more natural look, oil finish or hardwax oil soaks in rather than sitting on top.
If you like simple, low-mess finishes, a wipe-on finish or wipe-on polyurethane goes on with a rag in thin, even layers.
Prepare Bare Wood for Consistent Absorption
Bare wood soaks up stain based on its surface condition. Hidden problems like glue spots or trapped moisture will show as blotches later. Check the wood closely, sand in the right order, and get rid of dust before you even open your stain.
Inspect for Glue, Filler, Mill Marks, and Moisture
Look over every surface for leftover glue from assembly. Dried glue blocks stain and leaves a light patch that never matches the rest.
Watch for mill marks and mill glaze too. These are little ridges or shiny, compressed spots left by planers, and they keep stain from soaking in evenly.
If you used wood filler on cracks or nail holes, make sure it’s totally dry and sanded flush. Filler can take stain differently than the wood around it, so those patches might need extra attention.
Use a moisture meter to check your wood before staining. If it’s too wet, it won’t take stain evenly and your finish could fail later.
Sand With the Grain Using the Right Grit Sequence
Start with 120-grit sandpaper to get rid of mill marks, rough spots, and glue residue. Always sand with the grain. Cross-grain scratches show up like a sore thumb once you add stain.
Move up to 220-grit for the final pass. This smooths the wood but doesn’t close the pores too much, so the stain can still soak in.
A sanding block helps you keep pressure even on flat surfaces. For big projects, a random-orbit sander speeds things up, but finish by hand along the grain to erase any swirl marks.
Plywood needs a lighter touch. The veneer is thin, and if you sand too much, you can go right through it before you even start staining.
Remove Dust Without Contaminating the Surface
If you leave sanding dust on the wood, it’ll mix with the stain and make your finish cloudy or gritty. Use a tack cloth to pick up dust from the grain without leaving lint.
A lint-free cloth or rag works well for a final wipe. Regular rags can leave fibers that stick to the wood and show up in the finish.
If the wood has grease, oil, or old finish, clean it first with wood cleaner or mineral spirits. Let it dry all the way before you move on. Any leftover moisture will mess with how the stain absorbs.
Condition Blotch-Prone Woods and Test the Color
Some woods just soak up stain unevenly, so you get dark patches next to light ones. You can fix this with a wood conditioner and a little bit of testing before you dive into your project.
When Pre-Stain Conditioner Is Necessary
Some wood species really need a pre-stain conditioner because their grain soaks up stain at different rates. Softwoods like pine are usually the biggest culprits. Pine has both soft and hard grain lines right next to each other, so the soft areas just drink up stain and turn dark fast.
Other woods that tend to blotch include maple, birch, cherry, and poplar. These have tight, unpredictable grain, and stain can pool in some spots while skipping others.
If you’re working with dense, open-grain woods like oak or ash, you probably don’t need a conditioner. Those absorb stain more evenly on their own. Double-check your wood species against a blotch-prone list before deciding.
How to Apply Conditioner and Follow Its Timing Window
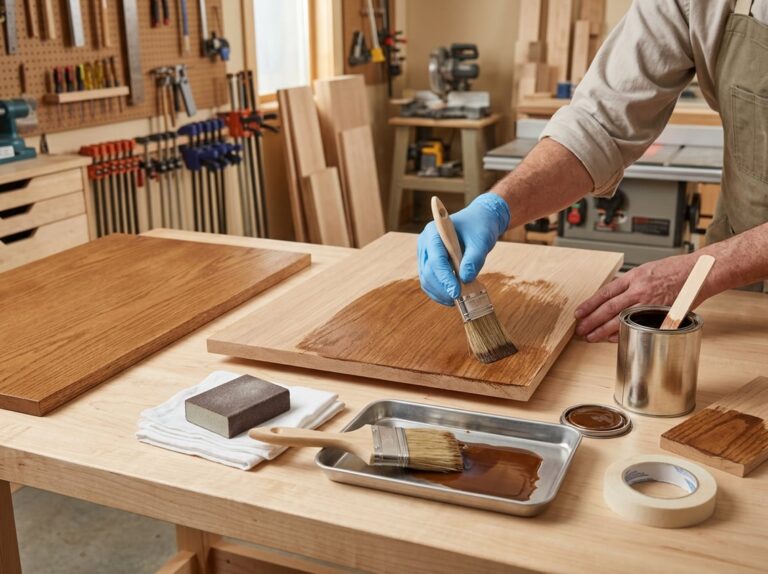
Use a clean rag or brush to apply pre-stain conditioner, moving with the wood grain. Cover the surface evenly and watch for dry spots.
Most conditioners need to sit for 5 to 15 minutes, but check your product label since times vary.
After waiting, wipe off any extra conditioner with a clean rag. Don’t let it dry completely on the wood or it’ll block the stain from soaking in.
You usually have up to two hours to get your stain on after conditioning. If you wait too long, the conditioner cures and barely lets any stain in.
Some woodworkers skip store-bought conditioner and use dewaxed shellac or a sanding sealer. A thin wipe-on finish can help even things out before staining, but it will lighten your final color a bit.
Build a Test Board Before Staining the Project
Test your stain on a scrap piece from the same wood as your project. Include both face grain and end grain, since end grain soaks up stain much faster and always turns darker.
Follow your entire finishing plan on the test board. Sand it to the same grit, apply conditioner if you’re using one, and let it sit for the same time.
Apply your stain just like you will on the real piece. Wipe off the excess and let it dry before you check the color, since wet stain always looks darker.
Compare the test board in natural light. If the color’s too light, too dark, or blotchy, tweak your sanding, conditioner timing, or stain choice before you start the real thing.
Apply and Wipe Stain for an Even Coat
The right tool and a clear plan really make the difference between a smooth, consistent finish and a blotchy mess. Work in small sections, keep your wipe-off timing steady, and you’ll get even color across the whole piece.
Select Rags, Brushes, and Applicators for the Stain Type
Your applicator depends on the stain. Cotton rags work great for most oil-based stains since they hold liquid and release it evenly. Lint-free rags are best for the final wipe, because regular cloth can leave fibers behind.
For water-based stain, use a synthetic brush. Natural bristle brushes soak up water, swell, and end up ruining your strokes.
Foam brushes are fine for small projects or touch-ups, but they don’t hold much stain. You’ll reload more often, which means a higher chance of streaks on big surfaces.
Gel stain works best with a rag or applicator pad since it’s so thick. Always have extra lint-free rags on hand. You’ll use more than you think.
Work in Manageable Sections Along the Grain
Don’t try to stain a whole tabletop or cabinet door at once. Break the surface into smaller sections, about 2 or 3 feet wide, so you can apply and wipe before the stain dries.
Always move with the wood grain. This helps the stain soak in evenly and hides little streaks or lap marks after it dries.
Wood grain makes a difference in stain absorption. Tight grain like maple or birch takes in less stain and can look blotchy. Open grain woods like oak absorb more evenly.
Move to the next section only after you’ve wiped off the excess from the current one. That way, you keep wet edges from drying before you blend them in.
Control Wipe-Off Timing, Overlaps, and Color Depth
Wipe-off timing changes your final color. Most oil-based stains need 5 to 15 minutes before wiping, but always check the label.
If you wipe too soon, the color may look uneven. Wait too long, and the stain gets tacky and hard to remove, causing dark streaks.
For a consistent look, wipe with the grain using long, even strokes. Overlap each pass a bit to avoid gaps or lines.
If you want a darker color, apply a second coat after the first dries. Try this on scrap wood first, since some stains get much darker with extra coats.
Keep a clean, dry rag nearby to catch any pooling stain in corners or along edges. That’ll stop dark spots from forming as it dries.
Dry, Protect, and Maintain the Finished Surface
Once the stain color looks right, you need to protect it. Give the wood enough time to dry, add a topcoat, and clean your tools properly.
Allow Proper Drying and Recoat Times
Check your stain label for drying times. Most oil-based stains need about 24 hours to dry. Water-based stains can dry in 4 to 6 hours.
Temperature and humidity change how fast things dry. A cool, damp room slows drying, while a warm, dry space speeds it up.
Touch the wood before adding a topcoat. If it still feels sticky or smells strong, give it more time.
If you rush this, you might trap moisture and end up with a cloudy or uneven finish.
| Stain Type | Typical Dry Time |
|---|---|
| Oil-based | 24 hours |
| Water-based | 4–6 hours |
| Gel stain | 24 hours |
Apply a Clear Protective Finish Without Streaks
A clear topcoat protects your stained wood from scratches, water, and daily wear. Polyurethane, lacquer, shellac, varnish, and hardwax oil are all common choices.
Oil-based polyurethane gives a warm tone and strong protection but takes longer to dry. Water-based polyurethane dries faster and stays clear, which is great over light stains. Wipe-on polyurethane is easier for beginners since it goes on thin and helps avoid drips.
Use a natural bristle brush for oil-based finishes and a synthetic brush for water-based ones.
Apply thin, even coats. Brush in one direction, following the grain. Let each coat dry, then lightly sand with fine sandpaper before the next layer. Most projects need two or three coats for good protection.
Clean Brushes and Dispose of Stain-Soaked Rags Safely
Clean oil-based brushes with mineral spirits. Swirl the bristles in a container until the color stops coming out, then rinse with soap and water.
Water-based brushes just need soap and warm water. Reshape the bristles and let them air dry flat.
Stain-soaked rags can catch fire on their own, since the oils heat up as they dry.
Lay used rags flat outside until they’re totally dry before throwing them away. Never pile them up or toss them in the trash while wet. Once dry, seal them in a metal container with water or put them in a sealed bag away from heat.
Avoid Common Beginner Staining Mistakes
Lots of finishing problems come from small, avoidable errors. Keep an eye out for these:
- Skipping ventilation, Always work in a space with fresh air moving through. Stain and topcoat fumes build up fast indoors.
- No safety gear, Wear a dust mask when sanding, goggles when finishing, and nitrile gloves to protect your hands.
- Recoating too soon, This traps solvents and weakens the topcoat.
- Using the wrong brush, Natural bristle brushes are best for oil-based. Synthetic brushes work better with water-based.
- Ignoring dust, Wipe down finished wood with a clean cloth before each coat to avoid trapped particles.
- Storing rags improperly, Always dry stain rags flat before disposal to prevent fire risk.
Frequently Asked Questions
Getting a smooth, even stain job mostly comes down to a few key steps. You need proper sanding, the right conditioner timing, and at least a basic sense of how your wood’s grain will react to stain.
How do I prepare and sand wood before applying stain?
Start by sanding with 120-grit sandpaper to get rid of rough spots and any old finish. Wipe the dust away with a clean cloth, then sand again with the same grit to smooth things out more.
For a final pass, use 120- or 150-grit sandpaper. If you’re working with softer wood like pine, you can go up to 180-grit to help control how much stain it soaks up.
Don’t sand past 180-grit. Wood that’s sanded too smooth won’t take stain well, and you’ll end up with a lighter, uneven color.
After sanding, clean the surface all the way. Use a lint-free or tack cloth to pick up leftover dust, since even small particles can mess with how the stain absorbs.
What is the best way to apply wood stain evenly with a rag or brush?
Start with the edges and corners first. That way, you stop drips from forming in spots that are tough to fix later.
Work across flat areas with long, full strokes, not short, choppy ones. This helps you get even coverage without obvious start and stop marks.
If you’re using a cloth, fold it so the edges are tucked inside, then wipe with the smooth side. Always move in the same direction as the grain, not against it or across it.
Check your coverage as you go. Look for light or missed spots and fix them before the stain dries.
When should I use a pre-stain wood conditioner to prevent blotching?
Softwoods like pine, and plywood too, tend to soak up stain unevenly. A pre-stain conditioner helps by partially sealing the wood so it absorbs stain more evenly.
Apply conditioner over the whole surface, then let it sit for 5 to 10 minutes. Don’t leave it on more than two hours, or it might not work as well.
Wipe off any extra conditioner with a clean cloth before it dries on the surface. Wait for it to fully absorb before you stain.
If you skip this on blotch-prone wood, you’ll usually end up with dark, splotchy patches after staining.
How does wood grain affect stain absorption and final color?
Open-grain woods like oak and walnut have big pores that soak up more stain. This gives you deeper, richer color after it dries.
Dense woods like maple have tight grain. They don’t absorb stain as easily, so the color often looks lighter or more uneven unless you use a dye stain instead of a pigment one.
Pine and other soft, blotch-prone woods have grain that varies a lot even within a single board. That’s why conditioner or gel stain often works better on these than standard liquid stain.
Knowing your wood species ahead of time helps you pick the right stain and prep method before you start.
How long should stain dry before applying a protective sealer or finish?
Most stains need a few hours to dry, but honestly, letting the piece sit overnight just works better. That way, the stain really sinks into the wood instead of hanging out on the surface.
If you put on a topcoat too soon, the finish might drag or even lift the stain, and you could end up with a patchy look. Giving it enough time helps you avoid that headache.
Drying times aren’t always the same, though. It depends on humidity, temperature, and whatever stain you picked. Take a look at the label for your particular product, since they’re all a bit different.
How can I test a stain color on scrap wood before staining the project?
Grab a piece of scrap wood from the same species, and ideally, the same batch as your main project. Boards might look similar, but they can soak up stain in their own way.
Sand that scrap the same way you sanded your project. Use the same grits and match the number of passes.
Put the stain on using the same method you’ll use for the actual piece, whether you like a brush, rag, or sponge. Let it dry all the way, since stain can fool you when it’s still wet.
If the color’s off, you can tweak it by switching stains, adding a conditioner, or even messing with how long you let it sit before wiping. Better to experiment now than regret it later.