A strong glue joint actually starts long before you even grab the glue bottle. Good wood joinery depends on three things: a clean fit, the right amount of glue, and even clamping pressure. Miss any one of these, and your project could fall apart later, even if it looks fine at first glance.
Gluing wood seems simple, but little mistakes can make joints weak. Beginners sometimes use too much or too little glue, clamp unevenly, or forget to check for square before the glue sets. Once you know what to watch for, these are easy to avoid.
This guide covers the process of gluing wood for woodworking joints. You’ll see how to spread glue the right way, apply the right amount of clamping pressure, and let joints dry fully before moving on. We’ll get into preventing squeeze-out, aligning pieces, and keeping your woodworking glue in good shape too.
Choose the Right Adhesive for the Job
Not all wood glues act the same, and picking the wrong one can leave you with a weak joint. Where your project will live, how much moisture it might see, and what type of wood you’re using all matter when you pick an adhesive.
PVA Glue for Everyday Furniture and Cabinetry
For most indoor woodworking, PVA wood glue is the go-to. Polyvinyl acetate, or yellow glue, is simple to use and cleans up with water. Titebond and Titebond II are popular for furniture and cabinetry.
PVA glue dries fast and often bonds stronger than the wood itself. You get about 5 to 10 minutes of open time before you need to clamp things together.
This glue is best for indoor projects that won’t see much moisture or big swings in temperature. It’s not great for outdoor furniture or anything that gets wet.
Water-Resistant and Waterproof Options
If your project might get wet, you’ll need something different. Titebond III Ultimate Wood Glue and Gorilla Wood Glue both give you water resistance for outdoor furniture or things like cutting boards.
Here’s a quick comparison:
| Glue Type | Water Resistance | Best Use |
|---|---|---|
| Titebond II | Good | Outdoor exposure, not constant wetness |
| Titebond III | Excellent | Cutting boards, outdoor furniture |
| Polyurethane | Excellent | Bonding wood to non-wood materials |
Waterproof wood glue costs a bit more than regular PVA, but it’s worth it if your project will see rain, humidity, or regular washing. Always check the label, since not all wood glues deal with water the same way.
When Epoxy, Polyurethane, Hide Glue, or CA Glue Makes Sense
Sometimes PVA just isn’t right. Epoxy works best for filling gaps or fixing damaged wood, since it bonds even when surfaces don’t fit perfectly.
Polyurethane glue expands as it cures, so it’s handy for bonding wood to metal or plastic. It does foam up, so you’ll have to clean off the extra after it dries.
Hide glue is more traditional and often used for repairing furniture, especially antiques. You can reverse it with heat and water, making future repairs easier.
CA glue, or super glue, is good for quick, small repairs. It sets in seconds, so it’s best for fast fixes, not big glue-ups.
Matching Glue to Wood Species and Project Conditions
Different woods take glue differently. Oily woods like teak or rosewood can be tough to bond, so wipe them with acetone before gluing.
Porous woods like pine or poplar soak up glue fast. Sometimes you need a second coat to make sure the joint gets enough adhesive.
Temperature matters too. Most PVA glues need it to be above 50°F to cure right, while epoxy handles cooler temps.
Before you start, check the glue’s label for its best temperature range and dry time. Matching the glue to both the wood and your shop gives you the best shot at a strong joint.
Prepare Wood for a Strong Bond
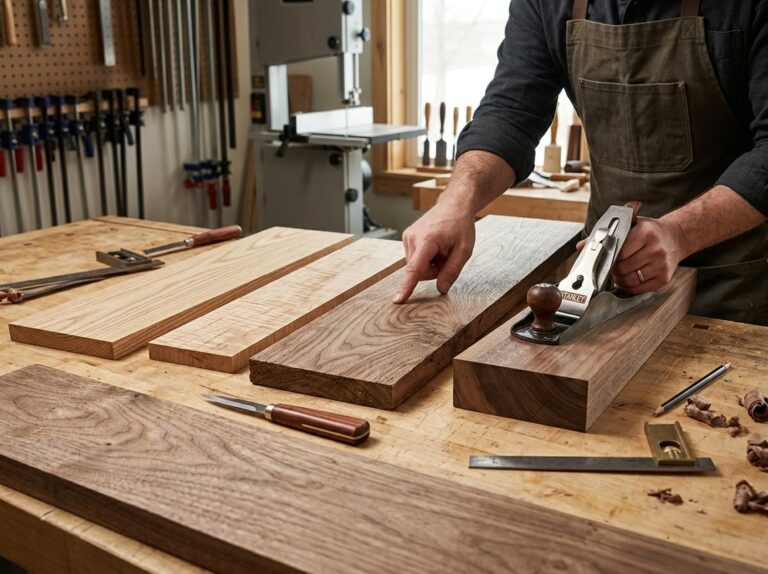
You want flat surfaces, the right grain orientation, a good dry-fit, and a plan for wood movement before you even think about glue.
Create Flat, Clean, Well-Fitting Mating Surfaces
Your mating surfaces need to touch each other fully. Any gap or bump weakens the bond, no matter how much glue you use.
Use sharp tools for clean cuts. A dull chisel or chipped router bit just tears the wood fibers, and those don’t bond well.
Check for flatness before glue-up. Run your hand across the wood or grab a straightedge to spot high spots or dips.
Clean off dust, wax, and oils. These block glue from soaking in. Usually, a dry, clean cloth does the trick.
Quick checklist:
- Surfaces should feel smooth
- No visible gaps when pieces are pressed together
- No sawdust, oil, or finish left behind
- Cuts made with sharp blades
Understand Long Grain, End Grain, and Grain Orientation
Grain orientation really affects how well glue holds. Long grain to long grain gives you the strongest bond because glue soaks into open wood fibers along the board’s length.
End grain acts differently. The fibers here suck up glue too fast, leaving little on the surface to form a bond. A pure end grain joint, like butting two board ends together, is always weak.
This comes up most with joinery. Mortise and tenon joints work because the tenon has both long grain and end grain, and the long grain is where most of the strength comes from.
Lap joints also rely on long grain contact for strength. Know what kind of grain you’re gluing before you start.
Dry-Fit Joinery Before Opening the Glue Bottle
Always test your joint before adding glue. This catches problems while you can still fix them.
Put the pieces together by hand. They should fit snugly, but you shouldn’t have to force them. If you need to hammer or clamp hard just to close the joint, it’s too tight.
Check for square at each corner. Look for gaps along the joint line. A gap means the surfaces aren’t matching up right.
If something doesn’t fit, fix it now. Trim high spots with a chisel or sand tight areas. If you’re not sure about a technique, test on scrap first.
Plan for Wood Movement and Shop Humidity
Wood moves as humidity changes in your shop. It expands when it’s humid and shrinks when dry. This movement can crack a joint over time if you don’t plan for it.
Different woods move at different rates. Here’s a quick look:
| Wood Species | Movement Level |
|---|---|
| Pine | Low to moderate |
| Poplar | Moderate |
| Maple | Moderate to high |
| Oak | High |
Softwoods like pine move less than hardwoods like oak. Poplar’s in the middle, which is why a lot of beginners use it.
Let your wood sit in your shop for a few days before cutting joints. This helps reduce movement after glue-up. Store wood flat, away from heat or moisture, to keep it stable.
Follow a Reliable Glue-Up Process
Gluing wood well is about the order you do things, not just the glue itself. Set up your workspace, spread the glue, join the parts while the glue is wet, then check your work before it sets.
Set Up Clamps, Cauls, and Protection Before Applying Glue
Get everything ready before you open the glue. Once glue hits wood, your open time starts ticking down.
Lay out your bar clamps or pipe clamps and set them to about the right width. This saves you time when your hands are sticky with glue.
Cover your work surface with wax paper or plastic. That way, squeeze-out won’t glue your project to the table.
If you’re joining a panel or tabletop, cut wood cauls to spread pressure along the edge joint. Cauls help keep the boards from bowing.
Do a dry run first. Clamp the pieces together without glue to make sure everything fits and your clamps reach where you need them.
Spread an Even, Complete Glue Film
Cover the whole surface, not just a few dots or lines. A thin, even film bonds better than a thick, messy one.
Use a brush, roller, or flat stick to spread the glue. For edge joints, run a bead down the center and spread it to both edges.
Coverage checklist:
- Both surfaces should look wet, not spotty
- No thick puddles or dry spots
- Glue should reach all the edges and corners
Too little glue makes a weak joint. Too much just causes squeeze-out and wastes glue. Aim for full, thin coverage every time.
Assemble and Align Parts Within the Open Time
Work quickly once the glue is on. Most wood glues give you five to ten minutes of open time before they start setting up.
Press the pieces together and check alignment right away. For cabinetry and tabletops, line up the edges and faces so they’re flush.
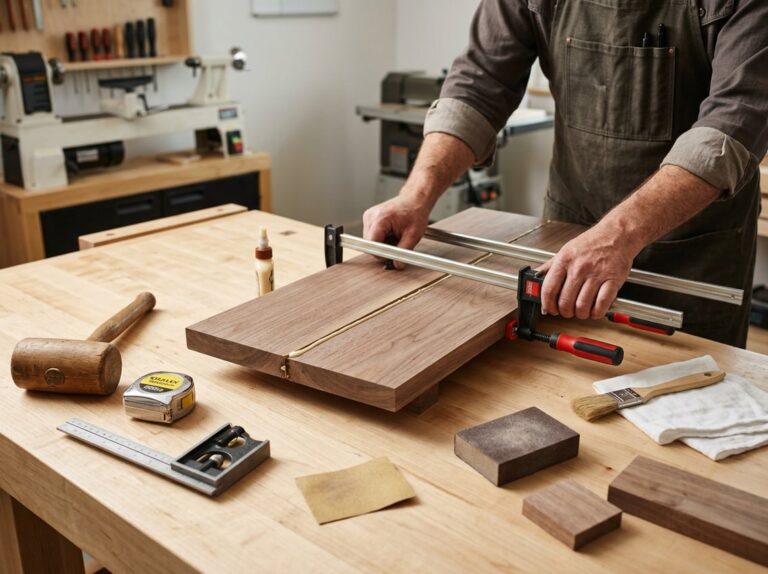
Start clamping from the center and work outward. This pushes air and extra glue toward the edges instead of trapping it inside.
Wipe away squeeze-out with a damp cloth as soon as you see it. If you wait until it dries, cleanup gets way harder and can leave marks on the wood.
Don’t overtighten your clamps. Too much pressure squeezes out too much glue and can leave the joint weaker than it should be.
Confirm the Assembly Is Flat, Square, and Stable
Check your work before the glue sets fully. Once it hardens, you can’t easily fix alignment problems.
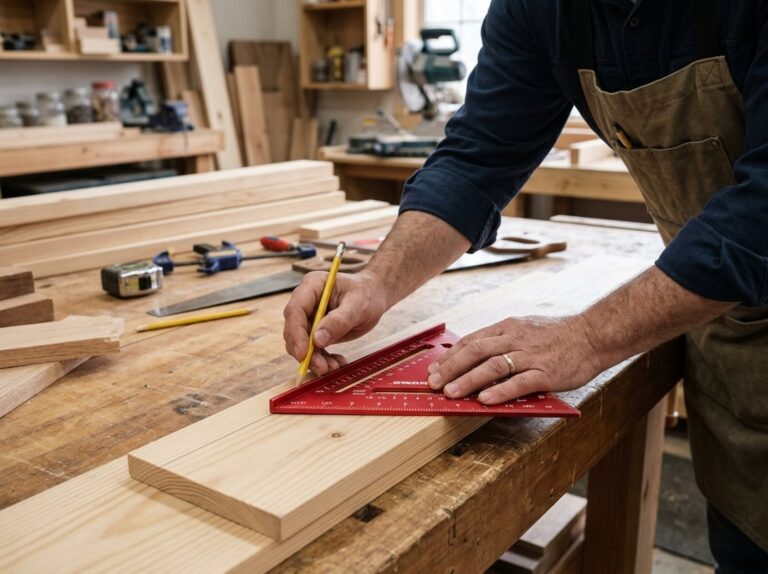
Measure diagonally across the assembly from corner to corner. If both measurements match, the piece is square. If they don’t, adjust the clamps slightly to correct it.
Lay a straightedge across the surface to check for flatness. This matters most for wood panels and tabletops, where warping shows up easily.
Use a piece of scrap wood under your clamps if you need to protect the wood surface from marks. Let the assembly sit undisturbed for the time listed on your glue bottle before moving it.
Apply Clamping Pressure Without Starving the Joint
Clamping pressure holds wood pieces together while the glue sets, but too much force can push out the glue you need for a strong bond. You want enough clamps in the right spots, a light bead of squeeze-out to confirm proper pressure, and a setup that keeps panels flat and aligned.
Use Enough Clamps in the Right Locations
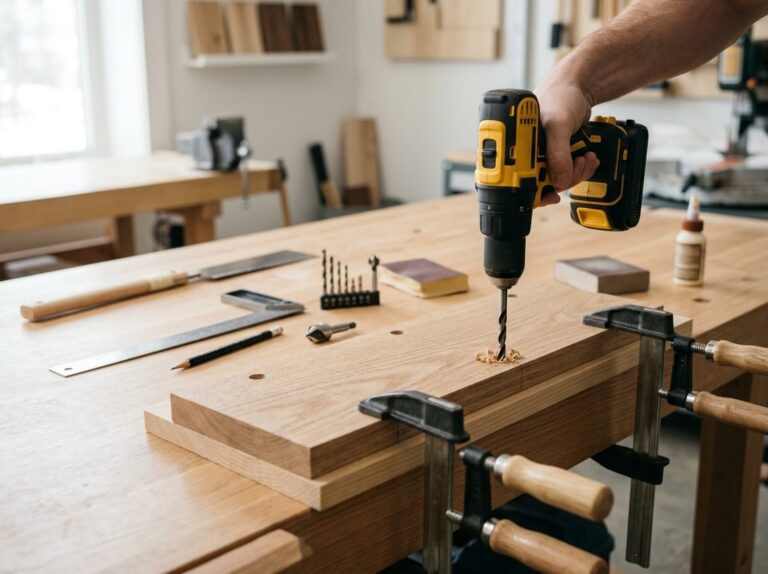
Spread clamps evenly along the joint, spacing them every 6 to 8 inches on edge joints and long glue-ups. This keeps pressure consistent from end to end.
Bar clamps work well for wide panels and tabletops because they apply broad, even force across the surface. Pipe clamps are a good budget option for long boards, since you can adjust their length by swapping pipe sizes.
Place clamps on both the top and bottom of a panel, alternating sides. This stops the boards from bowing upward or downward as you tighten each one.
For edge joints, check that clamp jaws sit flat against the wood, not at an angle. Angled pressure pushes boards out of alignment before the glue has a chance to set.
Recognize Proper Pressure and a Healthy Glue Line
A strong glue joint needs firm contact, not maximum force. Tighten clamps until you see a thin, continuous line of glue squeeze out along the seam.
This small amount of squeeze-out tells you the joint has enough glue and even pressure. If you see almost no squeeze-out, the joint may be starved, meaning there isn’t enough glue left between the wood fibers to form a strong bond.
On the other hand, heavy squeeze-out along the whole seam often means you’re overtightening. Excess pressure can force too much glue out of the joint, leaving a thin, weak layer behind.
Check pressure by hand-tightening clamps until snug, then giving each one a small extra turn. Avoid using tools like wrenches for added leverage, since this raises the risk of starving the joint.
Prevent Bowing, Slipping, and Panel Misalignment
Wood panels and tabletops can bow or twist if pressure isn’t balanced across the glue-up. Use cauls, which are straight boards clamped across the panel, to spread pressure evenly and keep the surface flat.
Before adding glue, dry-fit your pieces and clamps first. This lets you check that boards sit flush and aligned without wasting open glue time.
Pay attention to grain orientation when arranging boards for a panel. Alternating the grain direction on each board can reduce overall warping as the wood expands and contracts.
As you tighten clamps, watch for pieces sliding out of position. A slight adjustment early on is easy, but once the glue begins to set, moving pieces can damage the joint.
Know When Joinery Needs Mechanical Reinforcement
Not every joint relies on glue alone. Certain types of wood joinery, such as a mortise and tenon or a lap joint, get extra strength from mechanical fastening like screws, dowels, or pins.
These joints have interlocking parts that resist stress from multiple directions, so glue works alongside the mechanical connection rather than as the sole support. Clamping pressure still matters here, since it holds the parts tightly together while the glue cures around the joint.
For structural pieces or those under regular weight or movement, consider adding mechanical fasteners even if the glue joint looks solid. This gives the joint added durability without relying only on the strength of the glue bond.
Manage Drying, Curing, and Glue Squeeze-Out
Wood glue needs time to bond and time to cure, and these are not the same thing. You also need a plan for handling squeeze-out at the right moment, or you risk pushing glue into the wood grain and ruining your finish.
Separate Clamp Time From Full Curing Time
Clamp time and curing time are different stages. Clamp time is how long the joint needs pressure to hold pieces in place, usually 30 minutes to an hour for PVA glue.
Curing time is how long the glue needs to reach full strength. This can take 24 hours or longer, depending on the glue type.
| Glue Type | Clamp Time | Full Cure Time |
|---|---|---|
| PVA (standard) | 30-60 minutes | 24 hours |
| Titebond II | 30-60 minutes | 24 hours |
| Titebond III | 30-60 minutes | 24 hours |
| Polyurethane glue | 1-2 hours | 24 hours |
| Epoxy | 2-12 hours (varies by mix) | 24-72 hours |
| Hide glue | 1 hour | 24 hours |
Don’t stress a joint or move it right after unclamping. Wait for full curing before sanding, drilling, or applying weight to the joint.
Remove Wet Excess Glue Without Driving It Into Grain
Wipe glue squeeze-out while it’s still wet, but do it carefully. A damp cloth works well for this step.
Wring the cloth out so it’s damp, not soaked. Too much water can push glue into the wood surfaces or raise the grain.
Wipe in one direction, away from the joint line. Don’t scrub back and forth, since this spreads thin glue film across the wood instead of removing it.
Change to a clean section of the cloth often. A glue-soaked cloth just moves glue around instead of picking it up.
For epoxy, wipe with a cloth dampened with the solvent listed on the product label. Water won’t remove uncured epoxy the same way it removes PVA glue.
Scrape or Chisel Cured Residue Safely
If glue dries before you catch it, wait until it’s fully hardened before removing it. Half-dried glue smears instead of coming off clean.
A sharp chisel works best for this job. Hold the chisel at a low angle, bevel side down, and slide it under the glue bump to pop it off the wood surfaces.
Don’t dig the chisel edge into the wood. Light pressure is enough once the glue has fully hardened.
For flat panels, a scraper held at a steep angle can shave off dried glue without gouging the surface. Test on a scrap piece first if you’re unsure how the tool will react to your wood species.
Sand lightly after scraping to blend the area. Avoid heavy sanding, since this can create low spots that show up under a finish.
Avoid Finishing Problems Around Glue Lines
Dried glue blocks stain and finish from soaking into the wood. This leaves light blotches or shiny spots along glue joints that don’t match the rest of the piece.
Check every glue line under bright, angled light before finishing. Dried glue often looks clear but leaves a slight sheen you can spot this way.
Use a damp cloth or scraper to clean any spots you find. Sand the area smooth once the glue is gone.
Lay wax paper under joints during glue-up to protect your work surface. Wax paper also stops squeeze-out from bonding to your bench or clamps, so cleanup stays simple.
Avoid Common Beginner Errors and Maintain Your Supplies
Most weak joints trace back to a handful of fixable habits, not bad luck. If you fix your glue application, store your bottles correctly, and follow basic shop safety, your joints will hold and your supplies will last longer.
Fix Gaps, Poor Fits, and Weak End-Grain Bonds
A gap between mating surfaces is one of the top reasons a joint fails. If your pieces do not sit flush before you add glue, no amount of clamping will fix it. Dry-fit every joint first and sand or plane down any high spots.
End grain soaks up glue fast because the wood fibers act like tiny straws. This can leave you with a starved joint, where too little glue remains to form a strong bond. To fix this, apply a thin first coat of glue to the end grain, let it soak in for a minute, then add a second coat before clamping.
Weak glue-ups can also happen when you use the wrong glue for the job. PVA wood glue, like Titebond, works well for face-grain joints but is not ideal for end grain alone. For high-stress end-grain joints, consider adding mechanical support like dowels or a spline.
Avoid Glue Contamination, Expired Adhesive, and Rushed Assembly
Dust, oil, and old finish on your wood will block a strong chemical bond between the glue and the wood fibers. Always wipe your mating surfaces with a clean cloth before you apply glue.
Old glue is another hidden problem. Wood glue that is past its shelf life may look fine but bond poorly. If your glue has turned thick, chunky, or stringy, throw it out.
Rushing the assembly step causes more failures than any other beginner mistake. Once you spread the glue, you only have a few minutes of open time before it starts to set. Dry-fit your pieces first, gather your clamps, and only mix or open your glue once everything is ready to go.
Store Glue Bottles for Consistent Performance
How you store your glue affects how well it performs. Keep bottles upright, sealed tightly, and stored at room temperature. Freezing or extreme heat can ruin PVA wood glue, epoxy, and CA glue alike.
Follow these habits to keep your glue in good shape:
- Wipe the nozzle clean after every use to stop dried glue from clogging the tip.
- Store super glue in a cool, dry spot, since heat speeds up curing inside the bottle.
- Label two-part epoxy with the date you opened it, since it loses strength over time.
- Keep a damp cloth nearby during glue-ups to catch drips before they harden.
Check bottles every few months and replace any that have changed in color, smell, or texture.
Use Safe Shop Practices During Glue-Ups
Basic shop safety protects both you and your project. Wear safety glasses when using CA glue, since it can bond skin or splash into your eyes. Keep a bottle of acetone or nail polish remover nearby for super glue cleanup.
Use sharp tools when trimming dried glue squeeze-out or fitting joints. Dull tools slip more often and can damage your wood or cut your hand.
Always keep a few pieces of scrap wood on hand to test glue spread, clamping pressure, and drying times before you commit to your actual project. This simple habit, common in careful woodworking, helps you catch problems early and build a strong glue joint every time.
Frequently Asked Questions
Wood glue joints rely on a few key things: picking the right glue, using enough but not too much, clamping with the right pressure, and letting it dry long enough. If you get these details right, you’ll avoid weak joints and messy squeeze-out.
What is the strongest wood glue for furniture joints?
Yellow wood glue, or carpenter’s glue, usually does the trick for most furniture joints. Once it cures, the bond can end up stronger than the wood itself.
If you need water resistance for outdoor projects, try polyurethane glue or Type III wood glue. Epoxy is another solid choice, especially when you need to fill a gap or glue end grain.
The best glue can’t fix a sloppy joint. Tight, long-grain surfaces always hold better than loose fits, no matter what type of glue you use.
How much wood glue should I apply to a joint?
Spread a thin, even layer over both surfaces. You want full coverage, but not so much that it drips or pools everywhere.
Too little glue leaves dry spots that won’t bond. Too much makes things slippery and causes a lot of squeeze-out.
A good sign: if you see a thin, steady line of glue squeezing out when you clamp, you’re on track. If it’s running down the sides, that’s way too much.
What clamping pressure is needed for a strong wood glue joint?
Clamps should just hold things firmly, not force them together. If you need a lot of pressure just to close the joint, the fit’s probably off before you even add glue.
For edge-to-edge joints, use moderate, even pressure along the boards. Make sure the surfaces stay flat and don’t bow up in the middle.
Joints like mortise-and-tenon or dovetails usually just need light pressure, since they should fit snugly to start with.
How long should wood glue dry before removing clamps or using the project?
Most yellow wood glue sets enough to remove clamps after 30 minutes to an hour, but it’s not fully cured yet.
It’s best to wait at least 24 hours before you sand, move, or use the piece. That gives the glue time to reach full strength.
Temperature and humidity matter, too. If your shop’s cold or damp, glue takes longer to cure, so give it extra time if it’s below 65°F.
Can I glue wood together without clamps?
Sometimes, you can skip clamps if the joint fits tightly on its own. Dovetails and mortise-and-tenon joints often hold with just hand pressure or a light tap from a mallet while the glue sets.
For flat or edge-to-edge joints, though, clamps keep things lined up and under even pressure. Without them, boards can shift or pull apart as the glue dries.
If you don’t have clamps, sometimes heavy objects or even tape work for small fixes. That’s fine for minor repairs, but not for anything structural.
How can I prevent glue squeeze-out and keep pieces aligned during a glue-up?
Go for a thin, even coat of glue rather than slathering it on thick. That way, you’re less likely to have glue oozing everywhere once you clamp things together.
Before you even touch the glue, dry-fit your joint. It helps you figure out the fit and mark spots for alignment, so when you actually start gluing, you’re not fumbling around.
Grab some clamping cauls or even just scrap wood blocks to spread out the pressure and keep boards from drifting. If you do get some squeeze-out, let it sit until it’s more rubbery than wet, then peel it off with a sharp chisel. Wiping it when it’s wet just smears the mess around, honestly.