Woodworking plans can look like a jumble of lines, numbers, and odd symbols at first glance. But at their core, they’re just instructions: drawings, measurements, cut lists, and joinery notes. Once you know what’s what, it’s not much harder than following a recipe. Here’s how to break down each part so you know where to look and what to check before you ever pick up a saw.
You really don’t need years of experience to read a woodworking plan. Most plans, no matter how simple or complex, stick to the same structure. Once you get how the views, measurements, and symbols work together, beginner projects start to feel a lot more doable.
Start With the Project Overview
Before you touch a piece of wood, take a look at the whole plan. This gives you a real sense of what the project involves, how big it’ll be, and whether it matches your current skillset.
Check the Skill Level and Required Tools
Most beginner woodworking plans call out a skill level right at the top. That’s your clue if it’s for beginners, intermediate builders, or advanced woodworkers.
Read this part closely before you commit. A beginner project should stick to simple joinery and tools you probably already have or can borrow.
Check the tools list too. Some plans only need basic hand tools, but others expect you to have a table saw, router, or planer.
If you don’t have the right tools, figure out early if you can rent, borrow, or swap out for what you do have. You don’t want to get halfway through and realize you’re stuck because you’re missing something crucial.
Confirm Overall Dimensions and Available Space
Every plan should list the finished project’s overall dimensions: width, height, and depth.
Jot these down before you do anything else. Then, actually measure the area where your project will live, whether that’s a wall, a corner, or some awkward nook.
A project that looks small on paper can easily turn out way too tall for your space or awkwardly wide for a hallway. Compare the numbers to your real space. If it’s close, measure twice and check for stuff like outlets, trim, or doors that might get in the way.
Review the Complete Build Before Cutting
Read every step of the plan from start to finish before you cut anything. That means checking the cut list, joinery details, and how you’re supposed to put it all together.
Lots of woodworking projects, especially the bigger ones, have steps that build on each other. If you skip around, you might miss something important that affects the fit or strength later on.
Look for any parts that depend on earlier steps. For example, maybe you need to cut a shelf before joining the sides. Walking through the whole plan now helps you see how everything fits before you waste any wood.
Understand Plan Drawings and Views
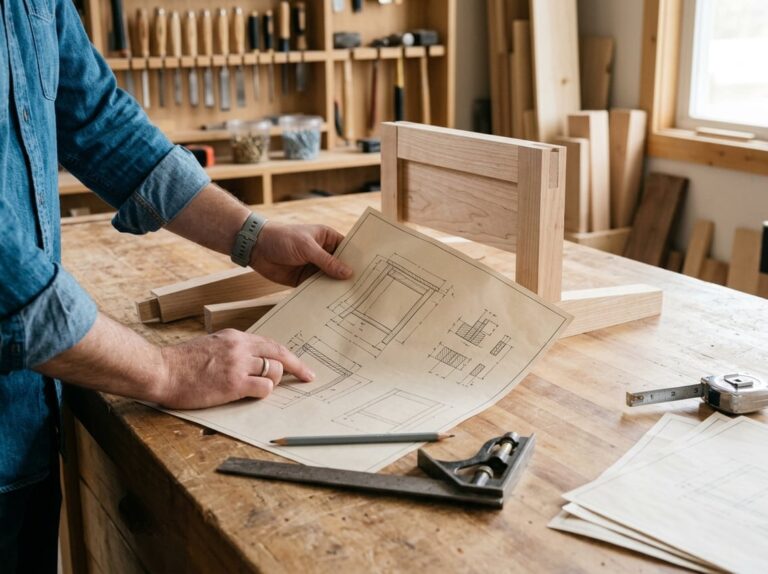
Woodworking plans use different drawings to show one project. Each one tells you something different, and you need all of them to get the full picture.
Use Front, Side, and Top Views Together
Most plans give you a front view, side view, and top view. Each shows the project from a different angle.
The front view is what you’d see standing in front of the piece. The side view shows depth and details you can’t see from the front, like a curved leg or a stepped edge. The top view (plan view) lays out everything from above.
Don’t just check one view. If you skip the side view, you might miss a depth or a shape that matters. Always compare all three before you start cutting.
Read a Plan View and Dimension Lines
A plan view looks down from above. It’s good for showing how parts line up, like where drawer openings or shelves go.
Dimension lines tell you the real size of each piece. They have arrows at both ends, and a number sits on or above the line. Thin extension lines stretch from the part’s edge to show what’s being measured.
Here’s what to check with dimension lines:
- Overall dimensions are on the outside and show total width, height, or depth
- Detail dimensions sit closer to a specific feature, like a hole or groove
- Units should stay consistent, so don’t mix inches and millimeters
Write the overall dimensions at the top of your cut list before you start cutting.
Follow Exploded Views and Part Labels
An exploded view pulls the project apart so you can see how everything fits, with each part spaced out along its connection points. This is usually the most clear way to see how parts go together.
Each part gets a label, like A, B, or C. These match the labels on your cut list, so you can find the exact size and material for each piece.
Exploded views also hint at assembly order. Parts in the middle or bottom usually go together first, and outer pieces get added last. Check this view before you start building, since it’s basically a visual assembly guide.
Spot Orientation, Hidden Lines, and Callouts
Some parts have left and right versions, or a front and back that aren’t identical. Watch for labels like “mirror” or “opposite” so you don’t accidentally cut two of the same when you need one of each.
Hidden lines (dashed) show features you can’t see from the outside, like shelf pins or mortises inside joints. Center lines (long and short dashes) mark the middle of round or symmetrical features, like drilled holes.
Callouts are quick notes by a part, giving extra info like material or thickness. You might see “3/4 Ply” or “8/4 Maple” to tell you exactly what to use.
Decode Measurements and Lumber Sizes
Numbers on a plan only help if you know what system they’re using and how wood sizing really works. Get these basics down early and you’ll dodge a lot of rookie mistakes.
Identify Imperial or Metric Units
Check which measurement system the plan uses before you start. Most plans from North America use inches and fractions.
If your tape measure or hardware store uses millimeters, you’ll need to convert. A quarter inch is 6.35 mm, and 3/4 inch is 19.05 mm. These pop up a lot, especially since 3/4 inch is standard for plywood and pine boards.
Write your converted sizes right on the plan or on your cut list. It saves you from doing math when you’re in the middle of a project.
Separate Part Dimensions From Finished Size
Plans list two types of numbers: part dimensions and overall dimensions. Part dimensions are the size of each board before assembly. Overall dimensions are the final size after everything’s put together.
Don’t mix them up. For example, a shelf side panel might be 12 inches wide, but the finished bookcase could be 14 inches wide after you add the back panel and edging.
Look for a diagram or elevation that shows the total height, width, and depth. Compare that to your cut list before you start, so you know it’ll actually fit where you want it.
Verify Actual Wood Thickness
Lumber sizes on a plan almost never match what you buy at the store. A “2×4” isn’t actually 2 inches by 4 inches. After drying and planing, it’s 1-1/2 inches by 3-1/2 inches.
It’s the same with plywood. A 3/4 inch sheet usually measures a little less, especially if it’s imported or lower grade. Always measure your boards with calipers or a tape measure, not just the label.
| Labeled Size | Typical Actual Size |
|---|---|
| 1×4 | 3/4″ × 3-1/2″ |
| 2×4 | 1-1/2″ × 3-1/2″ |
| 3/4″ plywood | 11/16″ to 23/32″ |
Adjust your joinery and dado depths based on what you measure, not what the lumberyard says.
Allow for Saw Kerf and Cutting Accuracy
Your saw blade removes a bit of material with every cut, called the kerf. Most blades cut a kerf between 1/8 inch and 1/16 inch wide.
If you’re cutting lots of parts from one board, the kerf adds up. Forgetting about it can make your final piece shorter than planned, especially with long cut lists and repeated cuts.
Also, pay attention to grain direction as you lay out cuts. Cutting against the grain on load-bearing parts can weaken the piece, even if the measurements are right.
Mark your cut lines clearly and double-check before each cut. A tiny mistake early on can snowball by the time you’re putting everything together.
Turn the Materials List Into a Shopping List
The materials list tells you what you need, but you’ll still have to turn it into real board sizes, hardware counts, and finish products before you head to the store. Getting this step right saves you a return trip and keeps your project from going over budget.
Read the Bill of Materials
The bill of materials sums up everything the project needs, separate from the cut list of individual parts. It usually groups items by type: lumber, sheet goods, hardware, and finish supplies.
Look it over before you even glance at the cut list. That way, you get a sense of total cost and scope before you buy anything.
Some plans combine the bill of materials with the cut list in one table. Others keep them separate, with the cut list showing part sizes and the bill of materials showing what to buy in bulk, like a quart of glue or a box of screws.
Check both sections against each other. If you spot a hinge or fastener in the diagram but not in the bill of materials, you’ll need to add it to your shopping list.
Calculate Lumber and Plywood Needs
Once you know what parts you need, group them by board size and material type. This makes it much easier to figure out how many boards or plywood sheets to buy, not just how many individual parts.
Plywood usually comes in 4×8-foot sheets. Sketch out your parts on paper or use a simple cut diagram to see how many will fit on each sheet before heading to the store.
For solid lumber, add extra length for saw kerf and mistakes. Most folks add 10 to 15 percent to their total board footage for waste.
- Round up to the nearest standard board length
- Buy one extra piece for test cuts or just-in-case moments
- Check if lengths listed are finished sizes or rough-cut blanks
Match Hardware, Fasteners, and Hinges
Hardware is surprisingly easy to overlook since it’s small and easy to skip. Go through the plan and write down every screw, bolt, hinge, and bracket by size and quantity.
Pay special attention to hinges. If you get the wrong size or style, the door or lid won’t sit flush, and the whole assembly can get thrown off.
Match screw length to the thickness of the wood you’re joining. Too long, and the screw pokes through. Too short, and it won’t hold.
If the plan doesn’t list a fastener size, use the parts diagram to estimate based on material thickness, then double-check with a hardware store associate if you’re not sure.
Choose Wood and Finish Materials
Pine is a classic choice for beginner projects because it’s affordable, easy to work with, and easy to find. Hardwoods cost more but might be worth it for furniture that gets a lot of use.
Wood glue is standard for most joints, but check if the plan calls for a specific type, like waterproof glue for outdoor builds. Not all wood glue holds up outside.
Finish materials really depend on the look and durability you want. Paint hides grain and works for certain styles, while varnish protects the wood and lets the grain show through.
Buy finish products based on how you’ll use the project. A tabletop needs a tougher finish than a decorative shelf that won’t see much wear.
Use the Cut List Without Wasting Wood
A cut list tells you what to cut, how many pieces you need, and what size each piece should be. Reading it the right way saves wood, time, and a lot of frustration before you even pick up a saw.
Read Part Names, Quantities, and Dimensions
Each line on a cut list stands for one part in your project. Before cutting, match the part name to the drawing in your plans so you know exactly where it fits.
Check the quantity next. If it says four legs, cut four legs, not two. Seems obvious, but it’s an easy mistake.
Then look at the dimensions. These numbers show thickness, width, and length for the finished part, not the rough board you started with.
Wood thickness can change after planing or sanding, so don’t assume your stock matches the listed size. A quick check with a tape measure and caliper can save you from ending up with a part that’s too thin or too short.
Plan Cuts Around Grain Direction
Grain direction affects both strength and looks. Parts that bend or support weight, like shelves or legs, need the grain running along the length of the piece, not across it.
Look for any grain arrows or notes in your plan before laying out your cuts. If there aren’t any, check similar parts on the diagram for clues.
Matching grain direction across visible pieces, like a tabletop or drawer front, makes the finished project look more consistent. Lay your boards out and compare grain patterns before cutting, especially for parts that sit side by side.
Spending a few extra minutes here can save you from mismatched grain later.
Label Pieces as You Cut
Once you start cutting, label each piece right away. Use a pencil to write the part name directly on the wood, matching the name from the cut list.
This step really matters when you have several parts that look almost identical. A drawer side and a drawer front can be easy to mix up once they’re off the saw.
Labeling also helps if you set a project aside and come back later. A quick note on each board saves you from re-measuring or guessing which piece goes where.
Check Every Part Before Assembly
Before you drill holes or grab clamps, lay out every part and compare it to the cut list again. Make sure you’ve got the right quantity of each labeled piece and that the dimensions still line up.
This is a good time to dry-fit the project without glue. Clamps can hold pieces in place so you can check for gaps, uneven edges, or parts that don’t line up as expected.
Catching a sizing mistake now, before glue or permanent joinery, is way easier than fixing it after assembly.
Follow Joinery and Assembly Details
Joinery symbols show how parts connect, while a dry fit checks that those connections actually work before you commit to glue. Following the assembly order in the plan keeps every joint accessible and every clamp where you need it.
Recognize Common Joinery Symbols
Joinery details usually show up in detail or section views, not the main drawing. Look for small icons or notes near the joint that tell you the joint type.
Common symbols include:
- Dashed lines for hidden edges, like a mortise cut inside a leg
- Hatching or crosshatch marks for a piece in cross-section
- Small circles or ovals for dowel or screw locations
- Labeled callouts naming the joint, such as “1/4 in. groove” or “3/8 in. tenon”
Read these symbols alongside the cut list. If a part has a groove or mortise, the cut list dimension might not include that cut. Check both before trimming any board to final size.
Interpret Butt Joints and Mortise-and-Tenon Details
Butt joints are the simplest connection in woodworking. One board’s end or edge meets another board’s flat surface, and they join at a right angle. Plans usually show butt joints with a straight dimension line and a note about fasteners, like screws or dowels.
Mortise-and-tenon joints need more attention. The mortise is a hole or slot cut into one piece. The tenon is a matching tongue cut on the end of another piece that fits into that hole.
Detail views will show the tenon’s width, thickness, and length, along with the mortise’s depth and position. Double-check that the tenon length is just a bit shorter than the mortise depth. This gap leaves room for glue and keeps the joint from bottoming out before it closes tight.
Dry Fit Before the Glue-Up
A dry fit means assembling your project without glue to see how the parts come together. This step catches problems while you can still fix them.
During a dry fit, check that:
- Every joint closes fully and sits flush
- Clamps can reach each joint without hitting other parts
- The project sits square, with equal corner-to-corner measurements
- No part is warped, twisted, or cut to the wrong size
Keep the dry-fit assembly together for a few minutes to make sure it holds its shape. If something doesn’t fit, mark the problem area with a pencil. Fix it now, before wood glue makes changes a pain.
Complete Assembly in the Intended Order
Assembly instructions in a plan list a specific order for a reason. If you build out of sequence, you might trap a part inside the structure, blocking access for glue, clamps, or fasteners.
Read the full assembly instructions before starting, and note any step that mentions clamping time or drying time. Glue-up often happens in stages: smaller subassemblies first, then those subassemblies join into the final structure.
Have your wood glue, clamps, and clean rags ready before you start. Apply glue to one subassembly at a time, follow the plan’s listed order, and wipe away squeeze-out before it dries. If you rush this step or skip ahead, you could end up having to break apart a joint that’s already set.
Finish the Project and Build Better Habits
Good habits at the end of a build matter just as much as good plan-reading at the start. Sanding, finishing, and testing new skills on scrap wood all protect the work you’ve put in.
Sand in a Logical Grit Sequence
Start with a coarser sandpaper grit and work your way up. A common sequence is 120, then 150, then 220 grit.
Skipping grits leaves scratches that show up once you apply finish. Each grit should remove the marks left by the one before it.
Sand with the grain, not against it. Sanding across the grain leaves marks that are tough to fix later.
Check your work under a bright light or by holding the wood at an angle. This makes scratches and rough spots easier to spot before you move to paint or varnish.
Apply Paint or Varnish After Final Inspection
Check every joint, dimension, and surface before you open a can of finish. Paint and varnish can hide small problems, but they won’t fix loose joints or gaps.
Once the piece passes inspection, wipe away sanding dust with a tack cloth. Dust left on the surface will show up as bumps under finish.
Apply thin, even coats. Thick coats of paint or varnish take longer to dry and are more likely to drip or bubble.
Let each coat dry fully before adding the next one. Most varnish needs 24 hours between coats, though this varies by product, so check the label.
Practice Unfamiliar Steps on Scrap Wood
If a woodworking plan calls for a joint or technique you haven’t tried before, test it on scrap wood first. This goes for cuts, joinery, and finishing methods alike.
Scrap wood lets you make mistakes without wasting your project material. It also helps you get a feel for how your specific tools and materials behave.
Test your finish on a scrap piece from the same wood species. Stain and varnish can look different depending on the wood, so this step avoids surprises on the final piece.
Keep a small supply of matching scrap on hand throughout the build. You might need it again if you add a new joint or repair later.
Choose Your Next Step-by-Step Project
Finishing one project well is the best way to get ready for the next one. Pick beginner woodworking projects that build on the skills you just used.
Here’s one way to plan progress:
| Skill Practiced | Next Project Type |
|---|---|
| Basic cuts and sanding | Simple shelf or box |
| Butt joints and screws | Small table or stool |
| Mortise-and-tenon joints | Chair or cabinet door |
Choose plans that stretch your skills without overwhelming you. If you jump too far ahead, you’ll likely end up frustrated or waste material.
Keep a record of what worked and what didn’t on this build. That record will make your next woodworking project easier to plan and finish.
Frequently Asked Questions
Before you grab a saw, it’s smart to have a plan for checking dimensions, reading symbols, and matching cut list parts to your drawings. Here are some answers to questions that usually pop up when you’re staring at a woodworking plan for the first time.
What information should I review first before starting a woodworking project plan?
Start with the finished size of the project. Jot down the width, height, and depth before you get ahead of yourself.
Then, figure out what units the plan uses. Are you working with inches, millimeters, or is there a note saying the drawing is full-size?
Pay attention to whether dimensions are rough, nominal, or finished. A “1×4” board isn’t the same as an actual 3/4-inch by 3-1/2-inch board, which trips up a lot of people.
Look for a legend, revision notes, or errata page. These might explain symbols or fix mistakes found after the plan was published.
How do I understand the dimensions and measurement markings shown on woodworking drawings?
Dimension lines connect two points and show a measurement, usually with a number right on or above the line. Extension lines stick out from the edges to mark exactly where that measurement begins and ends.
You’ll find overall dimensions on the outside of the drawing. Those tell you the total size.
Detail dimensions sit close to the feature they describe, like a hole or groove. If you see a number near a mortise, it just applies to that mortise, not the whole board.
Check your units before measuring anything. Mixing inches and millimeters on the same project? That’s asking for trouble. And don’t try to scale a printed drawing unless it specifically says it’s full-size.
How can I use a cut list to select, measure, and prepare lumber accurately?
A cut list is just a table listing every part in the project. You’ll usually see the part name, quantity, dimensions, and material type.
Match each part label from the cut list to the same label on your drawings. That way, you know exactly where each piece fits in the final build.
Add about 15 to 20 percent extra material to your lumber order. It’s almost inevitable you’ll run into knots, defects, or just make a mistake somewhere.
Check if the lengths listed are finished sizes or oversize blanks. Some plans give you extra length so you can trim after glue-up.
What do the common symbols, arrows, and dashed lines on woodworking diagrams mean?
Dashed lines usually mean hidden features, like a shelf pin hole that’s covered up by a side panel. They’re there to show you something’s present even if you can’t see it from that angle.
Center lines have a pattern of long and short dashes, marking the middle of a round part, like a drilled hole or turned leg.
Arrows along the wood grain show which way the grain should run. This matters for strength and, honestly, it just looks better.
Material callouts tell you the wood species and thickness for a part. For example, “3/4 Ply” means three-quarter-inch plywood.
How do I identify the joinery method required for each connection in a plan?
Check the detail views first. These are enlarged drawings that zoom in on joints like mortise-and-tenon or dado connections.
Section views help too, acting like a slice through the project so you can see how parts fit together inside.
Compare the joint dimensions in the detail view to the part sizes in your cut list. If the numbers don’t line up, pause and make sure you haven’t missed something.
Look at the assembly steps for notes about clamps, glue, or hardware. That tells you what tools you’ll need for each joint.
How can I tell which parts of a woodworking plan need to be cut, drilled, or assembled first?
Read the plan, starting with the biggest parts and working your way down to the smallest. Usually, you’ll want to tackle the main frame or box first, then deal with things like trim or hardware later.
Check out the exploded view to get a sense of assembly order. The parts drawn closer to the center of that diagram usually go together before the others, at least in my experience.
Look for any notes about drilling or joinery that need to happen before you put everything together. For instance, you might have to cut a groove in a board before you attach it to the rest of your project. It’s easy to miss that step if you’re not careful.
Mark any parts that need to be mirrored, like left and right legs or brackets. That way, you won’t accidentally cut two of the same piece when you really need one of each.