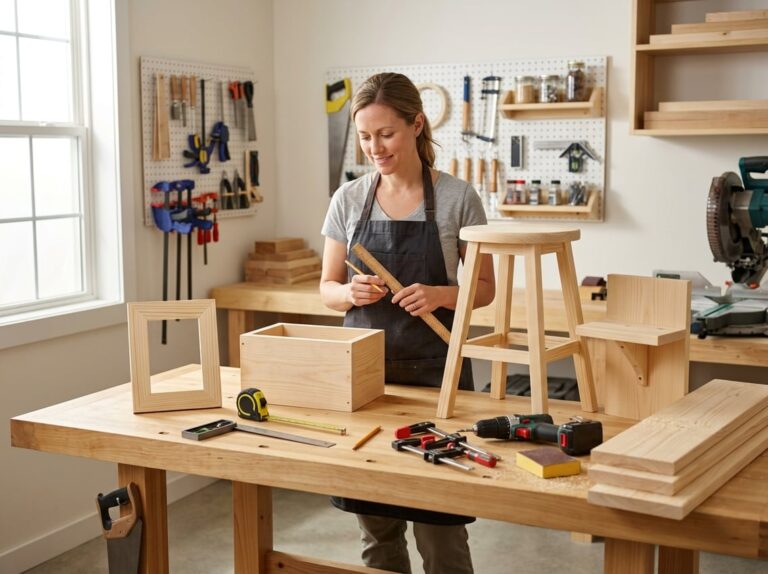
Picking your first woodworking project can honestly feel more intimidating than actually building it. There are endless plans online, and it’s easy to grab something way out of your league and just get stuck. The best first project fits your current skill level, uses tools you already have, and matches the time you can really put in.
Your choice depends a lot on the wood you pick, too. Soft woods like pine are cheaper and cut easier, so they’re perfect for starting out. Simple builds, like cutting boards or small shelves, let you get the feel for basic cuts and joints without needing a fancy shop.
Every project you actually finish teaches you something you’ll use later. Those early wins really help you feel ready to try bigger things. So, let’s look at how to match your skills, tools, and time with a project that actually sets you up for success.
What Makes a Project Suitable for Beginners
A solid beginner project should match your skills, keep the design simple, and include a clear plan you can read through before buying anything. These things matter more than the specific project you pick.
Match the Build to Your Current Skills
Your first build should use tools and joinery you already know or can pick up fast. Projects like a cutting board or a little shelf just need basic cuts and some sanding.
Skip anything that needs tools you don’t have or skills you’ve never tried. If you’ve never used a router, don’t start with routed joints. Look for easy projects with butt joints, pocket screws, or just glue instead of tricky joinery.
Choose something that challenges you a bit, but doesn’t throw five new skills at you all at once.
Keep the Design Small, Useful, and Forgiving
Smaller projects are cheaper and waste less wood if you mess up. A picture frame or step stool only takes a few boards, so mistakes are no big deal.
It’s way more motivating to build something you’ll actually use, like a coat rack or plant stand, instead of just making scrap.
Forgiving designs hide little flaws. Rustic or farmhouse styles, for example, don’t need perfect lines or tight joints. Try to find projects with these features:
- Few parts (under 10 pieces)
- Straight cuts, not curves or tricky angles
- Basic joinery like butt joints or dowels
- Wood that’s easy to buy, like pine or poplar
Check the Plan Before Buying Materials
Before you buy any wood, read the plan all the way through. Make sure you get what each step means and can picture how it fits together.
Check the cut list. It tells you exactly what size boards you need, so you don’t end up with too much or too little.
Compare the plan’s tools and joinery to what you already have and know how to use. If it calls for a table saw and you just have a circular saw, either find another method or pick a different build.
Honestly, a clear plan saves you money, time, and a lot of headaches before you even start cutting.
Assess Your Tools, Workspace, and Safety Needs
Before you pick your project, take a look at what tools you have, how much space you can work in, and what safety gear you’ll need. This way, you can pick something that fits your setup instead of needing to run out and buy a bunch of stuff first.
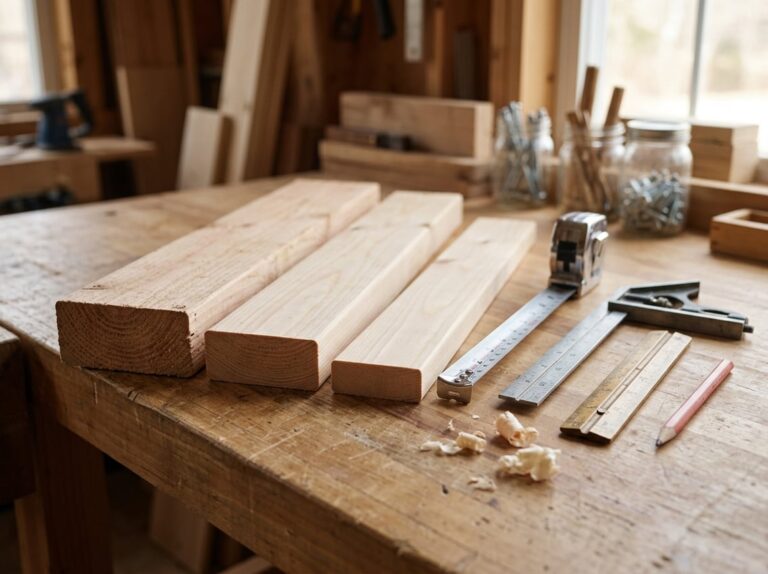
Essential Hand Tools and Layout Tools
You don’t need a full shop to get started. A handful of basic hand tools and layout tools will cover most beginner projects.
Here’s a basic list to check off:
- Measuring tape or tape measure for length and width
- Combination square or speed square for marking and checking angles
- Pencil for marking cuts
- Hand saw for simple cuts
- Hammer for nails
- Screwdrivers (flathead and Phillips) for assembly
- Clamps to hold things steady
Measuring and marking right matters more than having fancy tools. A cheap combination square, used well, gives you better results than a pricey one used carelessly.
When Basic Power Tools Make Sense
Power tools can speed things up, but you don’t need them all at once. Start with the ones that get used most often.
A cordless drill with a driver attachment is usually the first power tool people buy. It drills holes and drives screws, which covers most assembly work.
If you need curved or long, straight cuts, a circular saw or jigsaw is a good next step. These are cheaper and take up less space than a table saw or miter saw.
Hold off on the table saw, miter saw, and sander until you actually need them for a project. They’re useful, but they cost more and need more room.
Create a Safe, Stable Work Area
A stable workbench is more important than any one tool. If you don’t have one, even a sturdy table with a vise attached works for a lot of beginner projects. The vise keeps your work steady, so your hands are free and your cuts are straighter.
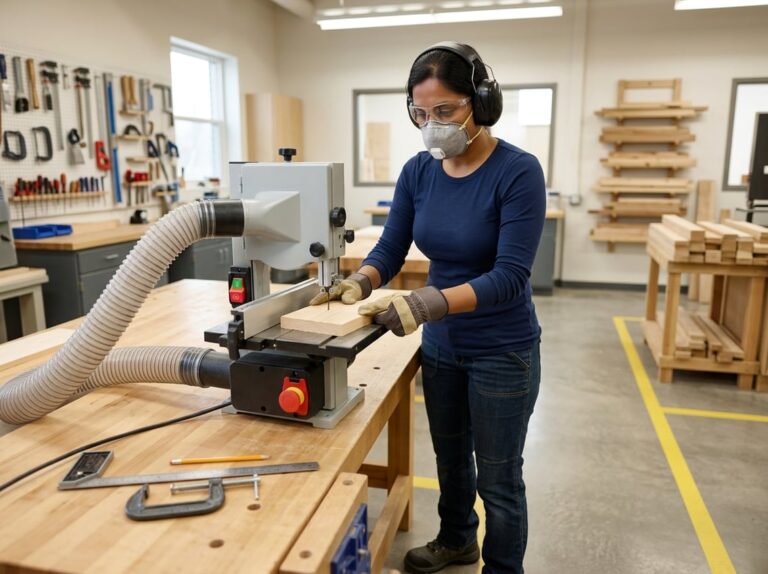
Don’t skip safety gear. Wear safety glasses every time you cut, drill, or sand. Use a dust mask when sanding or cutting wood that makes fine dust, and grab hearing protection when using power tools for a while.
Keep your woodworking shop area clear and make sure your tools are sharp before you start. Sharp tools cut cleaner and need less force, so you’re less likely to slip and get hurt.
Choose Wood That Supports a Successful First Build
The wood you pick totally affects how easy your project is to cut, sand, and put together. Easy, affordable materials help you focus on learning instead of stressing over expensive lumber.
Start With Affordable Softwoods and Plywood
For your first build, use softwood like pine or poplar. They’re easy to cut with basic tools and cost less, so mistakes won’t sting your wallet.
Pine is great for shelves, boxes, and small furniture. Poplar is smoother and takes paint well, though it’s a bit tougher to cut than pine.
Plywood is also good for flat panels, like cabinet sides or tabletops. It resists warping better than solid wood and comes in big sheets, so you get more for your money.
Save hardwood for later, once you’ve got some confidence. It’s pricier and needs sharper tools for nice results.
Use Scrap Wood for Practice Cuts
Before you cut your real project pieces, practice on scrap wood. You can test your saw, check your cuts, and tweak your technique without wasting good boards.
Keep leftovers from other projects, or ask the local lumber yard if they sell scrap cheap. A lot of hardware stores have a bin with short pieces of rough lumber for a bargain.
Use scrap to:
- Test drill bit sizes before drilling into your project
- See how a finish or stain looks on your wood
- Practice joints like pocket screws or butt joints
- Set up your saw fence and double-check your measurements
This helps you catch mistakes early and builds some muscle memory before you work on the real thing.
Understand Board Size, Grain, and Wood Movement
Lumber sizes at the store almost never match their names. A “2×4” is really about 1.5 inches by 3.5 inches. Always measure your board yourself before cutting, so your pieces fit right.
Check the grain direction. Straight grain is easier to cut and less likely to split. Try to avoid big knots near the edges, since those spots are weak and can crack.
Wood also expands and contracts with humidity, even after you cut and finish it. This is called wood movement. Solid wood needs little gaps in the design to let it move, especially in tabletops or wide panels.
Plywood doesn’t move as much as solid wood, so it’s a steadier choice for beginners working on flat, wide surfaces.
Compare Easy First Projects by Skill, Time, and Tools
Some projects only need an afternoon and a handful of screws. Others eat up a weekend and a stack of lumber. Here’s a table that breaks down popular first projects by skill level, time, and the tools you’ll want nearby.
| Project | Skill Level | Time | Tools Needed |
|---|---|---|---|
| Wooden Sign | Beginner | 1-2 hours | Sander, paint or stain, stencil |
| Picture Frame | Beginner | 1-2 hours | Miter saw, wood glue, clamps |
| Birdhouse | Beginner | 2-3 hours | Saw, drill, screws |
| Storage Crate | Beginner-Intermediate | 3-4 hours | Saw, drill, wood glue |
| Storage Box | Beginner-Intermediate | 3-4 hours | Saw, drill, hinges |
| Wall Shelf | Intermediate | 2-4 hours | Drill, level, brackets |
| Planter Box | Intermediate | 4-5 hours | Saw, drill, exterior screws |
| Cutting Board | Intermediate | 4-6 hours | Table saw, planer, food-safe finish |
| Coat Rack | Intermediate | 3-4 hours | Saw, drill, hooks |
| Bookshelf | Advanced | 8-12 hours | Table saw, clamps, joinery tools |
| Step Stool | Advanced | 6-10 hours | Saw, drill, sander |
| Side Table | Advanced | 10-15 hours | Table saw, router, joinery tools |
Quick Builds: Wooden Sign, Picture Frame, and Birdhouse
A wooden sign is probably one of the fastest things you can make. You just cut a board, sand it, and add paint or a stencil. Most signs are done in a couple of hours, tops.
A picture frame is another quick win. You only need a few pieces of wood cut at 45-degree angles. If you want to skip the tricky cuts, try a rustic version with rough-edged wood. It’s a lot more forgiving for your first try.
Building a birdhouse adds a little challenge with assembly. Cut the panels, drill the entry hole, and screw it together. All three projects use minimal wood and you’ll have something to show for your time by the end of the day.
Practical Storage: Crate, Storage Box, and Wall Shelf
A storage crate teaches you the basics of building a box. Cut four sides and a bottom, then join them with screws or nails. It’s sturdy enough for firewood, toys, or just about anything cluttering up the garage.
A storage box is similar but usually has a lid. You’ll need to attach a hinge, which is a nice next step after you’ve built a crate.
Wall shelves introduce you to brackets and mounting. Cut a board, attach it to a bracket, and make sure it sits level. Floating shelves look cleaner since they hide the brackets, but you’ll need to anchor them more precisely. Either way, you’ll get some practice measuring and mounting, which comes in handy for future projects.
Skill-Building Projects: Planter Box, Cutting Board, and Coat Rack
A planter box gets you into more complex joinery. Build a frame, add drainage, and pick wood or sealant that can handle being outside. It’s a good way to learn how your wood choices affect durability outdoors.
Cutting boards need more precision. Glue strips of wood together, then plane and sand the surface flat. You’ll also need to use a food-safe finish, since the wrong stuff can mess with food safety.
Making a coat rack teaches spacing and layout. Measure out hook placement across a board and mount it to the wall. It’s a solid way to sharpen your measuring skills before you tackle bigger projects.
Projects to Save for Later: Bookshelf, Step Stool, and Side Table
Bookshelves need some real planning. You want square cuts, level shelves, and usually some type of joinery beyond just screws, like dados or rabbets. Even a small bookshelf requires more time and precision than the earlier projects.
Step stools look simple but need solid joinery to be safe. Weak joints can make them wobbly or even dangerous.
Side tables combine several skills: cutting, joinery, and finishing. You also have to measure carefully so the legs are level. Probably best to save these for when you feel confident with simpler builds.
Plan the Build Before Making the First Cut
Good planning leads to good results. Before you touch any wood, set your budget, read the plans, and double-check measurements. These steps help you avoid turning small mistakes into wasted materials.
Set a Realistic Budget and Timeline
Figure out what you can spend before you buy anything. Lumber, hardware, and finish add up faster than you’d think, even on a small project.
Add about 15 percent to your material estimate for mistakes. It’s pretty common to cut a board wrong or split something while drilling.
Set a timeline that actually fits your life. A simple project might take:
- 2-3 hours for something like a small shelf or box
- 1-2 weekends for a stool or side table
- A few weekends for bigger furniture pieces
Rushing just leads to errors. Give yourself extra time, especially for glue and finish to dry.
Read the Cut List and Assembly Sequence
Always read the full cut list before you buy wood. This tells you the size and number of every part you’ll need.
Check the cut list against the assembly steps. Sometimes, plans list parts in a weird order compared to how you’ll actually build things.
Watch for these details in the plans:
| Detail | Why It Matters |
|---|---|
| Exact dimensions | Prevents buying too much or too little wood |
| Grain direction | Affects strength and appearance |
| Assembly order | Some parts must go together before others |
| Hardware list | Screws, nails, and glue needed |
If you skip this step, you’ll probably run out of material halfway through. It happens to everyone at least once.
Measure, Mark, and Dry-Fit Every Part
Accurate measuring saves you from most rookie mistakes. Use a tape measure for long boards and a combination or speed square to check corners.
Mark your cut lines with a pencil, not a pen. Pencil marks are easy to erase if you make changes.
Stick to “measure twice, cut once.” Seriously, do it for every board, not just the tricky ones.
Before final assembly, dry-fit everything without glue or screws. That way you’ll see if parts line up right.
When you’re ready to drill, match your drill bit to the screw size. Drill pilot holes first to avoid splitting the wood. Use a countersink bit if you want screw heads to sit flush with the surface.
Use Simple Construction and Finishing Methods
Pick joints you can cut with the tools you already own, put pieces together so they sit flat and true, and finish the project for how you’ll actually use it. These things matter more than fancy designs when you’re starting out.
Select Beginner-Friendly Joinery
Forget complicated joints at first. Those techniques take practice, and messing them up is just frustrating when you’re still learning the basics.
Try these simple joints:
- Butt joints, where two pieces meet at a square edge and you join them with glue and fasteners. Easiest joint there is, and it’s forgiving.
- Pocket holes, using a jig to drill angled holes so you can join boards with screws that stay hidden. Great for boxes, frames, and simple furniture.
- Wood glue with screws or nails. Glue alone holds fine on long-grain, but screws or nails help while the glue sets up.
These methods let you focus on measuring and cutting, not fussing over tight joints.
Assemble Square and Securely
If your project isn’t square, it’ll wobble or just look off, even if your cuts are accurate. Check corners for a true 90-degree angle before the glue dries.
Clamps are your best friend here. Use them to hold pieces tight while glue dries, so joints don’t shift.
Corner clamps help a lot with boxes, frames, and anything with 90-degree corners. They hold two boards at a right angle so you can drill, screw, or nail without things moving around.
Always dry-fit first, meaning assemble it without glue to check that everything lines up. That way, you catch problems before they’re permanent.
Sand and Finish for the Project’s Intended Use
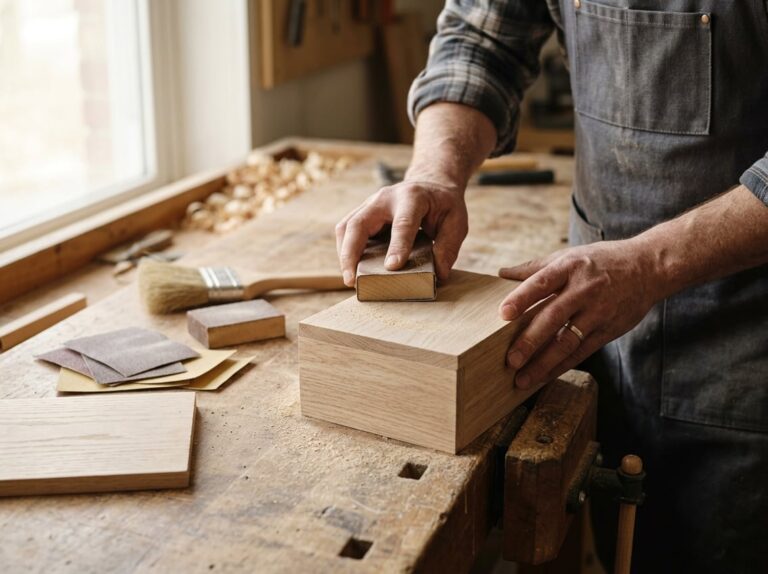
How you prep the surface makes a big difference in the final look and feel. Start sanding with a rougher grit and move to finer ones.
A sanding block helps you sand flat and even, instead of gouging one spot. Wrap sandpaper around the block for better control.
| Sandpaper Grit | Purpose |
|---|---|
| 120 grit | Removes rough spots, tool marks, and minor flaws |
| 220 grit | Smooths the surface before finishing |
When you’re done sanding, pick a finish that fits the project’s use:
- Polyurethane protects against scratches and moisture. It’s good for shelves, tables, or anything that gets daily use.
- Food-safe mineral oil is best for cutting boards or utensils, since it won’t add anything harmful to surfaces that touch food.
Choosing the right finish helps your project look good and hold up over time.
Build Confidence Through the Next Project
Finishing a project is just the beginning. What you do after that shapes how quickly your skills grow.
Treat Mistakes as Practice
Every beginner project comes with mistakes. A crooked cut or a gap in a joint isn’t the end of the world. It just tells you what to tweak next time.
Keep your first projects and look at them again after a few weeks. You’ll probably spot flaws you missed before, and honestly, that’s totally normal.
Write down what went wrong and why. If a board split, maybe you needed a pilot hole first.
This habit turns your first builds into a record of progress. It also helps you avoid making the same mistakes over and over.
Repeat Core Skills Before Adding Complexity
Before you jump into a tougher project, take some time to repeat the woodworking techniques you just picked up. Doing this really helps your hands remember what to do, and you’ll end up working faster down the road.
If your first project taught you to cut straight lines or sand evenly, try those same moves on another similar piece. Right now, being consistent is honestly more important than chasing variety.
Between projects, you might want to try things like:
- Re-measuring and re-cutting a few practice boards.
- Sanding a scrap piece until it’s smooth all over.
- Using a hand plane to flatten a small board.
- Drilling test holes to check your spacing and depth.
These little drills help you get more accurate without worrying about messing up a whole project.
Choose a Logical Next-Level Build
Your next project should use what you already know and add just one new challenge. That way, you keep learning without getting overwhelmed.
| Skill Level | Last Project | Suggested Next Project | New Skill Added |
|---|---|---|---|
| Beginner | Cutting board | Picture frame | Mitered corners |
| Beginner | Simple shelf | Small bookcase | Basic joinery |
| Early intermediate | Step stool | Small side table | Leg-to-top joints |
Pick a project that adds just one new technique, like trying a new joint or using a new tool such as a hand plane. Try not to take on a project that asks you to learn a bunch of new things at once.
Frequently Asked Questions
Picking your first project depends on a few things: your skill level, what tools you’ve got, the wood you want to use, and how much time you can actually spend. Here are some direct answers to the questions beginners ask most.
What is the best first woodworking project for a complete beginner?
A wooden coaster set or a simple picture frame makes a great starting point. Both only need one board, a saw, and some sandpaper.
You can finish either project in under two hours. The materials cost less than $15, so mistakes won’t hurt your wallet too much.
How do I choose a woodworking project that matches my skill level and available tools?
Start by listing the tools you already have. If all you’ve got is a hand saw and sandpaper, stick with projects like coasters or shelves that don’t need a router or table saw.
Pick a project that teaches you one new skill at a time. A picture frame shows you how to do mitered corners. A planter box lets you practice butt joints that actually hold weight. If you try to learn three new things at once, you usually just end up frustrated and waste wood.
What type of wood is easiest for beginners to work with?
Pine is probably the easiest wood for beginners. It’s soft, cuts easily, and doesn’t cost much compared to hardwoods like maple or walnut.
But for cutting boards, skip softwoods. Pine and cedar dent and split when you use a knife on them, so closed-grain hardwoods like maple or cherry work better for that.
Cedar is a good choice for outdoor projects like planters or birdhouses. It naturally resists rot, so you don’t have to mess with chemicals, which matters if birds or plants touch it directly.
Can I start woodworking without power tools, and which projects are suitable?
Yes, you can do plenty of beginner projects with just hand tools. Coasters, picture frames, and birdhouses all work fine with a hand saw, sandpaper, and some clamps.
Cutting with a hand saw takes more time and effort than a jigsaw, especially on thick wood. But for small, simple cuts, you get just as good a result.
How much time should a beginner expect to spend on a first woodworking project?
Most easy first projects take about one to two hours. Coasters might take just 45 minutes, while a picture frame is closer to two hours if you count sanding and glue-up.
Bigger projects take longer. A cutting board needs two or three hours plus glue drying time, and a planter box can take three to four hours from start to finish.
What should I look for in a beginner-friendly woodworking plan?
Grab a plan that spells out exact board sizes, gives you a clear cut list, and walks you through assembly one step at a time. If a plan leaves out measurements, you’ll probably end up wasting wood and getting frustrated.
See if the plan matches the tools you already have or actually want to get. It helps a lot when a beginner plan explains which joint type you’ll use, like a butt joint, miter joint, or pocket-hole joint, so you know what you’re getting into and what skills you’ll work on.
Double-check that the plan mentions how much time and money the project might take. If it skips those details, you could end up way over budget or run out of time halfway through, which is just annoying.