Finishing a wood project can feel intimidating if you haven’t tried it before. Maybe you’re worried you’ll mess up all your hard work with a single bad brush stroke. But honestly, solid wood finishing really comes down to four main steps: sanding, staining, sealing, and adding a topcoat like polyurethane. Once you get the hang of these, you can finish almost any woodworking project and not feel nervous about it.
Most beginners run into the same pitfalls. They skip sanding steps, rush the stain, or slap on polyurethane too thick. That leads to blotchy color, brush marks, or a rough finish. If you slow down and follow the right order, you can avoid most of these headaches.
This guide breaks down the basics of wood finishing in plain language. You’ll see how to prep your wood, pick a stain, seal it, and get a smooth topcoat. By the end, you’ll have what you need to give your project a finish that looks clean and stands up to use.
Prepare the Surface Before Applying Any Finish
The finish only looks as good as the wood underneath. Before you even think about stain or polyurethane, check the wood for problems, sand it well, and get rid of dust so nothing gets trapped in your finish.
Inspecting for Glue, Dents, and Milling Marks
Take a close look at every surface of your project. Wood glue is probably the most common problem, and it blocks stain from soaking in, which leaves light, blotchy spots once you finish.
Look for dents, scratches, and gouges. Stain doesn’t hide these, it actually makes them pop out more.
Check for machine marks, sometimes called washboarding. These show up as little ripples left behind by a jointer or planer that’s not cutting cleanly.
Run your hand over the wood and look at it under a bright light to spot most of these problems. Scrape or sand off glue spots completely. Sand out dents and marks before moving on.
Following a Simple Sanding Grit Progression
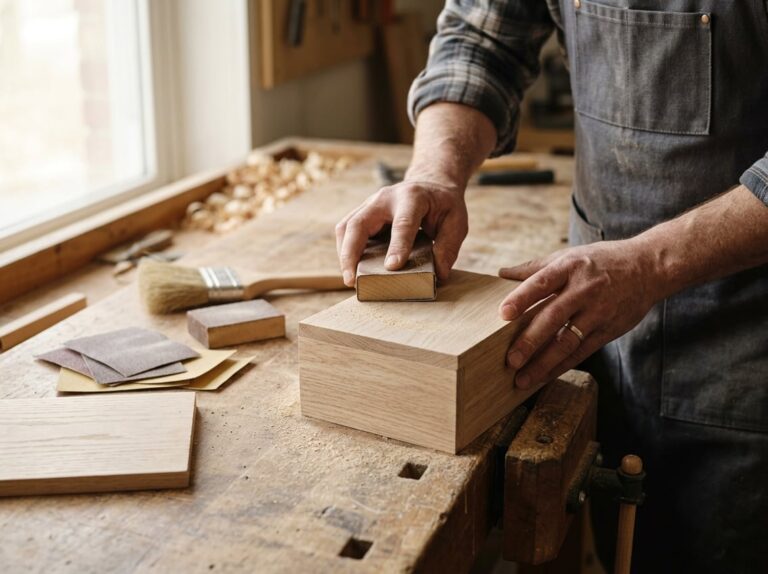
Sanding gets rid of flaws and smooths the wood so stain and finish go on evenly. If you see scratches or rough spots, start with 80 or 100-grit sandpaper. If it’s already pretty smooth, 120-grit is fine.
Work through the grits in order:
- 80 or 100-grit – takes care of major flaws and rough areas
- 120-grit – smooths out the coarser scratches
- 150-grit – makes the surface even finer
- 180-grit – gets it ready for stain or finish
- 220-grit or fine-grit sandpaper – last smoothing pass
Always sand with the grain, not across it. Use a sanding block for flat areas like tabletops so you don’t dig dips into soft spots. If you skip too many grits, you’ll end up with scratches that show through later, so take it step by step.
Removing Dust and Checking the Surface in Raking Light
After sanding, dust covers everything and settles into the grain. Wipe it off with a tack cloth or tack rag, which is just a sticky cloth that grabs fine particles. A vacuum helps as a first pass before you use the tack rag.
To check your sanding, hold a light low across the wood. This raking light shows scratches and dents you’d miss in regular light. Reflected light can help too, just from a different angle.
Some woodworkers wipe the surface with mineral spirits (paint thinner) before finishing. This darkens the wood for a bit and shows what it’ll look like with finish, making it easier to spot flaws before they’re permanent.
Choose Whether the Wood Needs Color
Some wood looks better natural, while other wood needs stain to look richer or more even. Testing on scrap, picking the right stain, and avoiding blotches are the three big steps here.
Testing Color on a Scrap of the Same Species
Always test stain on a scrap piece first. Use the same wood species as your project, since color and grain change from one type to another.
Oak and walnut usually take stain evenly. Pine, birch, cherry, and maple can get blotchy or uneven because their grain soaks up stain differently.
Apply the stain to the scrap just like you’ll do on your project. Let it dry all the way before judging the color, because wet stain always looks darker.
If it’s not the color you want, try a different stain or change how long you leave it on before wiping off the extra.
Selecting Oil-Based, Water-Based, or Gel Stain
Each kind of stain works a bit differently and gives a different look.
- Oil-based stain: Dries slowly, so you have more time to wipe off and blend. Works well on most woods, including oak, maple, and mahogany.
- Water-based stain: Dries fast and doesn’t smell as much. It can raise the grain, so you might need to sand lightly after the first coat.
- Gel stain: Sits on the surface instead of soaking in. Good for pine, birch, and other woods that blotch easily.
Walnut and mahogany often look good with just oil-based stain, since they’re already pretty dark and rich.
Preventing Blotchy Stain Absorption
Blotching happens when wood soaks up stain unevenly. Pine, birch, cherry, and maple are the usual suspects because they have both soft and hard grain areas.
Wood conditioner is the main way to stop this. Put it on before the stain to partly seal the wood’s pores, which helps the stain go on more evenly.
Here’s what you do:
- Sand the wood smooth with fine-grit paper.
- Apply wood conditioner and let it sit for the time on the label, usually 5 to 15 minutes.
- Wipe off any extra before it dries.
- Stain within two hours of using the conditioner for best results.
Gel stain is another good option, since it doesn’t soak in as much and lowers the risk of blotches on tricky woods like pine and birch.
Apply Stain Evenly and Let It Dry
Applying stain isn’t complicated once you know the basics. Work in small sections, wipe off extra stain quickly, and let the wood dry before adding a topcoat.
Applying a Wet Coat and Wiping Away Excess
Brush or wipe on a wet coat of stain using a foam brush, bristle brush, or clean cloth.
Go with the grain. That way, the stain soaks in evenly and looks more natural.
After you apply the stain, wait a few minutes, then wipe off the extra with a clean cloth before it dries.
Leaving too much stain makes the surface blotchy or sticky. Oil-based stain gives you more time to wipe, while water-based dries fast, so you have to work quickly. Gel stain sits on top and is easier to control, which is nice if you’re new to this.
Working in Manageable Sections
Don’t try to stain the whole project at once. Break it into smaller parts, like one leg or drawer front at a time.
This way, you control drying time better. If the stain starts drying before you can wipe, add a bit more to loosen it, then wipe right away.
Avoid going back over spots that have dried. Adding stain on top of dry stain can make dark patches or uneven color.
Working in small sections also lets you catch drips before they turn into runs or sags.
Allowing Full Stain Drying Time Before Topcoating
After staining, let the wood dry all the way before you add finish. Oil-based stain usually needs about 24 hours. Water-based can dry in a few hours, but always check the label.
Drying time changes with room temperature and humidity. If it’s cool or damp, it’ll take longer.
Touch the wood before moving on. If it feels tacky or sticky, it’s not dry yet.
If you put polyurethane on too soon, you can trap moisture and end up with a soft or cloudy finish. Wait until the stain feels totally dry before you start the next step.
Select a Sealer and Protective Topcoat
A sealer and a topcoat do different jobs. The sealer locks in stain color and fills wood pores, while a topcoat like polyurethane, varnish, or lacquer protects against water, dirt, and daily use.
When a Separate Sealer Is Helpful
Woods with open pores, like ash or oak, can soak up finish unevenly if you skip a sealer.
A sanding sealer fills those pores and gives you a smoother base for your topcoat. This also helps prevent blotching on woods that soak up stain unevenly.
You don’t always need a separate sealer. If you’re using oil-based polyurethane or wiping varnish, thin the first coat about 50% with paint thinner. This lets it soak in and dry hard faster, so you can sand it smooth sooner.
If you’re using shellac or lacquer, skip a separate sanding sealer. Both dry fast and build up thin layers that seal the surface well on their own.
Comparing Oil-Based and Water-Based Polyurethane
| Feature | Oil-Based Polyurethane | Water-Based Polyurethane |
|---|---|---|
| Dry time | Slower, more forgiving | Fast, less time to fix mistakes |
| Color | Warm amber tone | Clear, stays true to wood color |
| Odor | Stronger fumes | Mild, easier for indoor use |
| Grain raising | Minimal | Raises wood grain, needs extra sanding |
| Durability | Very durable, 2-3 coats needed | Durable, but slightly softer |
Oil-based polyurethane gives beginners more time to brush out bubbles and level the finish. Satin hides brush marks better than gloss, so it’s a smart pick for your first go.
Water-based finish dries fast, which is handy if you want to wrap up a project in a day. The downside? Less time to fix mistakes.
Considering Oils, Shellac, Lacquer, and Wiping Varnish
Oil finishes like tung oil, boiled linseed oil, and Danish oil soak right into the wood and leave a natural, low-sheen look. You just wipe them on with a rag, but they don’t protect the surface as much as polyurethane does.
Wiping varnish (think Waterlox, Seal-A-Cell, Profin) is basically oil-based varnish thinned with paint thinner. It goes on easily and dries with fewer brush marks, but you’ll need more coats to get close to polyurethane’s durability.
Shellac dries super quick and works as a sealer or a light-duty topcoat, but water or alcohol will mess it up in no time.
Lacquer sprays on thin and dries fast, giving a hard, clear finish, but you really need spray gear for that.
For a little extra protection or a softer sheen, some folks rub on paste wax after the finish cures.
Brush on Polyurethane in Thin, Smooth Coats
The right brush and a steady hand can make all the difference between a smooth finish and one full of bubbles or streaks. Thin coats dry cleaner and more even than thick ones, so patience is your friend here.
Matching the Brush to the Finish Type
Your brush choice really depends on the polyurethane. Natural bristle brushes work best with oil-based poly, since they hold and release the finish smoothly. If you’re using water-based poly, grab a synthetic brush. Natural bristles soak up water and puff up, which just ruins the finish.
Foam brushes are a budget pick for small stuff or touch-ups. They’ll work with both types, but they can trap tiny bubbles more than bristle brushes do. For big surfaces like tables, a good bristle brush gives you better control and fewer marks.
Using Controlled Strokes and a Wet Edge
Dip your brush about a third of the way into the polyurethane, then tap off the extra. Too much finish on the brush leads to drips and uneven coats.
Brush on the polyurethane in long, even strokes, following the wood grain. Always keep a wet edge, overlapping each stroke into the wet part before it dries. This keeps lap marks away and helps the coat look smooth.
Work in small sections, especially on bigger pieces. If you spot bubbles, lightly drag the brush tip over the surface to pop them before the poly dries.
Sanding Lightly Between Coats
Let each coat dry all the way before touching it. Water-based poly usually dries in a few hours, while oil-based can take a day or more.
Once it’s dry, sand lightly with 320-grit sandpaper. This knocks down bumps, dust, and raised grain. Wipe away the dust with a cloth dampened with mineral spirits and let it dry before the next coat.
Repeat for each layer. Three or four thin coats, sanded between each, give you a much smoother finish than one thick coat.
Avoid and Fix Common Finishing Problems
Even with careful prep, small problems can still show up. Most issues come from going too fast, using too much finish, or not waiting long enough between steps.
Correcting Dust Nibs, Roughness, and Raised Grain
Dust nibs are tiny bumps from dust settling on wet finish. You can feel them when you run your hand over the dry surface.
To fix dust nibs, wait until the coat is completely dry. Then sand lightly with 320-grit sandpaper until smooth. Wipe away dust before adding another coat.
Raised grain pops up with water-based finishes, since water swells the wood fibers. You can prevent this by wiping the wood with a damp cloth before staining, letting it dry, and then sanding smooth. That way, the grain rises early and won’t come back later.
Preventing Runs, Sags, and Uneven Sheen
Runs and sags show up when you lay on too much finish, especially on vertical surfaces. The extra liquid pools and drips before it dries.
To avoid this, stick to thin, even coats. Don’t overload your brush, and avoid going back over spots that have started to dry.
Brush marks happen if the finish is too thick or if you move too slowly. Water-based poly dries fast, so work in small sections and use light, smooth strokes.
If the sheen looks uneven after drying, chances are the coat went on unevenly. Sand lightly, then lay down a fresh, thin coat for a smoother, more even finish.
Knowing When to Let the Finish Cure
Drying and curing aren’t the same. A finish might feel dry in a few hours, but it can take days or weeks to fully cure and harden.
Check the product label for exact times, since brands and finish types vary. If you rush, you risk scratches or dents in the soft surface.
Once the finish is fully cured, you can add a coat of paste wax for extra protection and shine. Don’t wax too soon, or you might trap moisture and get a cloudy look. Always wait until curing is done.
Frequently Asked Questions
Here are some common questions about grit choices, stain coverage, sealers, and getting a smooth polyurethane finish without bubbles or streaks.
What are the basic steps for sanding, staining, sealing, and finishing a wood project?
Start by sanding to remove flaws and smooth things out. Then, if you want to change the color, apply stain. Use a sealer or conditioner if needed, and finish with a topcoat like polyurethane to protect the wood.
Each step builds on the last. If you skip or rush sanding, your stain can look uneven. If you add a topcoat before the stain dries, you might get a cloudy or sticky finish.
Stick to the order and let each step dry before moving on.
What sandpaper grits should beginners use before applying stain or polyurethane?
If the wood has scratches or machine marks, start with 80 or 100 grit. Move up to 120, then 150, then 180 to remove scratches from the coarser paper.
Stop at 180 or 220 grit for most jobs. Going finer can close the wood’s pores and make stain harder to apply evenly.
Always sand with the grain. Use a flat sanding block on flat surfaces so you don’t create low spots in softer grain.
How can I apply wood stain evenly and avoid blotchy or streaky results?
Apply stain with a brush, rag, or foam applicator using smooth, even strokes. Wipe off extra stain before it dries, since leftover stain causes blotches and uneven color.
Work on one section at a time, like a single leg or drawer front. That way, you get a feel for how fast the stain dries on your project.
Don’t let stain overlap onto an area that’s already dried. Going over a dry spot with more stain leaves a darker patch that stands out.
If the stain dries too fast and gets hard to wipe, add a bit more stain right away and wipe it off quickly.
Do I need to use a wood sealer or conditioner before staining?
You don’t always need it, but a sealer or conditioner helps on wood that absorbs stain unevenly. Softwoods like pine and blotchy hardwoods like cherry or birch really benefit.
A conditioner soaks in before the stain, so the stain goes on more evenly instead of soaking in heavy in some spots. Apply it, let it sit as the label says, then wipe off the excess before staining.
Skip this step on woods that already take stain well, like oak or walnut. Using conditioner when you don’t need it just adds time without much payoff.
How do I apply polyurethane without brush marks, bubbles, or streaks?
Use a good bristle or foam brush about two inches wide. Brush on thin, even coats, always going with the grain.
Work under a light so you can see reflections on the wet surface. That makes it much easier to spot bubbles, drips, or uneven spots while you still have time to fix them.
If bubbles pop up, lightly brush back over the area to pop them before it dries. On vertical surfaces, watch for drips and runs, and smooth them out with a nearly dry brush.
Thinning your first coat with paint thinner (about 50/50) helps it soak in and dry faster. It also makes sanding before the next coat way easier.
Should I sand between coats of polyurethane, and how many coats are needed?
Yeah, you should sand between every coat with 280 grit or finer sandpaper. It helps get rid of little bumps, dust, or rough patches so the next coat sticks better and looks smoother.
Make sure to wipe off all the dust with a tack cloth or even a vacuum before you put on another coat. If you skip that, you’ll probably end up with a rough, gritty finish. Nobody wants that.
Usually, two to three coats of polyurethane do the trick for most projects. If it’s something like a tabletop or a desk that sees a lot of action, you’ll want to go with three coats for extra durability.